Tag Archives: PHP

How to Fine-Tune PHP Error Reporting: Complete Disabling and Selective Controls Explained

This article explains how to turn off PHP error messages completely or tweak them to suit your needs.

PHP errors are generated by your websites and logged in error_log files in the directory where your PHP files are located. If you do not need the error_log file you can disable PHP error logging.

To turn off PHP error reporting, you need to add the following line to your .htaccess file to suppress any PHP error messages.

php_flag display_errors off

Quick Steps:

  1. Go to your cPanel account and select File Manager.
  2. Click on Settings, check the box Show hidden files and click Save.
  3. Open the .htaccess file and add the code “php_flag display_errors off”.
  4. Click on Save Changes to save and close the file.

Login into your cPanel account and open File Manager from the Files section.

cPanel home page.

cPanel home page.

Click on Settings in File Manager.

Settings in File Manager.

Settings in File Manager.

Tick the check box “Show hidden files” and click Save.

Settings in File Manager

Select your .htaccess file and click on the Edit option from the dashboard above.

Editing the .htaccess file.

Add the code “php_flag display_errors off” and click Save Changes.

Advanced options

Suppose you don’t want to disable PHP error reporting completely but to log only some specific types of PHP errors. In that case, you can add the following values in the .htaccess file alongside the value “php_flag display_errors on”

To report all types of errors and warnings: E_ALL

php_flag display_errors on
php_value error_reporting E_ALL

It’s the highest level, including notices, warnings, errors, strict standards, and deprecated functions.

To report only fatal errors: E_ERROR

php_flag display_errors on
php_value error_reporting E_ERROR

It does not include warnings, notices, or other non-fatal errors.

To report only warnings: E_WARNING

php_flag display_errors on
php_value error_reporting E_WARNING

It reports only warnings about potential issues that might cause problems but do not stop script execution.

To report only notices: E_NOTICE

php_flag display_errors on
php_value error_reporting E_NOTICE

Reports notice about non-critical issues, such as variable initialization, etc.

To report parse errors only: E_PARSE

php_flag display_errors on
php_value error_reporting E_PARSE

Reports parse errors that occur during PHP script compilation.

To report usage of deprecated functions only:

php_flag display_errors on
php_value error_reporting E_DEPRECATED

Reports usage of deprecated functions or features that might be removed in future PHP versions.

To report coding standards recommendations only:

php_flag display_errors on
php_value error_reporting E_STRICT

Reports coding standards recommendations to ensure compatibility with future versions of PHP.

Numeric Values (Bitwise OR combinations):

You can combine error constants using the bitwise OR operator (|) to report multiple types of errors. For example:

To report all errors except notices:

php_flag display_errors on
php_value error_reporting E_ALL & ~E_NOTICE

To report fatal errors and warnings but not notices:

php_flag display_errors on
php_value error_reporting E_ERROR | E_WARNING

Conclusion

Congrats! Now, you’ve successfully learned about how to disable or partially disable PHP error reporting using the .htaccess file.

How to Install NGINX, MySQL, PHP v7 (LEMP) on CentOS 7

In this guide we go through the steps for building the LEMP stack on CentOS 7.

All Commands – without sudo

yum update -y
yum install epel-release -y 
yum install nginx -y
systemctl start nginx
systemctl enable nginx
firewall-cmd --permanent --add-service=http
firewall-cmd --permanent --add-service=https
firewall-cmd --reload
yum install mariadb-server mariadb -y
systemctl start mariadb
systemctl enable mariadb 
mysql_secure_installation
yum install yum-utils http://rpms.remirepo.net/enterprise/remi-release-7.rpm -y
yum-config-manager –enable remi-php73 
yum install php php-mysql php-fpm -y 
sed -i '12s#.*#listen = /run/php-fpm/www.sock#' /etc/php-fpm.d/www.conf 
sed -i '31s#.*#listen.owner = nginx#' /etc/php-fpm.d/www.conf
sed -i '32s#.*#listen.group = nginx#' /etc/php-fpm.d/www.conf
sed -i '39s#.*#user = nginx#' /etc/php-fpm.d/www.conf
sed -i '41s#.*#group = nginx#' /etc/php-fpm.d/www.conf 
chown -R root:nginx /var/lib/php 
systemctl start php-fpm 
systemctl enable php-fpm 
echo -e "\nserver {\n\tlisten 80;\n\tserver_name your_server_ip;\n\n\troot /usr/share/nginx/html;\n\tindex index.php index.html index.htm;\n\n\tlocation / {\n\t\ttry_files \$uri \$uri/ =404;\n\t}\n\terror_page 404 /404.html;\n\terror_page 500 502 503 504 /50x.html;\n\tlocation = /50x.html {\n\t\troot /usr/share/nginx/html;\n\t}\n\n\tlocation ~ \.php$ {\n\\t\ttry_files \$uri =404;\n\t\tfastcgi_pass unix:/var/run/php-fpm/php-fpm.sock;\n\t\tfastcgi_index index.php;\n\t\tfastcgi_param SCRIPT_FILENAME \$document_root\$fastcgi_script_name;\n\t\t include fastcgi_params;\n\t}\n}" | tee /etc/nginx/conf.d/default.conf
systemctl restart nginx

All Commands  – with sudo

sudo yum update -y 
sudo yum install epel-release -y  
sudo yum install nginx -y 
sudo systemctl start nginx 
sudo systemctl enable nginx 
sudo firewall-cmd --permanent --add-service=http 
sudo firewall-cmd --permanent --add-service=https 
sudo firewall-cmd --reload 
sudo yum install mariadb-server mariadb -y 
sudo systemctl start mariadb 
sudo systemctl enable mariadb  
sudo mysql_secure_installation 
sudo yum install yum-utils http://rpms.remirepo.net/enterprise/remi-release-7.rpm -y 
sudo yum-config-manager –enable remi-php73  
sudo yum install php php-mysql php-fpm -y 
sudo sed -i '12s#.*#listen = /run/php-fpm/www.sock#' /etc/php-fpm.d/www.conf 
sudo sed -i '31s#.*#listen.owner = nginx#' /etc/php-fpm.d/www.conf
sudo sed -i '32s#.*#listen.group = nginx#' /etc/php-fpm.d/www.conf
sudo sed -i '39s#.*#user = nginx#' /etc/php-fpm.d/www.conf
sudo sed -i '41s#.*#group = nginx#' /etc/php-fpm.d/www.conf
sudo chown -R root:nginx /var/lib/php  
sudo systemctl start php-fpm  
sudo systemctl enable php-fpm  
echo -e "\nserver {\n\tlisten 80;\n\tserver_name your_server_ip;\n\n\troot /usr/share/nginx/html;\n\tindex index.php index.html index.htm;\n\n\tlocation / {\n\t\ttry_files \$uri \$uri/ =404;\n\t}\n\terror_page 404 /404.html;\n\terror_page 500 502 503 504 /50x.html;\n\tlocation = /50x.html {\n\t\troot /usr/share/nginx/html;\n\t}\n\n\tlocation ~ \.php$ {\n\\t\ttry_files \$uri =404;\n\t\tfastcgi_pass unix:/var/run/php-fpm/php-fpm.sock;\n\t\tfastcgi_index index.php;\n\t\tfastcgi_param SCRIPT_FILENAME \$document_root\$fastcgi_script_name;\n\t\t include fastcgi_params;\n\t}\n}" | sudo tee /etc/nginx/conf.d/default.conf
sudo systemctl restart nginx

LEMP stack is a group of open source software that is installed on a server so that we can host dynamic web applications and sites. LEMP stack is an another variation of the LAMP stack. LEMP is an acronym which consists of Linux as the operating system, NGINX as the web server, MySQL/MariaDB as the relational database management system and PHP as the server-side scripting language. 

Prerequisites

  • A CentOS 7 VPS
  • Root access to the server
  • An SSH client (PuTTY for example)

Step 1: Update Your System

Log in as a sudo user and then update your system using the following  command,

yum update -y

Step 2: Installing NGINX

Nginx is not available on the default CentOS 7 repositories, so add the Extra Packages for Enterprise Linux (EPEL) repository by executing the command below.

yum install epel-release -y

Now that the (EPEL) repository repository is installed on your server, let’s install the NGINX Web Server using the command below.

yum install nginx -y

After the installation, start and enable NGINX.

systemctl start nginx
systemctl enable nginx

Configure the system firewall for NGINX to allow 80 and 443 inbound to the server.

firewall-cmd --permanent --add-service=http

firewall-cmd --permanent --add-service=https

firewall-cmd --reload

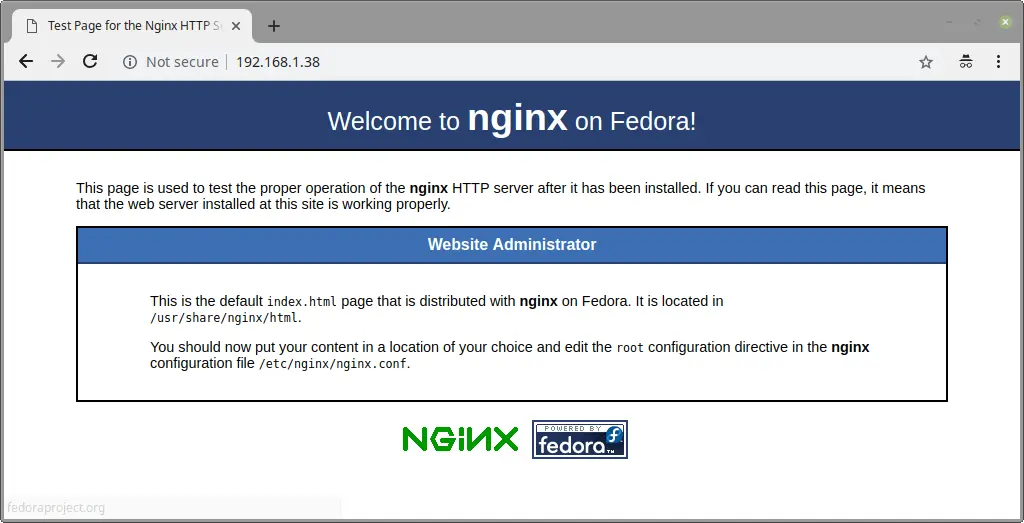
To verify if NGINX is running, visit your IP address via the browser.

http://server_domain_name_or_IP/

You should see the default NGINX page as shown below.

Step 3: Installing MariaDB

MariaDB – a drop in replacement of MySQL, is the default database management system in CentOS 7. It is a community-developed fork of the MySQL relational database management system.

MariaDB comes with default CentOS repositories, thus run the following command to install it.

yum install mariadb-server mariadb -y

After the installation is complete, start and enable the service.

systemctl start maridb

systemctl enable mariadb

Run the following command to prevent all unauthorized accesses and remove some dangerous defaults in your database configuration.

mysql_secure_installation

You will be prompted with an option to change the MariaDB root password, remove anonymous user accounts, disable root logins outside of localhost, remove test databases and reload privileges. It is recommended that you answer ‘yes’ to these options to secure the database server.

Step 4: Installing PHP

PHP is a widely used scripting language suited for web development. By default PHP 5.4 is available in the CentOS 7 Yum repositories. It is now outdated and no longer supported. We recommend that you install the latest stable version of PHP 7.x as it has many improvements and new features.

To install the latest PHP version we need to add REMI repository. Lets start by installing the package “yum-utils” for configuring yum repositories and install the REMI repository.

yum install yum-utils http://rpms.remirepo.net/enterprise/remi-release-7.rpm -y

Configure the repository for installing PHP 7.3 (or the latest stable version) using the following command. If there is a later version then simply modify the command by changing the version numbers in the command to match the release you wish to install.

yum-config-manager --enable remi-php73

We can now install PHP 7.3 along with its common dependencies with the command below,

yum install php php-mysql php-fpm -y 

Check the PHP version with the command below,

php -v

The output should look similar to what show below,

PHP 7.3.2 (cli) (built: Feb 5 2019 13:10:03) ( NTS )
Copyright (c) 1997-2018 The PHP Group
Zend Engine v3.3.2, Copyright (c) 1998-2018 Zend Technologies

By default PHP-FPM is configured to user “apache” on port 9000. W’ll need to change the user to nginx.

To do so edit the PHP-FPM configuration file at “/etc/php-fpm.d/www.conf” to what’s shown below.

...
user = nginx
...
group = nginx
...
listen = /run/php-fpm/www.sock
...
listen.owner = nginx
listen.group = nginx

Save the file and change the ownership of the directory “/var/lib/php” from “apache” to “nginx”.

chown -R root:nginx /var/lib/php

Start and enable PHP-FPM.

systemctl start php-fpm
systemctl enable php-fpm

Step 5: Configuring Nginx to Process PHP Pages

Create a new NGINX configuration file with the following command.

vim /etc/nginx/conf.d/default.conf

Paste the syntax below on to the newly created configuration file.

server {
    listen   80;
    server_name  your_server_ip;

    # note that these lines are originally from the "location /" block
    root   /usr/share/nginx/html;
    index index.php index.html index.htm;

    location / {
        try_files $uri $uri/ =404;
    }
    error_page 404 /404.html;
    error_page 500 502 503 504 /50x.html;
    location = /50x.html {
        root /usr/share/nginx/html;
    }

    location ~ \.php$ {
        try_files $uri =404;
        fastcgi_pass unix:/var/run/php-fpm/php-fpm.sock;
        fastcgi_index index.php;
        fastcgi_param SCRIPT_FILENAME $document_root$fastcgi_script_name;
        include fastcgi_params;
    }
}

Note: Replace “your_server_ip” with your actual server IP.

Save the file and restart NGINX for the changes to take effect.

systemctl restart nginx

Conclusion

Now that you have successfully installed LEMP stack, you are now ready to host any type of dynamic website/software applications. 

How to Install OpenLiteSpeed Web Server on CentOS 7

In this guide we go through the steps for installing OpenLiteSpeed Web Server on CentOS 7.

All Commands – without sudo

yum update -y
rpm -ivh http://rpms.litespeedtech.com/centos/litespeed-repo-1.1-1.el7.noarch.rpm
yum install openlitespeed
/usr/local/lsws/bin/lswsctrl start
yum install epel-release
yum install lsphp70 lsphp70-mysqlnd
/usr/local/lsws/admin/misc/admpass.sh 
firewall-cmd --zone=public --permanent --add-port=7080/tcp 
firewall-cmd --reload

All Commands – with sudo

sudo yum update -y
sudo rpm -ivh http://rpms.litespeedtech.com/centos/litespeed-repo-1.1-1.el7.noarch.rpm
sudo yum install openlitespeed
sudo /usr/local/lsws/bin/lswsctrl start
sudo yum install epel-release
sudo yum install lsphp70 lsphp70-mysqlnd
sudo /usr/local/lsws/admin/misc/admpass.sh
sudo firewall-cmd --zone=public --permanent --add-port=7080/tcp 
sudo firewall-cmd --reload

OpenLiteSpeed is a free, open source and lightweight web server from LiteSpeed. In this guide, we will demonstrate how to install OpenLiteSpeed, and then configure PHP version PHP 7.x.

Prerequisites

  • A CentOS 7 VPS
  • Sudo access

System Update

Log in as a sudo user and the update your system,

yum update -y

Add the OpenLiteSpeed Repository

Add the OpenLitespeed Repository to install the latest version of OpenLiteSpeed.

rpm -ivh http://rpms.litespeedtech.com/centos/litespeed-repo-1.1-1.el7.noarch.rpm

Install OpenLiteSpeed

Install the latest version of OpenLiteSpeed using the command below.

yum install openlitespeed

Start OpenLiteSpeed using the command below.

/usr/local/lsws/bin/lswsctrl start

Note: To stop it, run /usr/local/lsws/bin/lswsctrl stop.

Install PHP

OpenLiteSpeed uses LSPHP 5 by default which has reached its end of service life.  We recommend that you install the latest stable version of LSPHP 7.x (at least 7.1 currently as 7.0 is EoL) as it has many improvements and new features.

To install the latest PHP version we need to add EPEL repository from which we can install PHP 7 with the following command.

yum install epel-release

Install PHP 7 and its MySQL extension with the command below,

yum install lsphp70 lsphp70-mysqlnd

Configure OpenLiteSpeed

OpenLiteSpeed has a WebAdmin console which is accessed through port 7080. Start by configuring the username and password for the WebAdmin console.

/usr/local/lsws/admin/misc/admpass.sh

Pick a username for the administrative account, or press Enter to accept the default value for the username which is “admin”.

Next, you need to provide and verify a password for the Admin user. When choosing a password, choose a strong password as the WebAdmin console is open to the internet.

Please specify the user name of administrator.
This is the user name required to login the administration Web interface.

User name [admin]:

Please specify the administrator's password.
This is the password required to login the administration Web interface.

Password: 
Retype password: 
Administrator's username/password is updated successfully!

Update the firewall rules to allow the port 7080 to access the WebAdmin console.

firewall-cmd --zone=public --permanent --add-port=7080/tcp
firewall-cmd --reload

Open your web browser and type the following URL to access WebAdmin console.

http://SERVER_IP:7080
OR
http://localhost:7080

Enter the username and password that you’ve set and login.

OpenLiteSpeed WebAdmin Console

OpenLIteSpeed WebAdmin Login Page

Note: OpenLiteSpeed uses LSPHP 5 by default, we need to make few changes to setup LSPHP 70.

Login to the WebAdmin console and go to Server Configuration >> External App . There, you will find an external application named “lsphp5”. Click the Edit icon on the right hand side in order to edit this application as follows:

Name: lsphp70
Address: uds://tmp/lshttpd/lsphp.sock
Notes: LSPHP70 Configuration 
Max Connections: 35
Initial Request Timeout (secs): 60
Retry Timeout : 0
Command: /usr/local/lsws/lsphp70/bin/lsphp	

Click on the Save button to save the configurations.

Setup Script Handlers

Script handlers specifies OpenLiteSpeed which scripts should go to which external application. To setup a script handler we need to set OpenLiteSpeed to serve all .php scripts with the lsphp70 external application.

Click the Script Handler tab, and then use the Edit icon to update the script handler as follows:

Suffixes: php
Handler Type: LiteSpeed SAPI
Handler Name: lsphp70

Click the Save icon to save your changes.

The default port of OpenLiteSpeed is 8080, we need to change it to 80.

To do so, Click on Listener > Default, click the Edit icon on the right hand side, and then modify the settings as shown below:

Listener Name: Default
IP Address: ANY
Port: 80

To save these changes, gracefully restart OpenLiteSpeed by clicking the Graceful Restart icon at the top right corner.

OpenLiteSpeed

OpenLiteSpeed WebAdmin Interface

Click Yes to restart OpenLiteSpeed.

Conclusion

Congrats, OpenLiteSpeed has been successfully installed on your system. For additional information, refer to the OpenLiteSpeed Homepage: https://open.litespeedtech.com/mediawiki/

How to Install LAMP (Linux, Apache, MySQL, PHP) on CentOS 7

In this guide we will walk through the steps for installing and configuring LAMP stack on a CentOS 7 VPS.

All commands – without sudo

yum update
yum install httpd -y
systemctl start httpd
systemctl enable httpd
yum install mariadb-server mariadb -y
systemctl start mariadb
systemctl enable mariadb
systemctl mysql_secure_installation
yum install epel-release yum-utils -y
yum install http://rpms.remirepo.net/enterprise/remi-release-7.rpm -y
yum-config-manager --enable remi-php73
yum install php php-mysql -y
systemctl restart httpd

All commands – with sudo

sudo yum update -y
sudo yum install httpd -y
sudo systemctl start httpd
sudo systemctl enable httpd
sudo yum install mariadb-server mariadb -y
sudo systemctl start mariadb
sudo systemctl enable mariadb
sudo systemctl mysql_secure_installation
sudo yum install epel-release yum-utils -y
sudo yum install http://rpms.remirepo.net/enterprise/remi-release-7.rpm -y
sudo yum-config-manager --enable remi-php73
sudo yum install php php-mysql -y
sudo systemctl restart httpd

LAMP is a set of open source software packages that is used to create websites and web applications. LAMP is an acronym. It consists of Linux as the operating system, Apache as the Web server, MySQL/MariaDB as the relational database management system and PHP as the server-side scripting language. In this document, we will go through the steps necessary for installing the LAMP stack on a CentOS 7 server.

All you require for these operations is a VPS with CentOS 7 installed on it and root/root privileged user access to the server.

Prerequisites

  • A CentOS 7 VPS
  • Root access to the server
  • An SSH client (PuTTY for example)

Step 1: Update your system

Before we start, it is always good to update the system software on the server. This can be done by executing the command below.

 sudo yum update -y

Step 2: Install Apache

The installation of Apache is a simple step and this can be done using the Yum Package Manager.

sudo yum install httpd -y

Start and enable the Apache service with the following command.

sudo systemctl start httpd
sudo systemctl enable httpd

Check whether Apache is running by calling your IP/hostname in the browser. If Apache is running the default CentOS 7 Apache web page will be displayed.

LAMP Installation on CentOS 7 Server

Apache Test Page on CentOS 7 Server

Step 3: Install MariaDB Database

MariaDB is a drop-in replacement for MySQL. It is a reliable SQL server that comes with a rich set of enhancements and features. For dynamic websites, it is always necessary to store data. We can install MariaDB together with additional packages that are required by running the commands below:

sudo yum install mariadb-server mariadb -y

Now that the MariaDB has installed successfully, run the command below to start and enable the service.

sudo systemctl start mariadb
sudo systemctl enable mariadb

To prevent unauthorized access to your database and remove some dangerous defaults run the following command.

sudo mysql_secure_installation

You will be prompted with an option to change the MariaDB root password, remove anonymous user accounts, disable root logins outside of localhost, remove test databases and reload privileges. It is recommended that you answer ‘yes’ to these options to secure the database server.

Step 4: Install PHP

PHP is a widely used scripting language suited for web development. It works with Apache to display the dynamic content for your website. By default, PHP 5.4 is available in the CentOS 7 Yum repositories. We recommend that you install the latest stable version of PHP 7.x as it has many improvements and new features.

To install the latest PHP version we need to add EPEL and REMI repositories. Let’s start by installing the package “yum-utils” for configuring yum repositories and enabling the EPEL repository.

yum install epel-release yum-utils -y

Now, download and install the REMI repository.

yum install http://rpms.remirepo.net/enterprise/remi-release-7.rpm -y

Configure the repository for installing PHP 7.3 (or the latest stable version) using the following command. If there is a later version then simply modify the command by changing the version numbers in the command to match the release you wish to install.

yum-config-manager --enable remi-php73

We can now install PHP 7.3 along with its SQL dependency using the command below.

yum install php php-mysql -y

After installing PHP, restart the Apache service.

sudo systemctl restart httpd

Conclusion

That’s it. You’ve successfully installed the LAMP platform on your CentOS 7 system which can now run dynamic website and software applications. Depending on your web hosting needs, you might also need to install additional Apache modules and PHP extensions.

We highly recommend checking out OpenLiteSpeed web server as an open-source drop-in replacement for Apache. There can be significant speed increases by running OpenLiteSpeed. We have an article on how to install OpenLiteSpeed to help guide you.