Quick Steps:
Step 1: Open the Control Panel from the Start menu
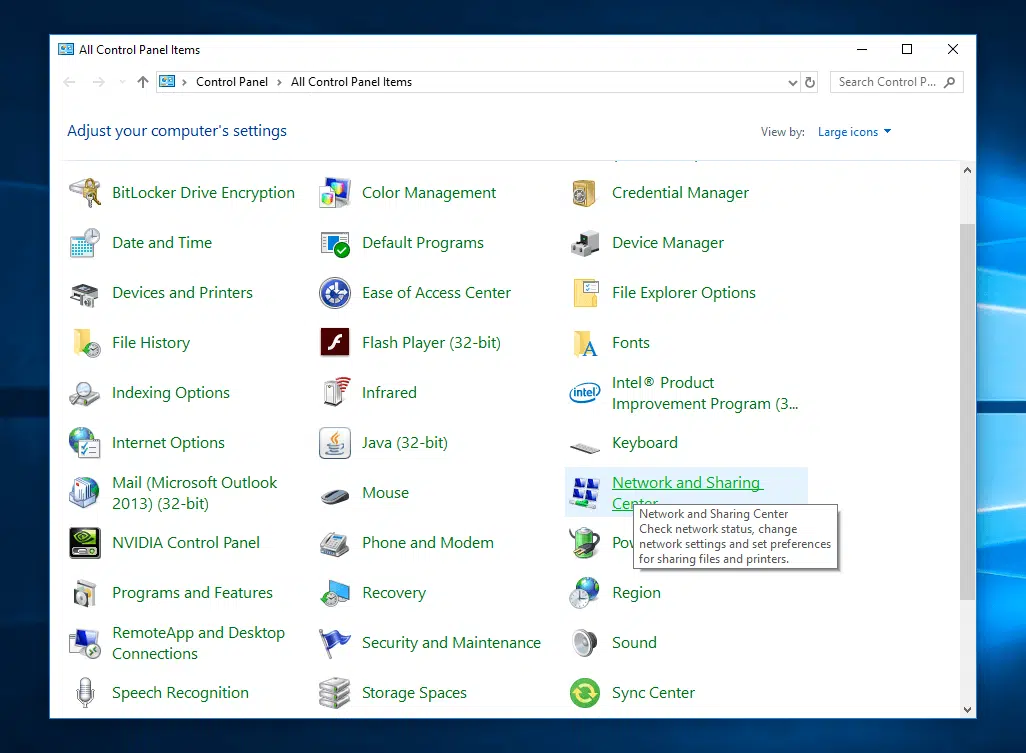
Step 2: Click Network and sharing Center
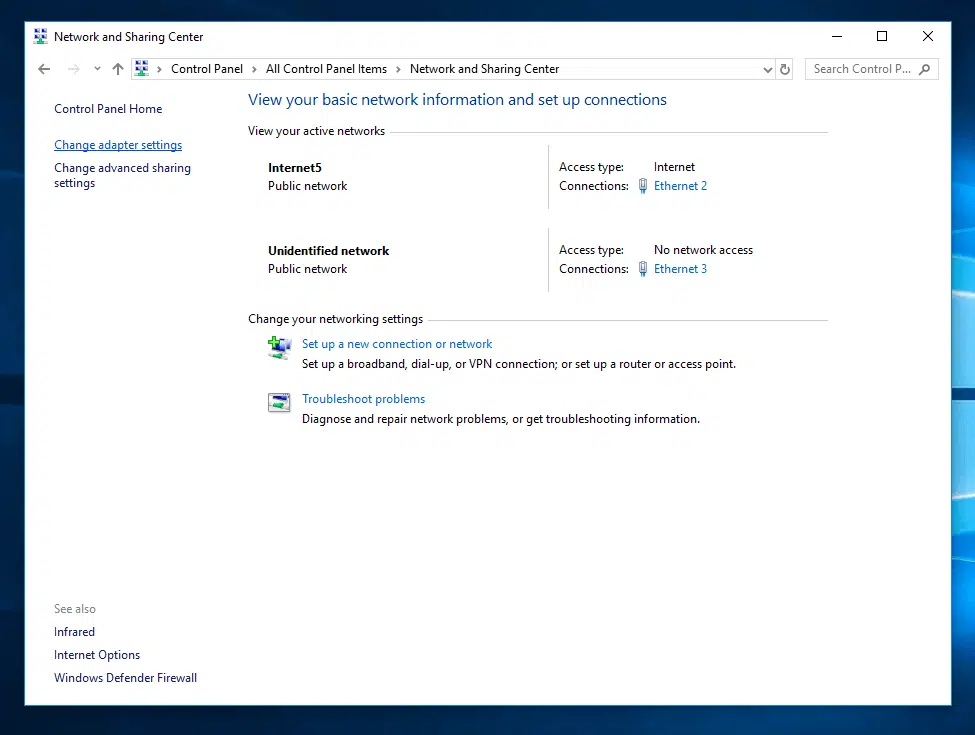
Step 3: Click Change adapter settings
Step 4: Right click on your active network adapter & choose properties
Step 5: Choose Internet Protocol Version 4 (TCP/IPv4) and click properties
Step 6: Enter the new DNS servers into the boxes under “Use the following DNS server addresses”
Background
By default, Windows will obtain the DNS servers from your internet connection. In most cases, these would be DNS servers from your ISP. Many ISP’s tend to cache DNS entries longer than they should and do not update records properly. Because of this, you may wish to use Google’s public DNS servers (or other DNS servers).
Detailed Instructions
To modify your DNS servers within Windows 10 (and other versions of Windows), you’ll need to modify the network adapter properties. First, locate the Control Panel from within Windows.
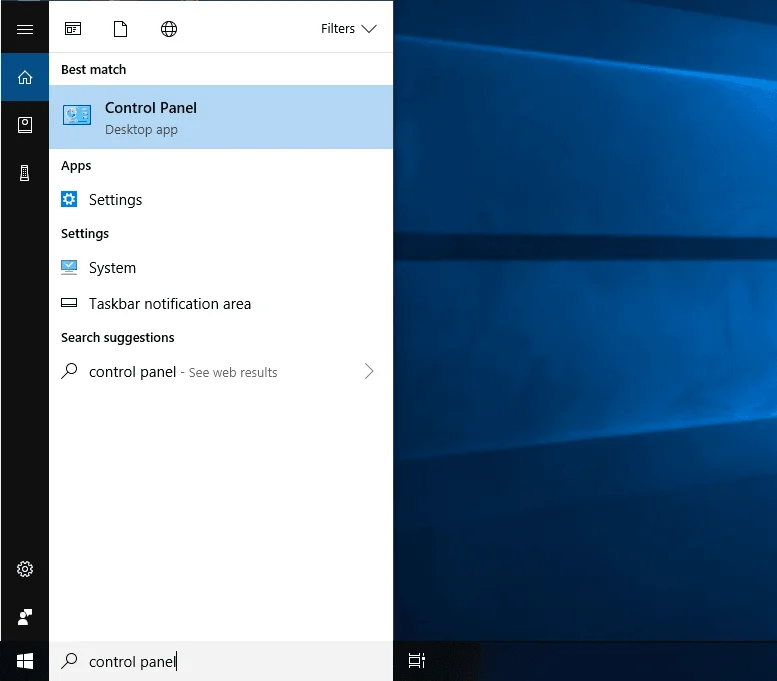
Next click on “Control Panel” from the search menu to open the Control Panel & then click “Network & Sharing Center”
After, you’ll open the Network & Sharing Center which will show basic network connection information. From here, on the left side of the page, click “Change adapter settings”.
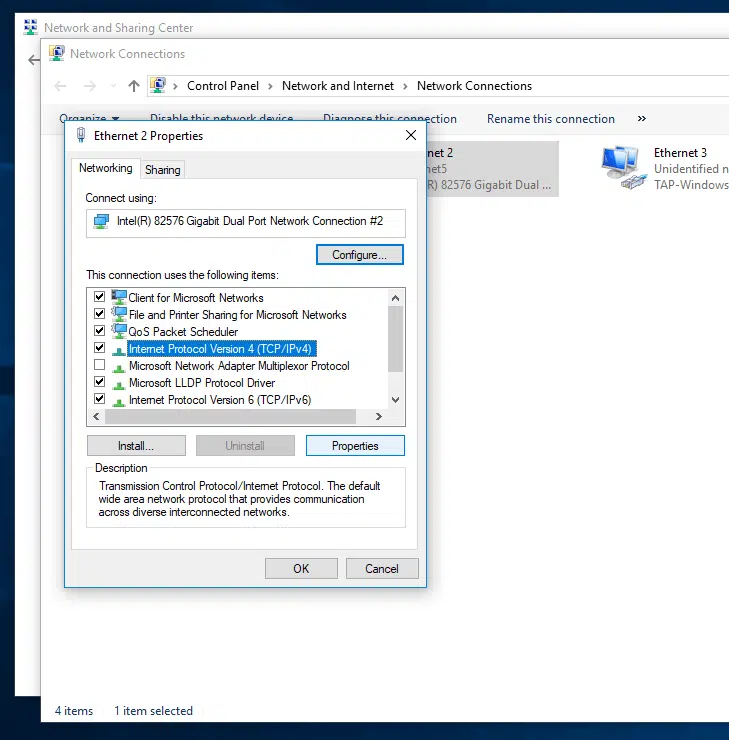
After you’ve clicked “Change adapter settings”, you’ll be taken to the list of network adapters. You’ll want to locate your current adapter that is in use & right click > Properties.
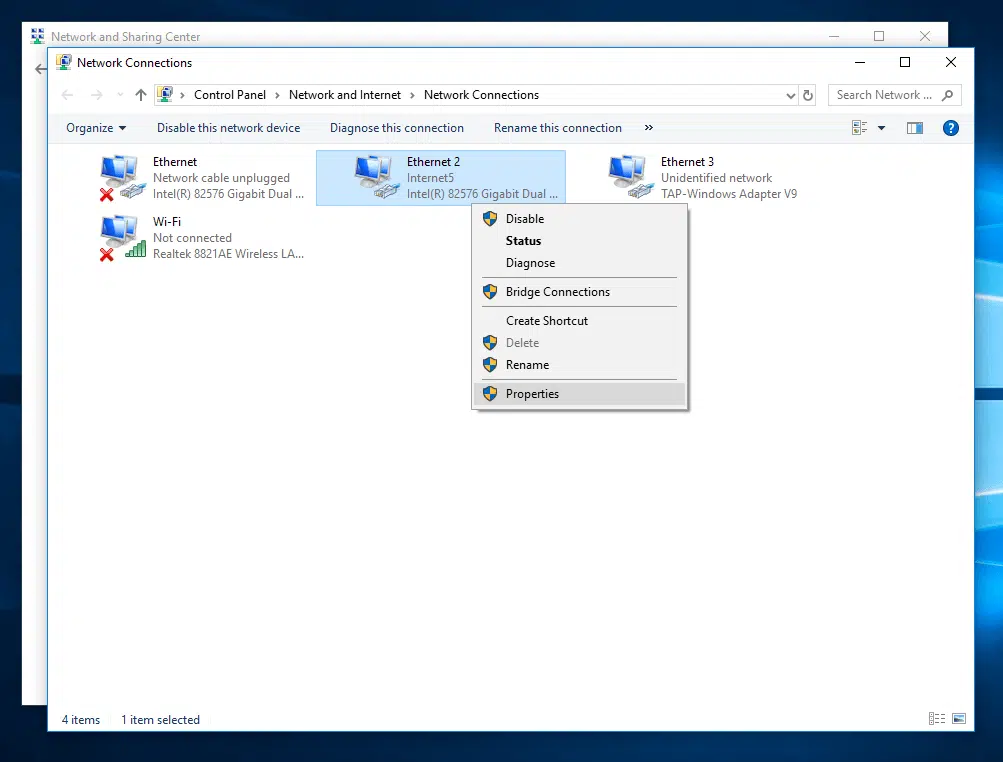
Windows 10 Network Adapter Properties
After clicking “Properties” you’ll need to locate the option for “Internet Protocol Version 4 (TCP/IPv4)” and then click “Properties”.
After clicking “Properties” from the previous step, you’ll now see the connection properties which has options for network settings including the option to specify DNS servers. As shown below, you can enter the Google public DNS servers into the bottom set of boxes titled “Use the following DNS server addresses”.
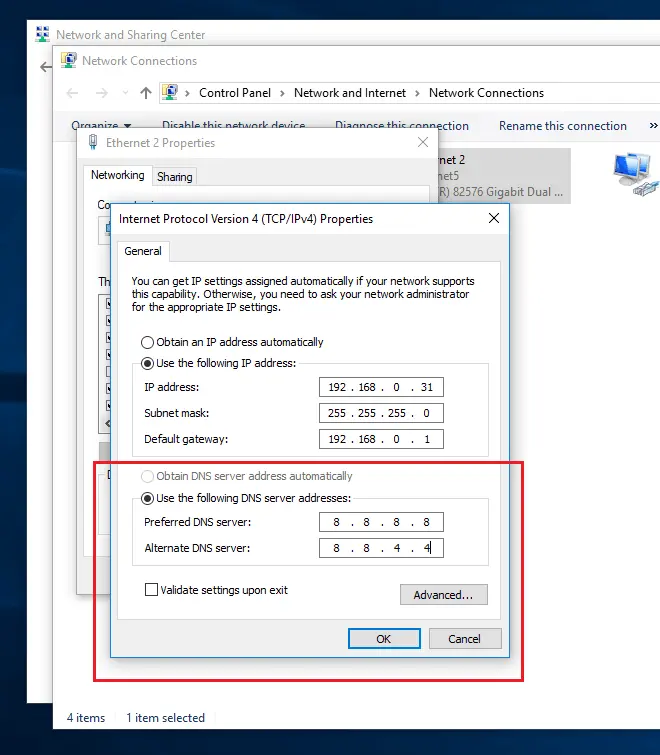
After entering the DNS servers you wish to use into the boxes, click “OK”. Please note, for these steps, you should modify ONLY the bottom two fields stating “Use the following DNS server addresses”.
Below are some public DNS servers. We recommend using either Google DNS or CloudFlare DNS. Prior to using the DNS servers, it is recommended to ensure these IP addresses are still in use.
Google Public DNS Servers
8.8.8.8
8.8.4.4
CloudFlare DNS
1.1.1.1
If you have any web hosting questions please feel free to reach out to us. We're happy to help.
Our Guiding Principles