
You’ve put it off long enough. It’s time to create a custom email address using cPanel to go along with your sparkly new personalized domain name.
See, your brand new website is done. Ready. A sense of pride washes over you. Everything you have to offer this world is now instantly available at the fingertips of the internet. But what if your visitors should wish to contact you? You thought you had that covered. All they had to do, according to your site, is email you at… tlee2817@hotmail.com?! (To be honest, the “2817” has no real significance; you kind of just settled on it after you found the year you were born was taken, not to mention the dozen or so other combinations you tried.)
It doesn’t have to be that way.
Among the great benefits of a personalized domain name is the ability to employ email addresses that correspond with it. Besides giving your web presence a more polished and professional look, email addresses that use your own domain also tend to instill added trust in the minds of your visitors.
Fortunately, VeeroTech has your back, making email address creation a cinch via the incredible power and ease of cPanel.
Creating the email address in cPanel
Your first step is telling the server to watch for mail and store it for you. Sound daunting? Nah, cPanel will do all the heavy lifting.
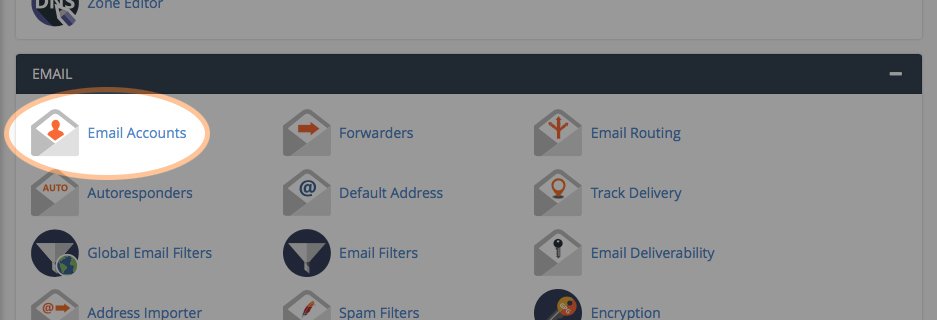
1. On your cPanel homepage, look for the Email Accounts icon and click it.
You’ll find yourself viewing a list of email addresses associated with your domain. Yes, an address is already there and waiting. Just ignore it. It’s generated by VeeroTech when you first signed up for web hosting.
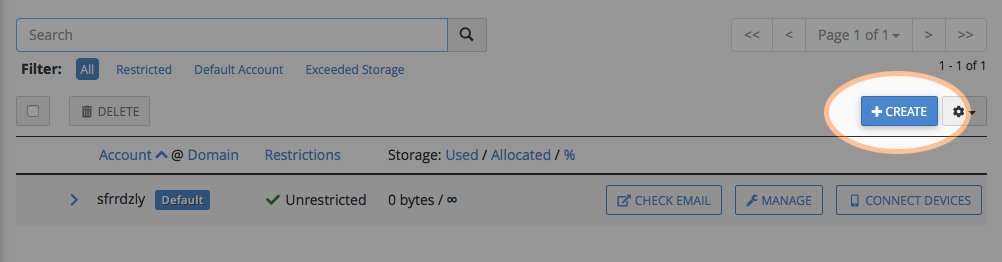
2. Click the Create button.
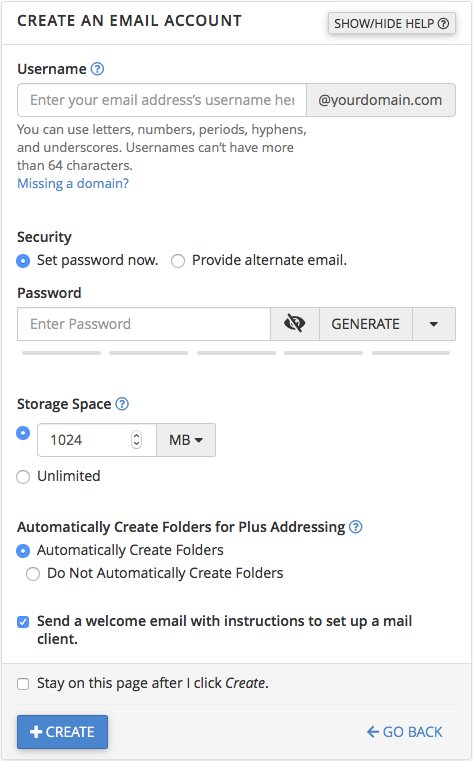
The panel that opens contains all the settings needed to bring your custom email address to glorious life.
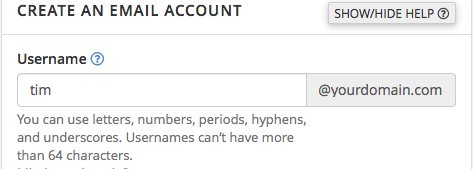
3. Enter the Username. This is simply the part of your email address that precedes the @ sign and your domain name.
You might just opt to go with your first name (tim). Or maybe you have a team and each member will require his or her own address, and you want to include a last name, too (timlee). In addition to letters and numbers, you can also include periods, hyphens, and underscores (tim.lee, tim-lee, tim_lee). It’s not case-sensitive, so no matter how you enter it, upper or lowercase letters will work all the same.
(You can find some additional tips on picking the best name format for your address over on the very helpful Budding Geek blog.)
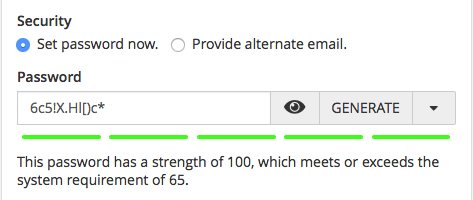
4. For Security, leave it at Set password now and enter the desired Password.
cPanel will gauge the strength of your password and let you know if you should make a change. Alternatively, you can click the Generate button to have a suggestion filled in for you. This is a great way to ensure you’ve met an adequate security threshold.
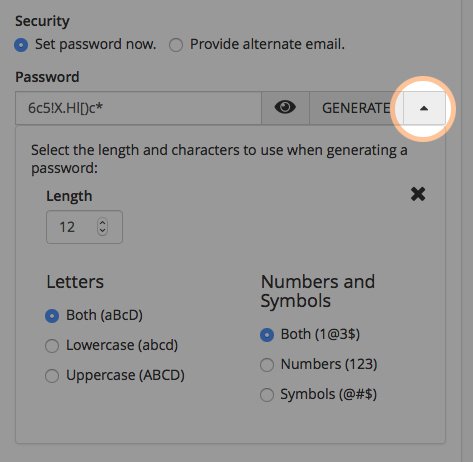
Handy tip: As shown above, you can easily alter the “recipe” for auto-generated passwords by clicking the little triangle at the far right.
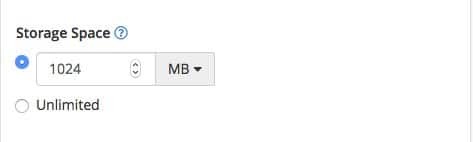
5. Choose the amount of Storage Space for incoming and outgoing emails.
You can raise or lower the value, or choose Unlimited if you don’t want a ceiling. To start, the default of 1GB (1,024MB) should be just fine.
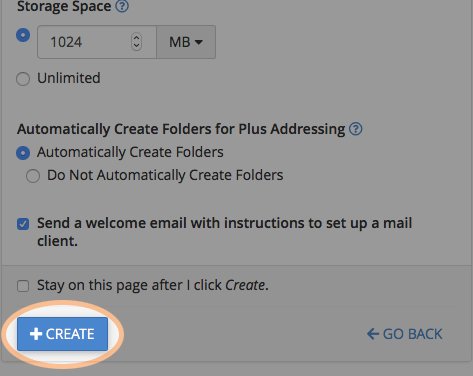
6. Leave the remaining settings at their defaults, and click Create.
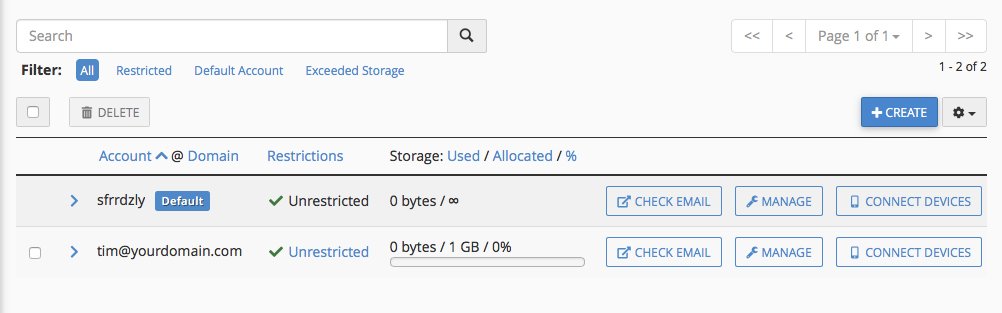
There it is — you’ve created your new email address in cPanel. Try not to be blinded by its ethereal glow!
This list offers a bird’s-eye view of all your created addresses, including how much storage space each is using versus how much you’ve allocated for it.
You’re halfway done. Can you believe it?
A quick word about managing email addresses
If you ever need to change the settings of an email address you’ve already created, this is where you’ll do it. There’s also a Manage button, which takes you back into the account settings, allowing you to change the password and storage space, among other things.
Automatically configuring your device to access your email address
Your second (and final!) step is to configure your device, or devices, to access the email address now resting comfortably on the server. Yes, this can seem overwhelming. But take a relieved breath, because again, cPanel is there to carry the burden.
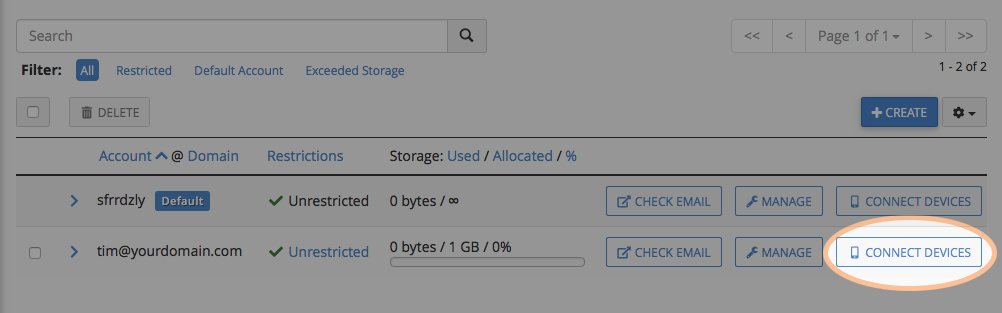
On the Email Accounts screen in cPanel, click the Connect Devices button next to the email address you just created.
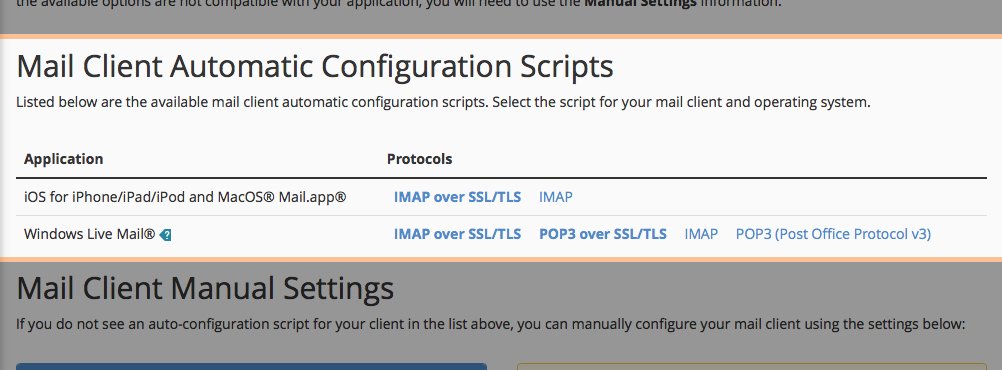
Your first (and, quite possibly, only) stop is the top section, Mail Client Automatic Configuration Scripts. If you see your mail client listed, then great — all you’re going to have to do is click a link, and cPanel will run a quick script that sets up your email account on the device you’re presently using.
So, if you want to share the account on, say, a desktop computer and your iPhone, you would log into cPanel separately on each, then choose the appropriate script.
You’ll notice under Protocols some fun-sounding options that are pure computerese. In a nutshell, here are the only two options you really need to consider:
IMAP over SSL/TLS. Email messages are stored on the server, synced, and accessible on any device you configure. This is the suggested configuration option for most devices.
POP3 over SSL/TLS. Email messages are downloaded to the device upon retrieval, and in most cases, deleted from the server. This might be okay if you only ever intend to use one device, and don’t care to have your messages archived and synced elsewhere.
(As an aside, SSL/TLS simply stands for two common cryptographic protocols designed to provide secure communication from one device to another.)
Once you’ve chosen the appropriate link, clicked it, and permitted cPanel to set up your device, it’s entirely possible you’re good to go! If so, congratulations — you can stop reading now and do something decidedly un-techie like jumping jacks or flossing.
Manually configuring your device to access your email address
But, uh-oh… what if there’s no corresponding configuration script for your device in the list? That’s okay, because cPanel gives you everything you need in order to do a little manual jiggering.
Every mail client has a way to set up an account. In most cases, you’ll find the process broken up into a series of steps, requiring you to simply provide some key info. cPanel lists that info out, and once you understand a couple basics, there’s no bite.
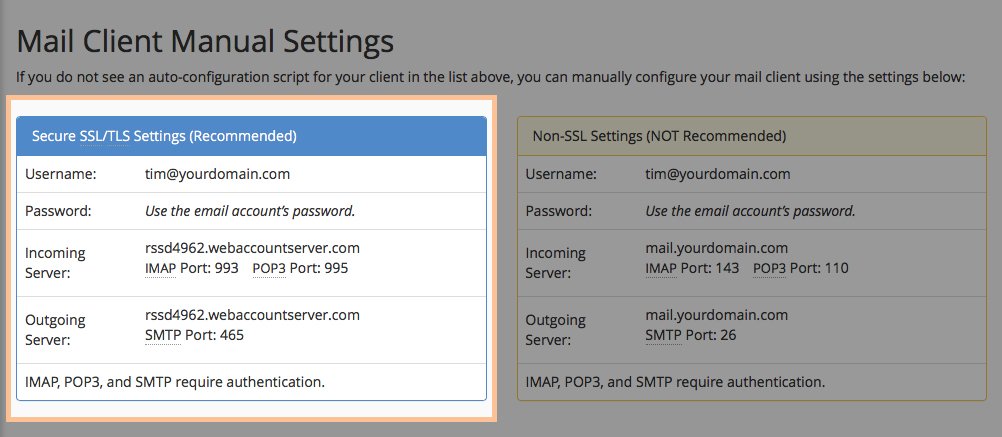
First off, you’ll want to use the settings in the Secure SSL/TLS Settings (Recommended) section. (Please remember: Don’t use the info in the above screenshot example. Refer to your own cPanel for your specific settings.)
Your mail client is, of course, going to want your account’s username (the full email address in this case) and password. That’s what you created in the steps up above. Just plug those in exactly as cPanel displays.
Then, you’re going to specify an incoming server. This is the server responsible for receiving messages. Once you’ve determined whether you’re going with IMAP or POP3 (see the brief explanation above), you’ll know which port to use. You’ll very likely opt for IMAP.
Lastly, you need to provide an outgoing server and its port number. This is the server responsible for sending your messages.
That’s it, seriously, you’re done
Now you can really get down to business. Or send out some links to funny cat videos. Or, maybe sending out links to funny cat videos is your business, in which case we applaud your entrepreneurial spirit. Regardless, your recipients will notice the difference — and you can finally stop cringing every time somebody asks you what that “2817” means.
If you have any web hosting questions please feel free to reach out to us. We're happy to help.