Quick Steps:
- Go to Backups menu in cPanel.
- Choose your destination for backup.
- Download the backup.
- Reseller hosting users can make use of services such as whmeasybackup.com
All VeeroTech Systems shared, reseller, cloud (shared/reseller) & managed VPS hosting plans include daily R1Soft backups (bi-hourly for cloud). While we offer this service as a courtesy, it is always recommended that you keep local hosting account backups just in case there’s a problem with ours.
For shared hosting:
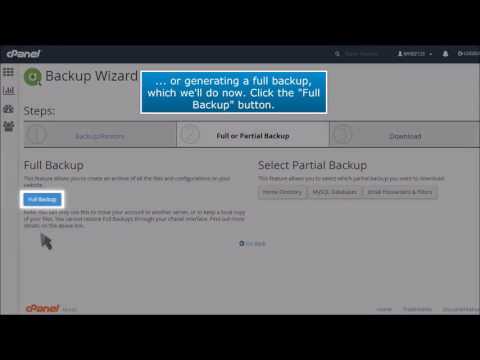
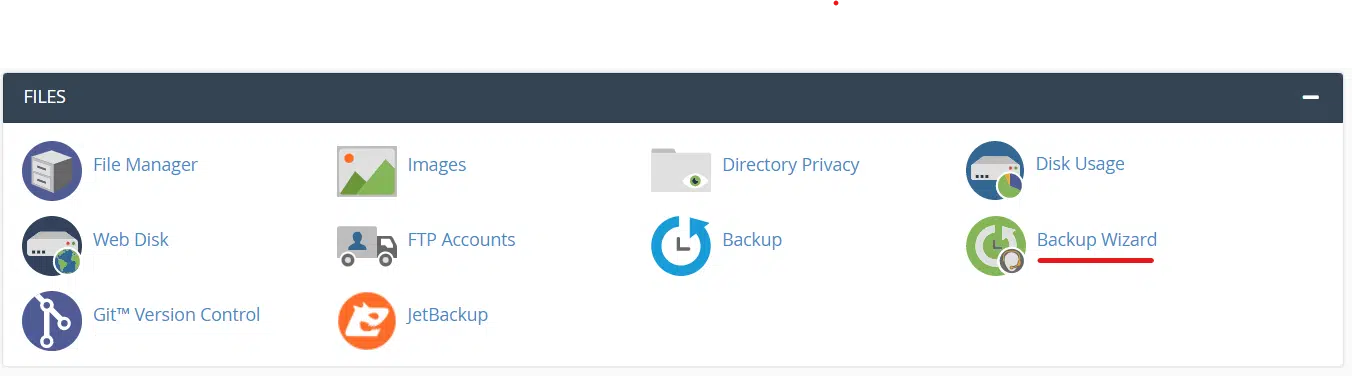
You can download a full backup of your entire cPanel hosting account by following the steps below – this assumes you’ve already located the “Backups” icon in cPanel.
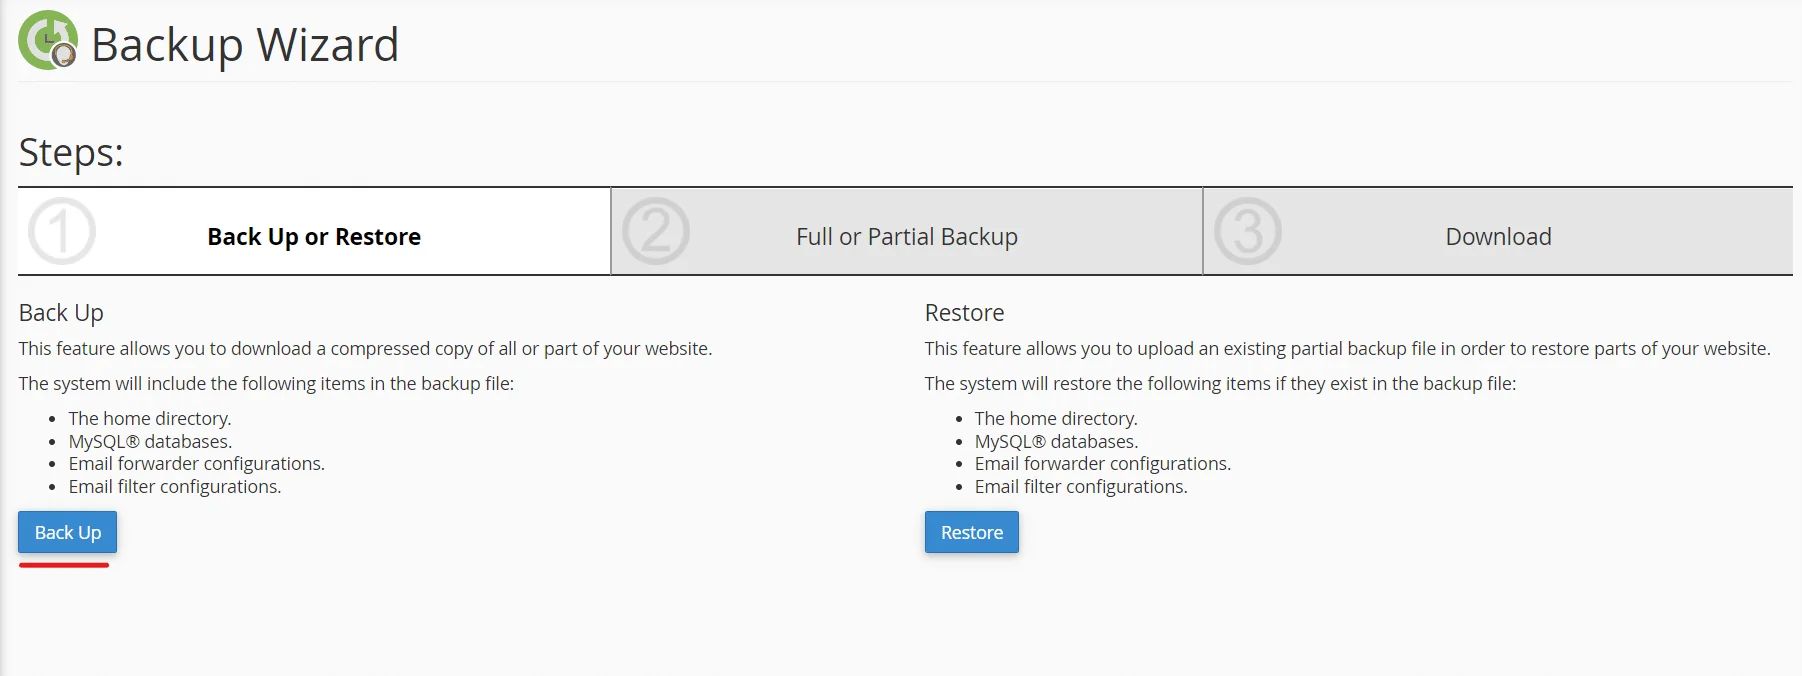
Select Backup from the first page.
Select Full Backup from the second page.
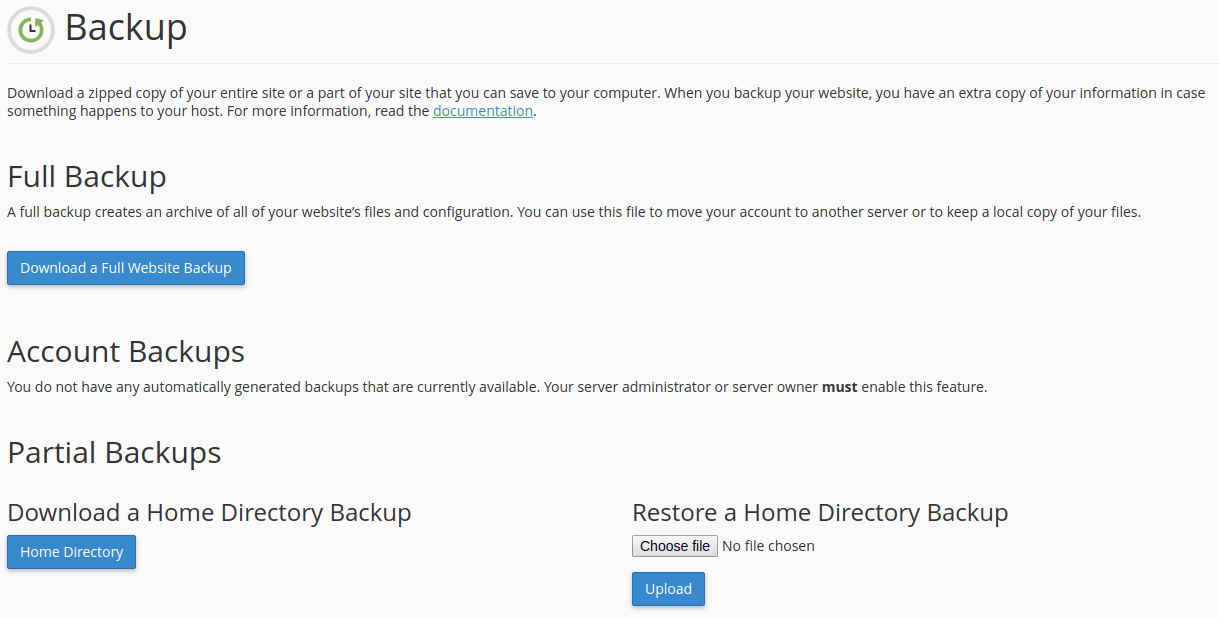
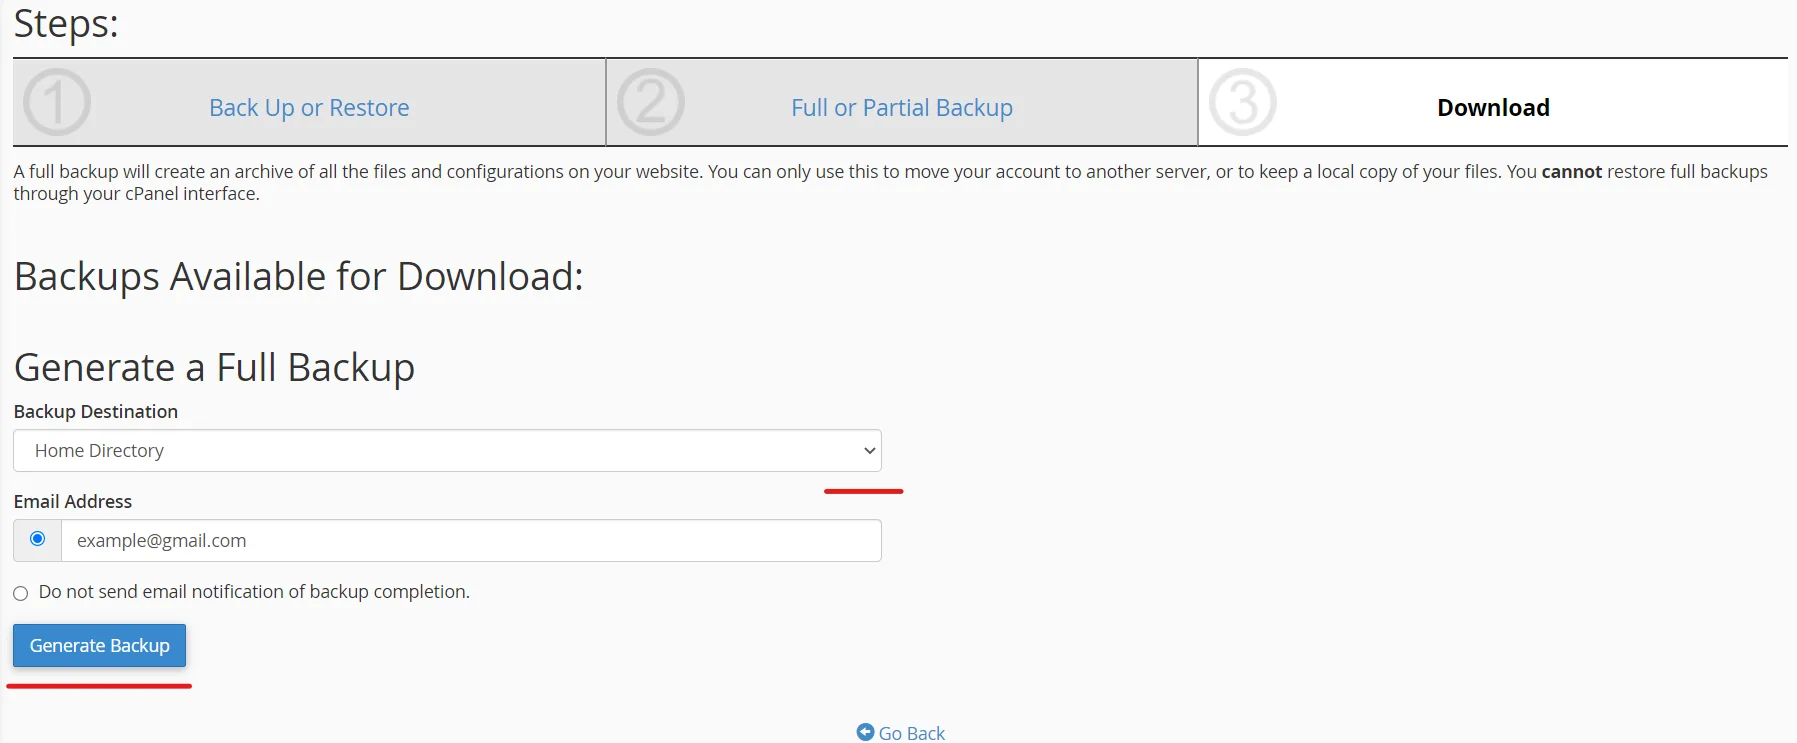
Select the destination for the backup files.
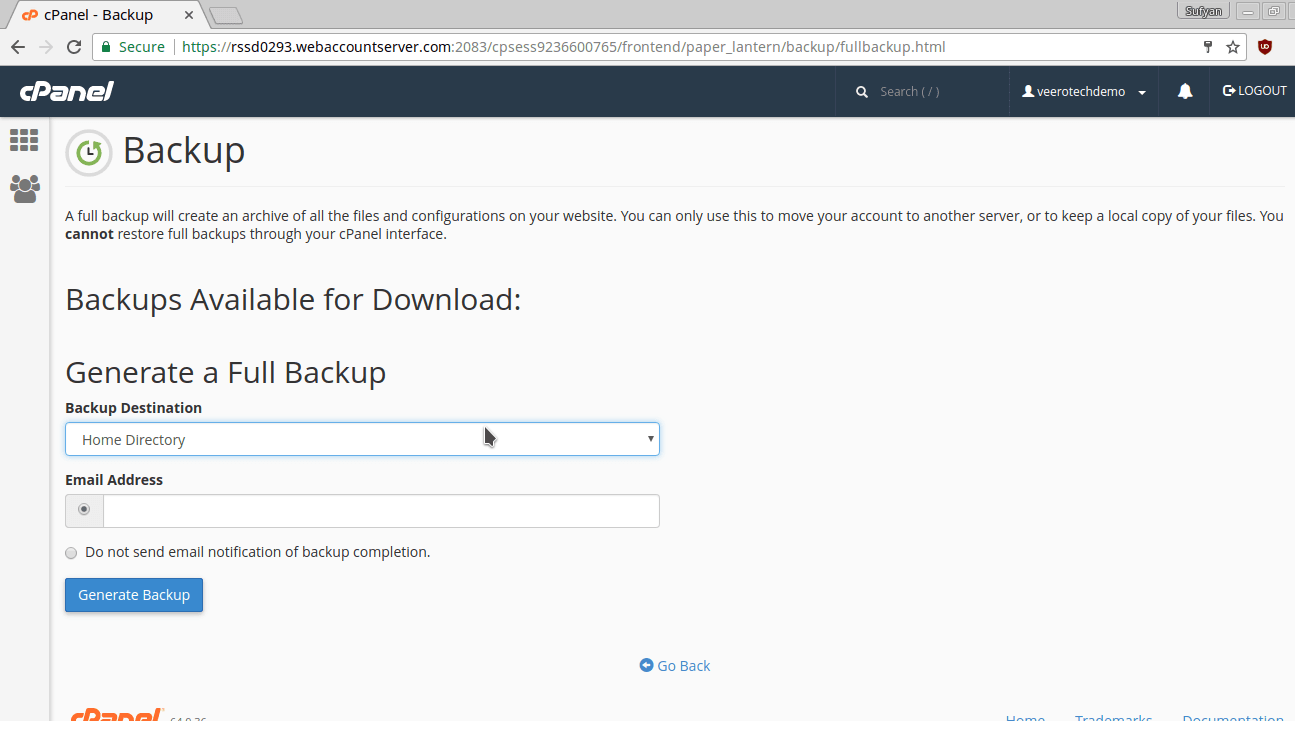
You have 3 options.
- You can store the files in your home directory on your web server by selecting Home Directory from the pull-down menu.
- cPanel can also utilize FTP or SCP to store the files to a remote machine. To do this, fill in the appropriate information and select the method for file transfer from the pull-down menu.
- If you wish to download the file to your computer, skip to the next step.
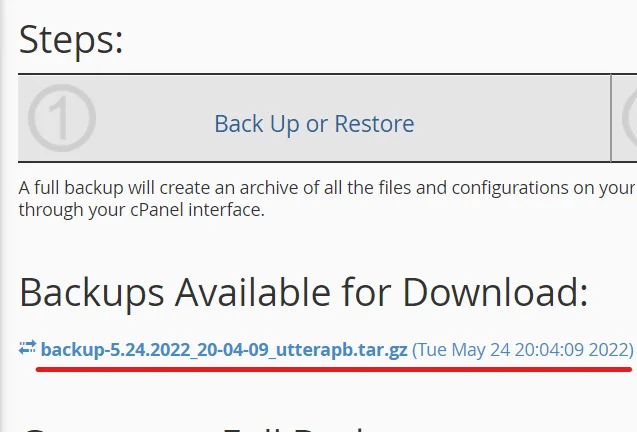
Click Generate Backup. To download a copy of the backup file to your computer, click the filename under Backups Available for Download.
If FTP or SCP was used, an email will be sent to the email address that you specified at the beginning of the process.
The date the backup was created appears in the filename which begins with: backup-MM-DD-YYYY The file will be stored as a “tar ball,” or compressed data file, with the filename extension: .tar.gz.
For reseller hosting:
For reseller hosting accounts, there are a few different options. You can follow the guide above for each individual cPanel account or you could utilize a software script called WHMEasybackup. WHMEasybackup runs on your reseller account and has the ability to perform automated backups of each of your resold cPanel accounts & FTP them to a remote location. You can find more information on WHMEasybackup by visiting the link below:
http://whmeasybackup.com/
Should you decide you’d like to integrate this script to automate your backups (WHMEasybackup), you can request assistance from our tech support if you’re unsure of how to do so. We do offer various tech time options & fair labor rates to perform various tasks.
For VPS hosting:
Backing up your VPS can be done in many ways – if you have a managed VPS, we already include R1Soft daily backups. Alternatively, if you are utilizing cPanel/WHM, you can use the above methods to back up your VPS & websites.