In this tutorial, we will go over a few simple steps to configure the MX records to use Google Workspace. Please note, that you must have an active Google Workspace subscription for your mail to function properly.
Note (Updated 2023):
Google Workspace has released new recommended MX records as of 2023 to improve email routing, security, and performance. If you’re setting up or updating your MX records, we recommend following the new configuration provided by Google. The legacy MX records are still supported but may be phased out in the future.
Google MX Records
Current version (2023 & later):
| Name/Host/Alias* | Priority | Value/Answer/Destination |
|---|---|---|
| Blank or @ | 1 | SMTP.GOOGLE.COM |
| Name/Host/Alias | Time to Live (TTL*) | Record Type | Priority | Value/Answer/Destination |
| @ or leave blank | 3600 | MX | 1 | ASPMX.L.GOOGLE.COM. |
| @ or leave blank | 3600 | MX | 5 | ALT1.ASPMX.L.GOOGLE.COM. |
| @ or leave blank | 3600 | MX | 5 | ALT2.ASPMX.L.GOOGLE.COM. |
| @ or leave blank | 3600 | MX | 10 | ALT3.ASPMX.L.GOOGLE.COM. |
| @ or leave blank | 3600 | MX | 10 | ALT4.ASPMX.L.GOOGLE.COM. |
Quick Steps
- Login to cPanel and click the Zone Editor icon.
- Click Manage near the required domain and filter MX records in the zone records.
- Make a note of your Google MX records.
- Click “Add MX record” from the drop-down, enter the Google MX records, and click Save.
- Click the Email Routing icon in the cPanel
- Select “Remote Mail Exchanger” and click Change.

How to Configure Google MX Records in a cPanel
The first step would be to log into your cPanel hosting account and locate the “Zone Editor” icon under the Domains section as below.
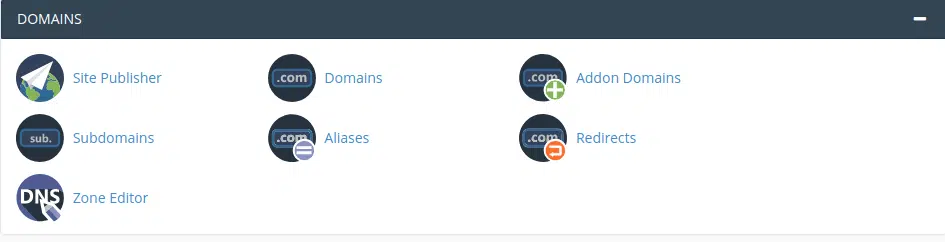
cPanel domains panel
Once you have clicked on the Zone Editor icon, you will be taken to the DNS configuration page as below. It will list all the domains added in the cPanel. Click on the “Manage” button near the domain you want to add the Google MX records. For this tutorial, we will use our veerotechdemo.com domain for reference.
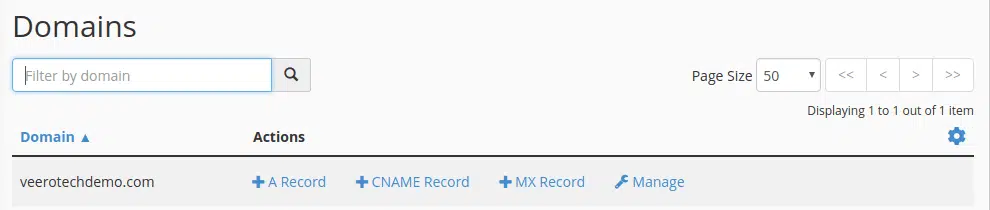
cpanel zone editor
On the next screen, you will see all the DNS records associated with the domain.
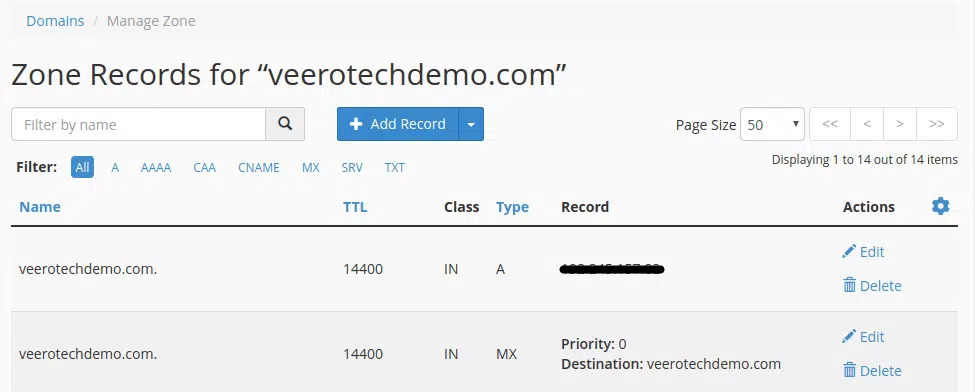
cPanel zone editor add record
cPanel has added a filter option to see only the specific records needed. Click “MX” in the filter section to see the current MX records. By default, there will be a default MX record.
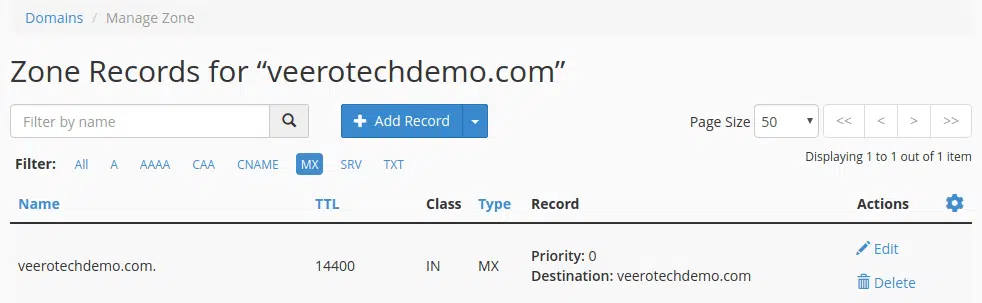
cPanel zone editor records list
Now we can add MX records provided by Google. The records can be found in the email you received or here: Google Workspace
We’ve also provided them below:
Current version (2023 & later):
Priority: 1
Destination: SMTP.GOOGLE.COM
Legacy version (before 2023):
Priority: 1
Destination: ASPMX.L.GOOGLE.COM

Priority: 5
Destination: ALT1.ASPMX.L.GOOGLE.COM

Priority: 5
Destination: ALT2.ASPMX.L.GOOGLE.COM

Priority: 10
Destination: ALT3.ASPMX.L.GOOGLE.COM

Priority: 10
Destination: ALT4.ASPMX.L.GOOGLE.COM
Choose “Add MX record” from the “Add Record” blue drop-down button just above the filter section to add new MX records.
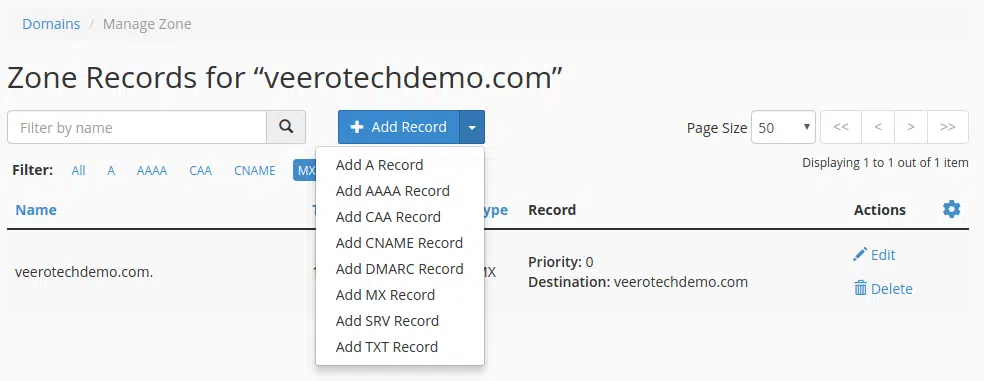
cpanel zone editor add mx record
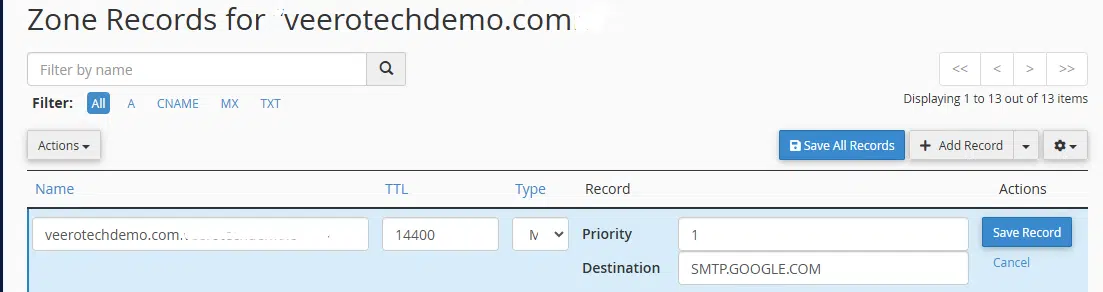
Enter the priority and destination into the corresponding boxes as shown below & click the blue “Add New Record” button.
cPanel zone editor mx record added
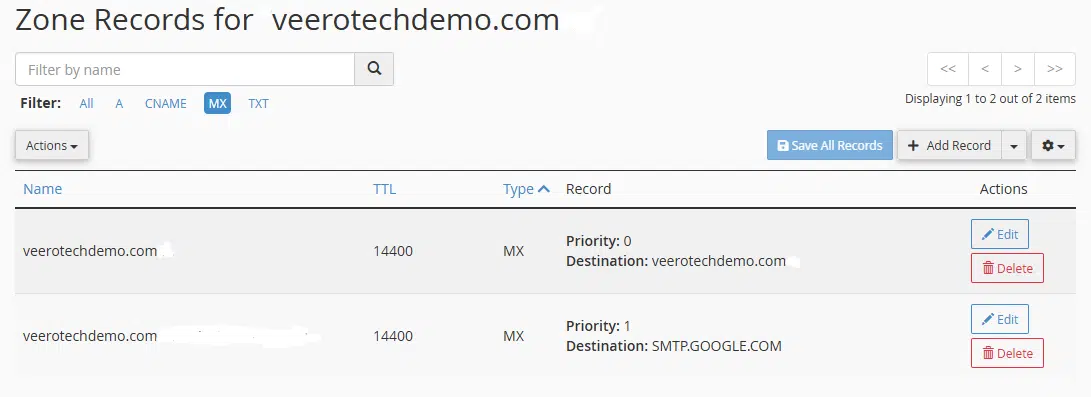
After clicking the “Add New Record” button, you’ll then see the record added successfully.
cPanel zone editor mx record list
The next step would be to remove the default record. As shown above, the default record in this tutorial would be for Priority 0 and Destination veerotechdemo.com – you would want to click “Remove” for your default record, located on the far right side. Click the blue “Delete” button to remove it.
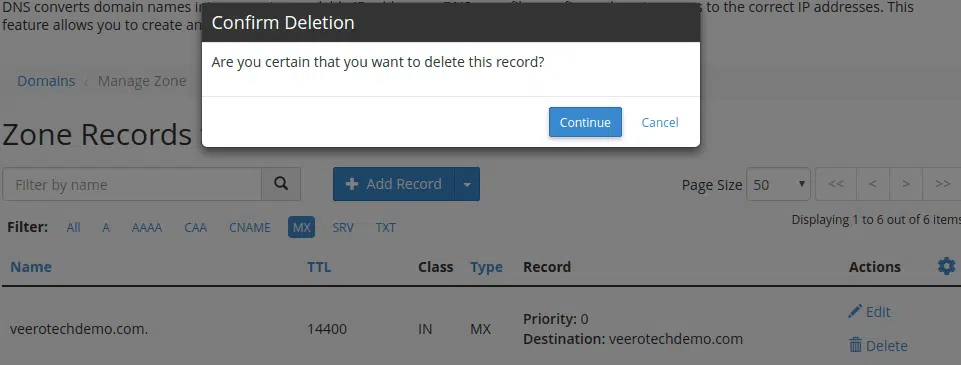
cPanel zone editor removes default mx record
The very last step is to ensure that the Mail Exchanger is set to “Remote”. Go back to the cPanel main page and search for the “Email Routing” Icon which is under the “Email” pane.
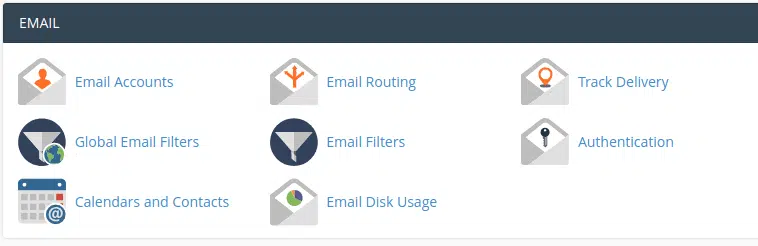
cPanel email panel
While the option selected is “Automatically Detect Configuration”, we recommend that you click “Remote Mail Exchanger” and then click Change.
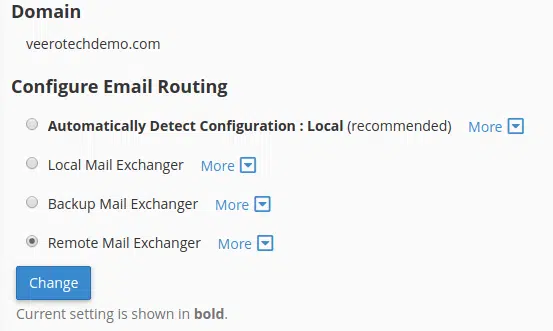
cPanel remote mail exchanger
That’s it! You’ve now configured your cPanel hosting account to route emails to your G Suite (Google Apps) account. We recommend allowing up to 48 hours for the DNS changes to fully propagate. You can also test by sending mail to your domain which should then go to your G Suite.
Note: You must have an active, valid email address for your Google Suite (Google Apps) account that is accepting mail.