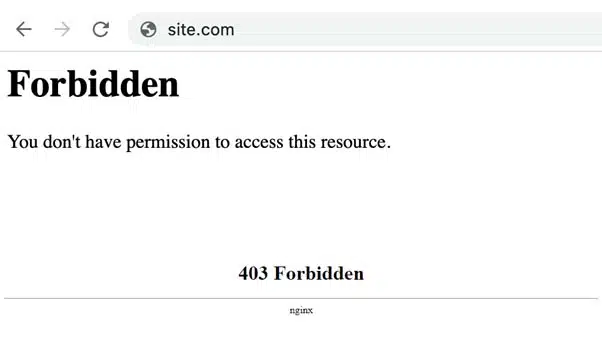
A “403 Forbidden Error” can lock you and your visitors out of your website, displaying a frustrating message like “You don’t have permission to access this resource.” This server-side error, common across shared, VPS, or reseller hosting, often results from incorrect permissions, misconfigured .htaccess files, or security restrictions. Whether you’re running a WordPress site, Joomla, or a custom app, this issue is fixable for any skill level webmaster – beginner, intermediate or advance. Our comprehensive guide provides step-by-step solutions using your hosting control panel, terminal, or security tools, ensuring you regain access quickly. Let’s fix that 403 error now!
What Causes a 403 Forbidden Error?
A 403 error occurs when the server denies access to a resource due to permission or configuration issues. Common causes include:
- Incorrect File/Folder Permissions: Files set to restrictive permissions (e.g., 600 instead of 644) or directories to 777 instead of 755, blocking server access.
- Misconfigured .htaccess Rules: Rules in .htaccess restricting access (e.g.,
Deny from allor IP-based restrictions). - Security Plugin Restrictions: CMS plugins (e.g., Wordfence, iThemes Security) blocking IPs or user roles.
- Hotlink Protection: Enabled hotlink protection preventing access to images or files from external sites.
- Mod_Security Rules: Server-side mod_security blocking legitimate requests (e.g., flagged as suspicious POST data).
- IP Blacklisting: Your IP or visitor IPs blocked by the server’s firewall or .htaccess rules.
- Directory Indexing Disabled: No index file (e.g.,
index.php) in a directory with indexing disabled, triggering 403. - Server Misconfiguration: Incorrect server settings (e.g., Apache’s
Options -Indexesor Nginx’sdeny all).
Step-by-Step Fix
Follow these detailed steps to resolve all causes of the 403 error, starting with common issues and progressing to advanced troubleshooting:
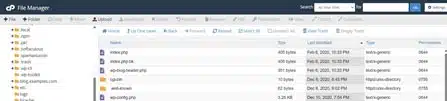
1. Check File and Folder Permissions
- Log into your hosting control panel (e.g., cPanel, DirectAdmin) and open File Manager.
- Navigate to your site’s root directory, typically
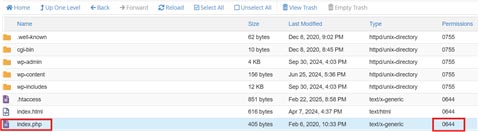
public_htmlfor primary domains or a subdirectory for add-ons. - Right-click key files (e.g.,
index.php,.htaccess) and select Change Permissions. - Set file permissions to 644 (read/write for owner, read for others) and directory permissions to 755 (read/write/execute for owner, read/execute for others).
Example: For
public_html, ensure permissions are 755; forwp-config.php, ensure 644. - Alternatively, via SSH: Run
chmod 644 index.phpfor files andchmod 755 public_htmlfor directories. - Check error logs for permission errors (e.g., “Permission denied: /public_html/index.php”).
- Correct permissions often resolve 403 errors.
What’s Next
If the issue persists, check .htaccess rules.
2. Review and Fix .htaccess Rules
- In File Manager, locate the
.htaccessfile inpublic_html, right-click, and rename it to “.htaccess_old.” - Refresh your site—if it loads,
.htaccesswas the issue. - Download
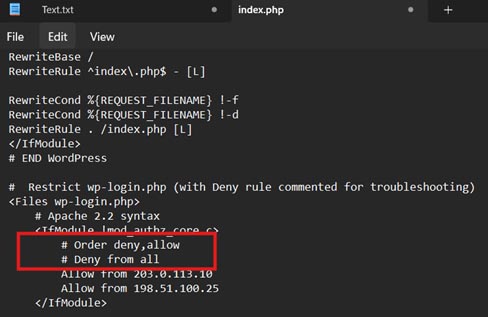
.htaccess_oldand open in a text editor (e.g., Notepad++). - Look for restrictive rules, e.g.:
Deny from all(blocks all access).Require ip 192.168.1.1(restricts to specific IPs).
- Remove or comment out problematic rules with
#(e.g.,#Deny from all). - Paste the file into a Generative AI tool like Grok or ChatGPT to check for errors (e.g., “Invalid Deny directive”).
- Save as
.htaccess, reupload, and set permissions to 644. - Alternatively, via FTP: Use FileZilla to edit
.htaccess.
If .htaccess isn’t the cause, investigate plugins or server security settings.
3. Disable Security Plugins
- For WordPress: In File Manager, navigate to
wp-content/plugins. - Right-click security plugin folders (e.g., “wordfence”) and rename them (e.g., “
wordfence_old“) to deactivate.Note: Renaming plugin folders may temporarily break plugin configuration or logging. Reactivate them carefully after troubleshooting.
- Refresh your site—if it loads, the plugin was blocking access.
- Alternatively, via WP-CLI: Run
wp plugin deactivate <pluginname>(e.g.,wp plugin deactivate wordfence) to disable specific plugins. - Check plugin settings in wp-admin (after access is restored) for IP blocks or role restrictions.
- For non-CMS sites, check control panel > Security for IP blacklists or restrictions.
If plugins aren’t the issue, check hotlink protection, mod_security, or server settings.
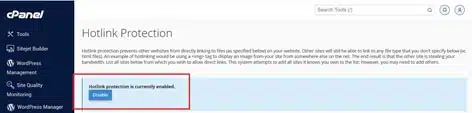
4. Address Hotlink Protection and Mod_Security
- In your control panel, check for hotlink protection settings (e.g., cPanel > Security > Hotlink Protection).
- Disable hotlink protection temporarily and test your site.
- For mod_security: Check error logs for messages like “mod_security: Access denied with code 403.”
- Contact your hosting provider to whitelist specific mod_security rules or disable conflicting settings.
- Alternatively, via
.htaccess: AddSecFilterEngine Off(if permitted) and test, but consult your provider first.
5. Fix Directory Indexing and Server Issues
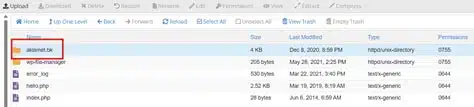
- Ensure an index file (e.g.,
index.php,index.html) exists inpublic_htmlor affected directories. - In
.htaccess, ensureOptions +Indexesis not overridden byOptions -Indexes. - Contact your hosting provider to check server configurations (e.g., Apache’s
Deny allor Nginx’sdeny all). - Check for IP blacklisting in control panel > Security or
.htaccess(e.g.,Deny from 192.168.1.1).
6. Verify and Finalize
- Reload your site to confirm the error is resolved.
- If the error persists, recheck error logs or scan for malware using a security plugin (e.g., Sucuri).
- Contact your hosting provider’s support team for server-side issues (e.g., firewall blocks).
Preventing Future 403 Errors
- Set Correct Permissions: Regularly verify file (644) and directory (755) permissions.
- Review .htaccess: Test rules with htaccesscheck.com or Generative AI tools like Grok.
- Configure Security Plugins: Adjust settings to avoid blocking legitimate users.
- Run WordPress on Autopilot: VeeroTech’s managed hosting includes fully managed, pre-optimized, and pre-configured servers to support WordPress out of the box and deliver top performance, thanks to your premium AMD EPYC hardware. Coupled with proactive monitoring and 24/7/365 human support, there is next to no chance you encounter such errors from the server side. Start today or migrate for a FREE WordPress Performance Evaluation and FREE Migration Service!
Conclusion
Fixing a 403 Forbidden Error is easy with this guide. By correcting permissions, .htaccess rules, plugin settings, and server settings, you’ll restore site access.
Related Posts
FAQs
A server error denying access to a resource due to permissions or configuration issues.
Plugins like Wordfence can block IPs or roles if misconfigured.
Yes, files should be 644 and directories 755 to allow server access.
Error logs may show “mod_security: Access denied”; contact your provider.
Check .htaccess or control panel security settings and remove the block.
If you have any web hosting questions please feel free to reach out to us. We're happy to help.
Our Guiding Principles