In this guide we’ll go over how to perform a manual backup of your WordPress site by using the cPanel file manager & phpMyAdmin.
Step 1: Backing up the WordPress files
First, you’ll want to make a copy of your WordPress files by using the cPanel file manager.
Once you’ve opened the file manager, you will need to double click on the “public_html” directory in order to access the public location of your hosting account.
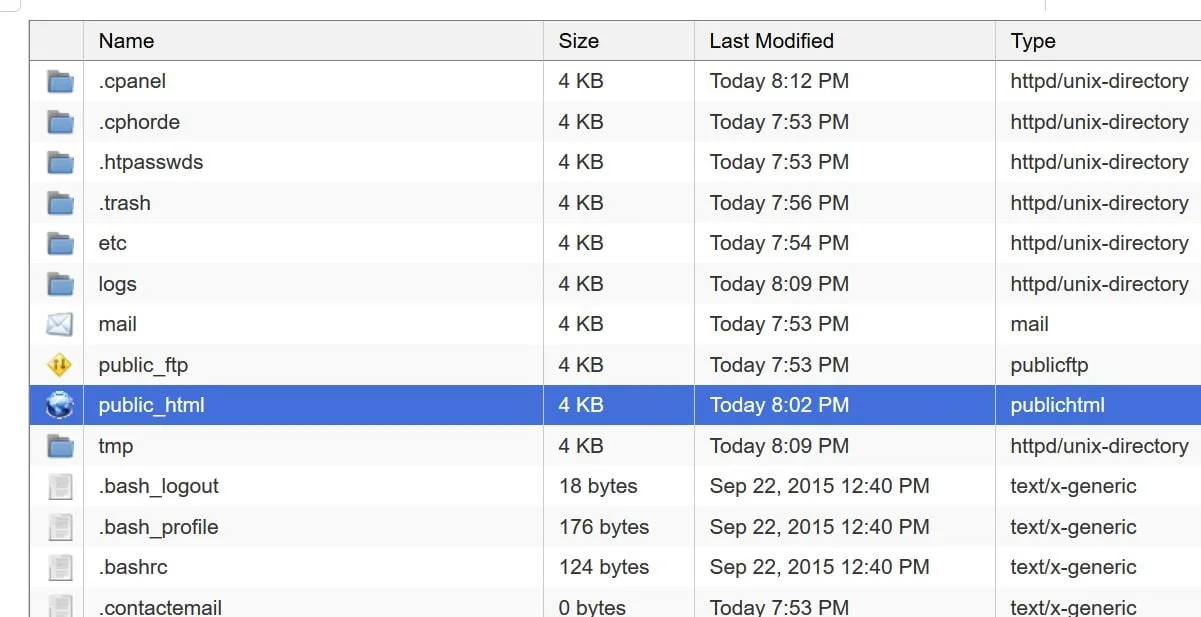
After you’ve entered the “public_html” directory, you should now see various files & folders named similar to the ones shown below highlighted in “blue”.
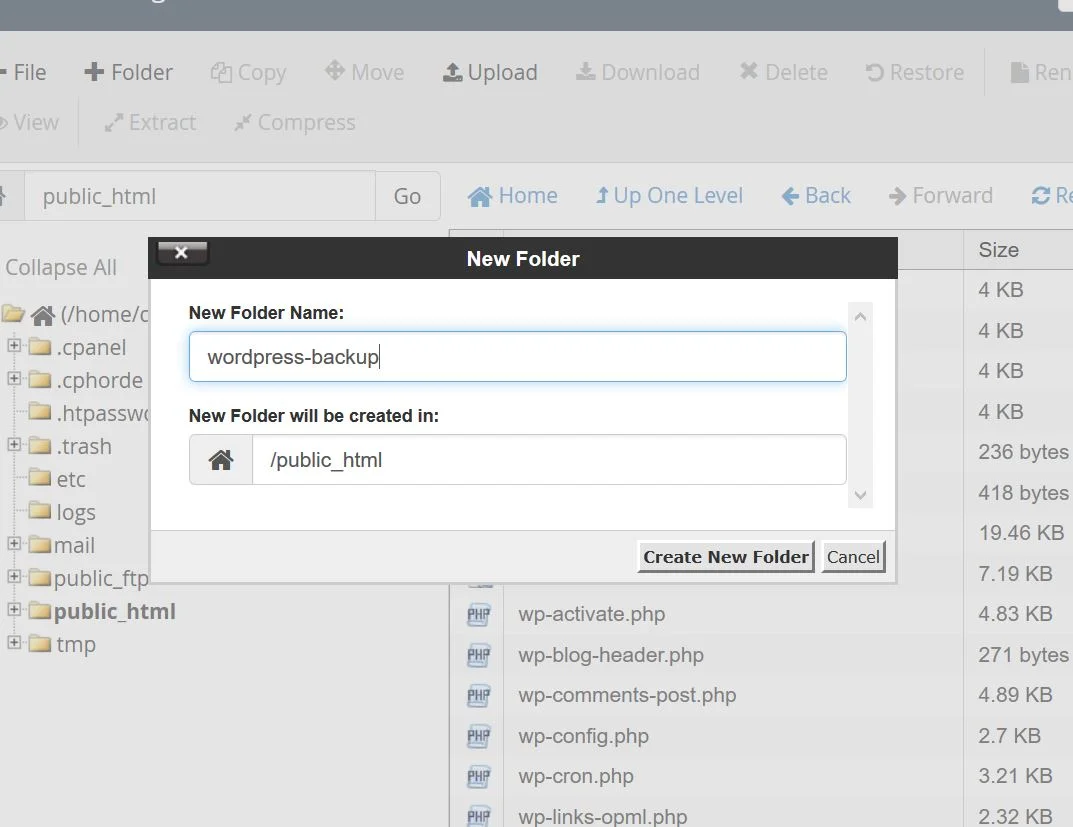
Next, we’ll create a directory called “wordpress-backup” to copy our WordPress files into. Please note, if you are using FTP to download your files, this step is not necessary.
First, click on the “+Folder” at the top left of the file manager. You’ll then be prompted to to create a folder. In this demo, we’ll use “wordpress-backup” as the directory we’ll copy our files to.
If you use a different folder name, please update the folder name to the name you have chosen. Once done, click “Create New Folder”. Be sure to retain the name of the folder you created.
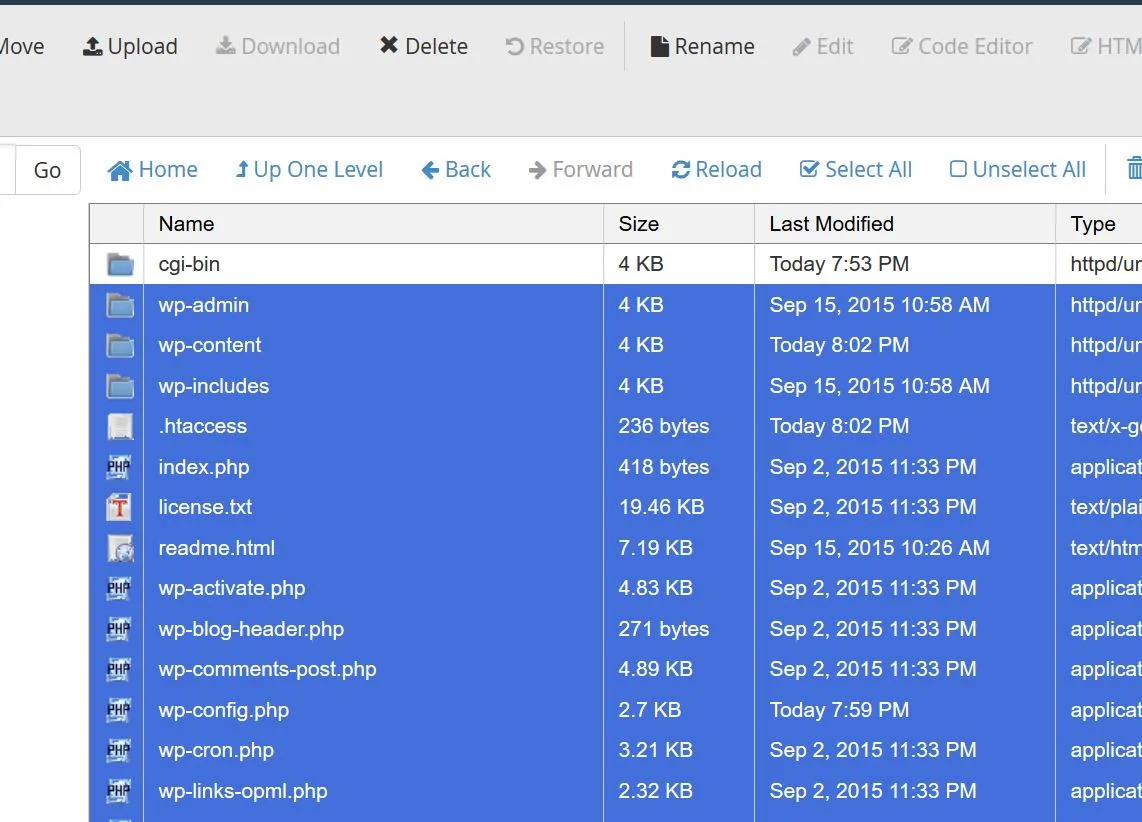
Next, we’ll highlight all of the WordPress related files and copy them into our newly created directory. Highlight the files as shown below, then “right click” & select “copy”.
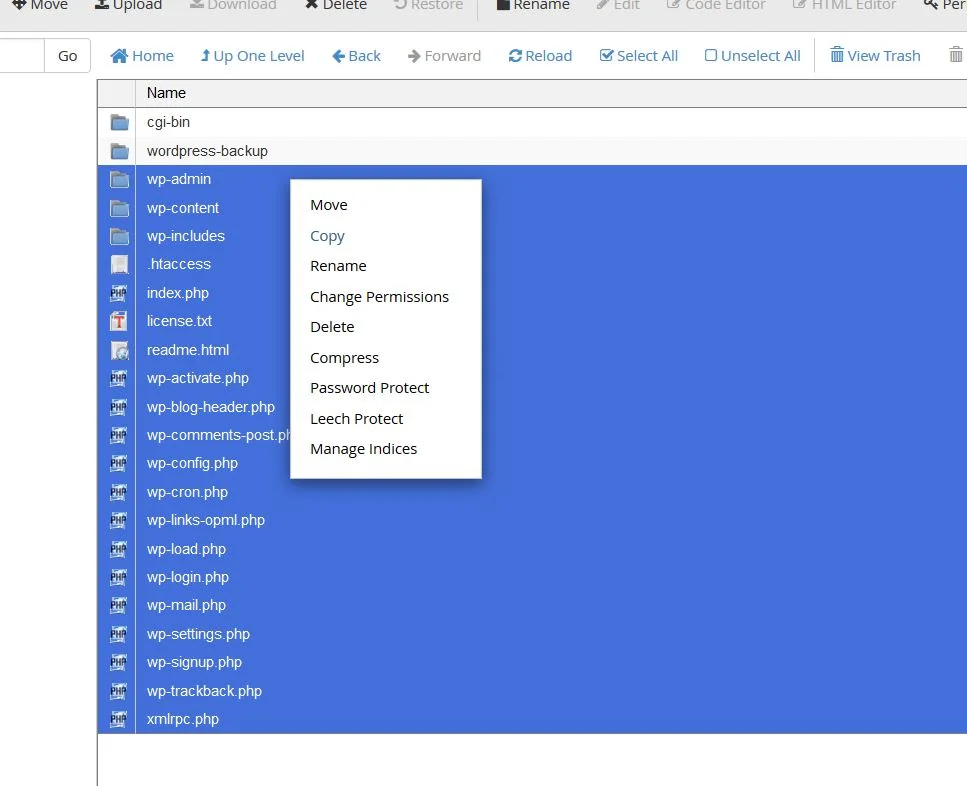
Next, you’ll click “copy” & then enter the name of the directory you have chosen & click “Copy Files”. Now, the files you’ve selected will be copied into the directory titled “wordpress-backup” (or your chosen directory if the name is different).
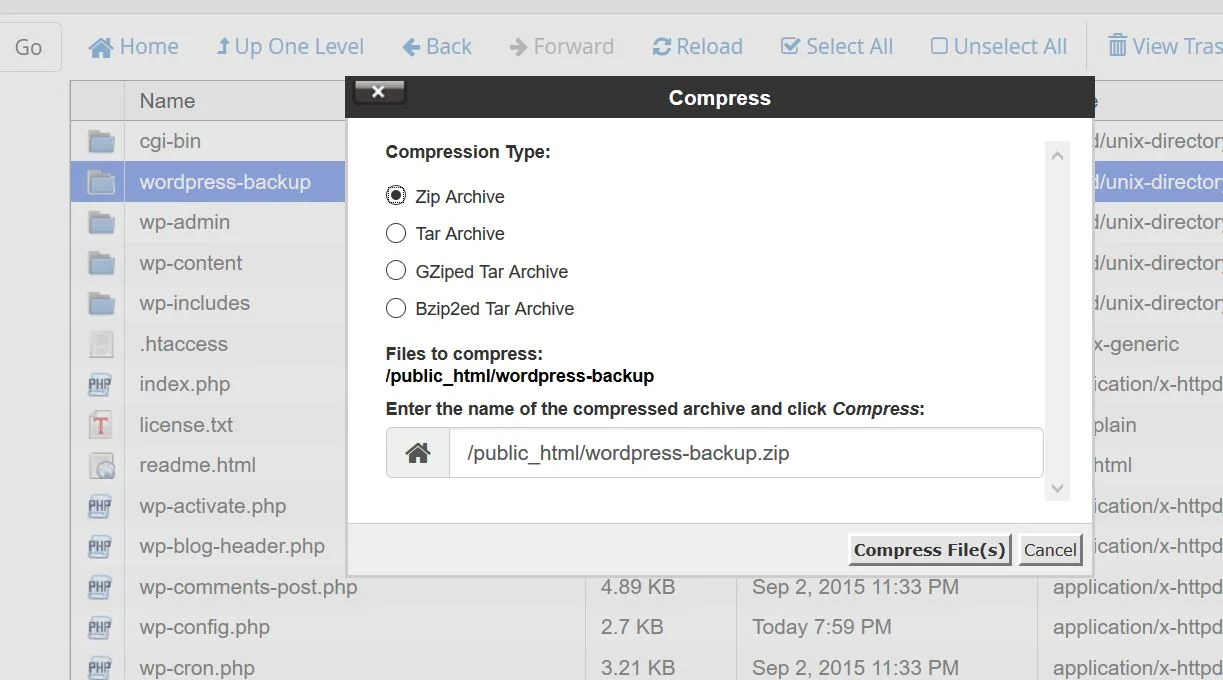
The next step will be to make a “ZIP” of your backup directory. To do this, simply click on the directory to highlight it “blue”, then right click & choose “compress”. From here, you’ll want to choose the type or archive. We recommend choosing “ZIP”. Once you’ve chosen the type, click “Compress Files”.
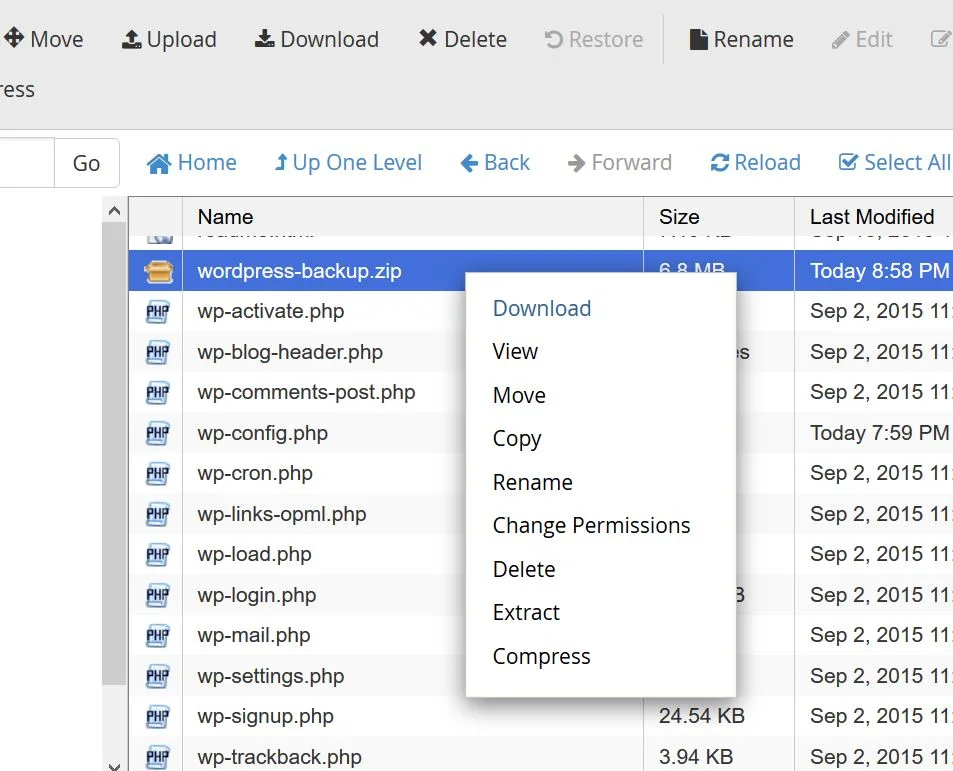
Now, you should see a compressed (zipped) file located in the public_html directory, shown below. You can simply right click on the newly created zip file & click download. You should download this to a safe place on your computer or where you store your local backups.
Step 2: Backing up the WordPress database
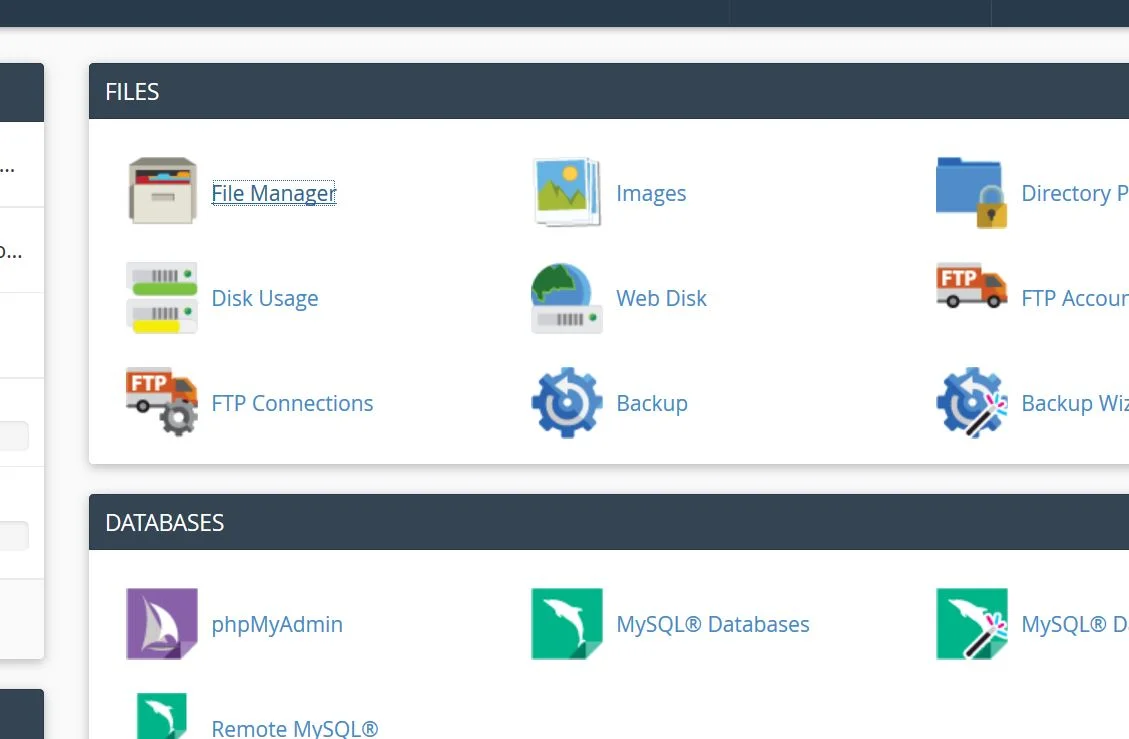
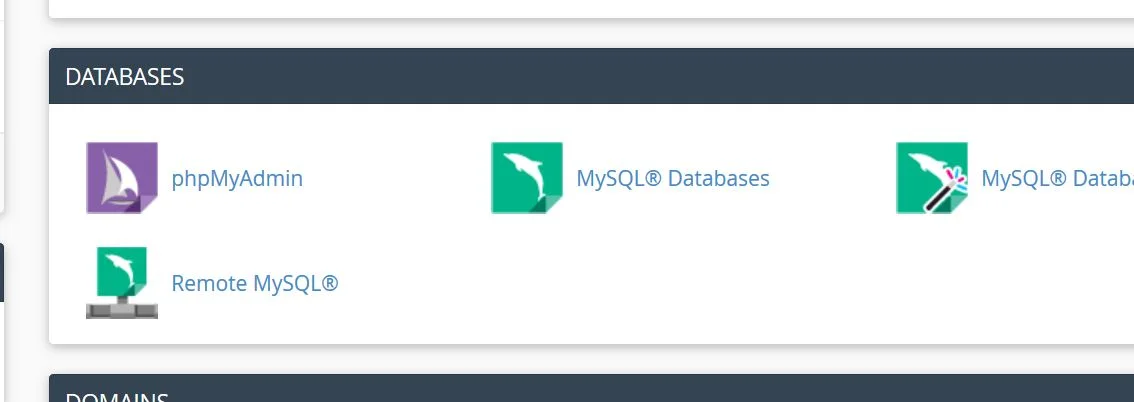
First, you’ll want to locate & click the “phpMyAdmin” icon in cPanel, as shown below:
Once you click the “phpMyAdmin” icon, you’ll then be taken into the phpMyAdmin database management portal. From here, you’ll want to click once on your database located on the left. In this demo, our database will be the “demoveer_demowp” database.

The next step will be to click “Export” from the top menu. Choose “Quick”, ensure the options are selected as shown below & then click “Go”.

After clicking “Go”, you’ll be prompted to save the mySQL database “.SQL” file. This file contains the WordPress database & your posts, content etc. You’ll want to store this file with the ZIP file you created earlier on in this tutorial.
Once you have downloaded both the compressed file containing the WordPress files from step 1 & the database .SQL file in step 2, your backup has now been completed.
If you have any web hosting questions please feel free to reach out to us. We're happy to help.
Our Guiding Principles