Email filters are indispensable tools for efficient inbox management. They enable you to sort and organize incoming emails based on specific criteria automatically. If you utilize cPanel as your hosting control panel, this step-by-step guide will empower you with the knowledge to create email filters effortlessly. By implementing these filters, you can take charge of your inbox and enhance your email management, ultimately boosting productivity.
Quick Steps
- Login to cPanel
- Locate the Email Filters Section
- Select the Relevant Email Account
- Add a New Filter
- Configure the Filter Rules
- Define the Filter Criteria
- Select the Filter Actions
- Save the Filter Settings
Follow the step-by-step instructions below to create email filters in your cPanel interface.
Upon logging in to cPanel, scroll down to the Email section. Look for the Email Filters icon, which is situated within this section. Click on the icon to proceed with the email filter setup.
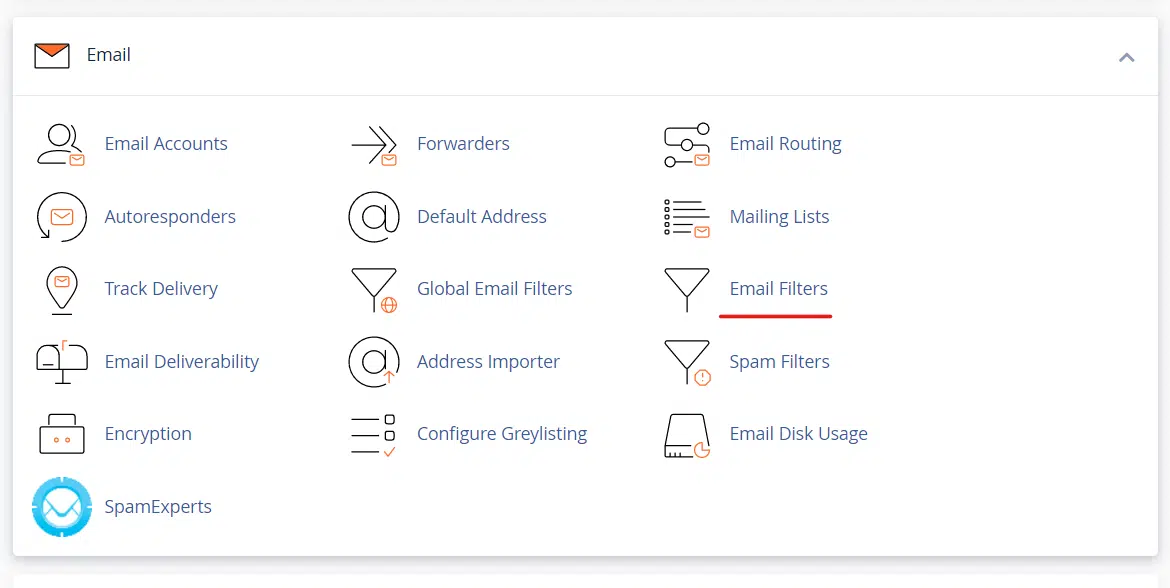
email filters cPanel
In the Email Filters interface, you will find a comprehensive list of your email accounts. Choose the specific email account you wish to create the filter by clicking on the “Manage Filters” button adjacent to it.
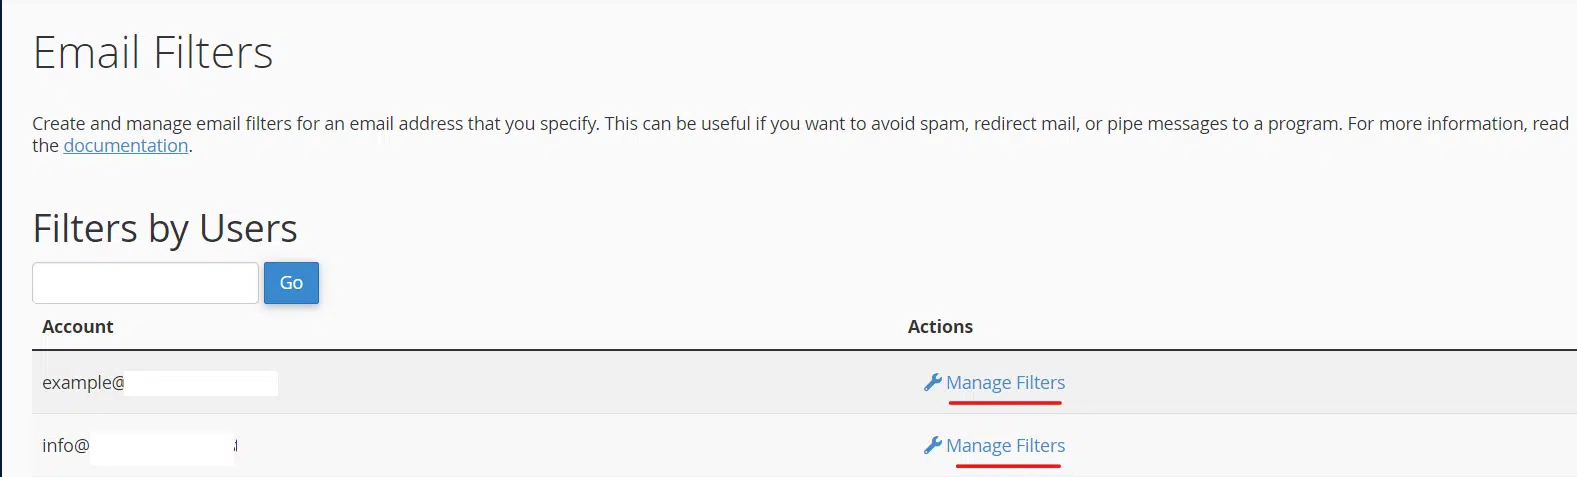
email filters cPanel
Once you access the filter management page of the chosen email account, locate the “Create a New Filter” button and click on it. This button will initiate the creation process for your new email filter.
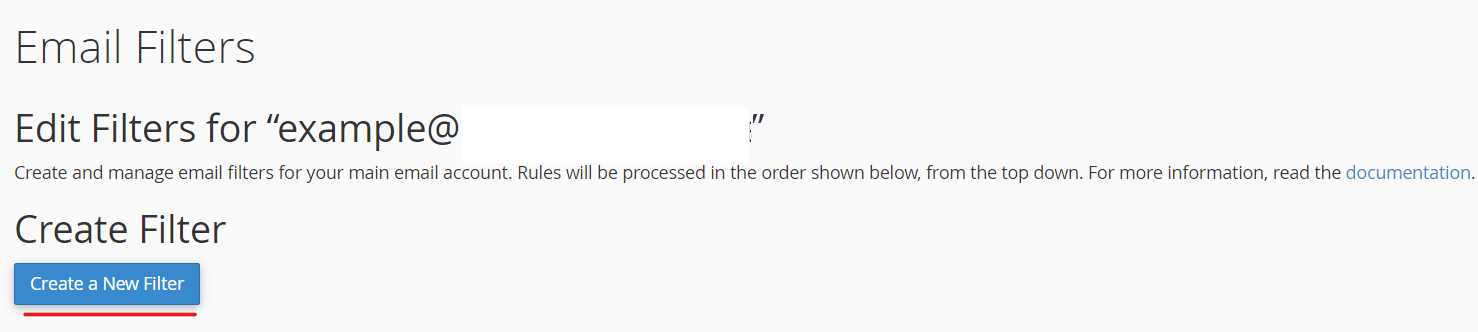
email filters cPanel
A form will appear, allowing you to define the filter rules. Begin by providing a descriptive name for your filter in the “Filter Name” field, enabling easy identification in the future. Within the “Rules” section, you can specify the conditions that incoming emails must satisfy for the filter to activate. For instance, you may choose to filter emails based on the sender’s address, subject, or specific keywords present in the email body.
Having established the filter criteria, determine the desired actions the filter should take on the matched emails. In the “Actions” section, select options such as “Discard” to delete the email, “Redirect to Email” for forwarding, or “Pipe to a Program” for custom processing.
After configuring the filter rules and actions, click on the “Create” button to preserve the filter settings. At this point, the filter will become active for the selected email account, processing incoming emails accordingly.
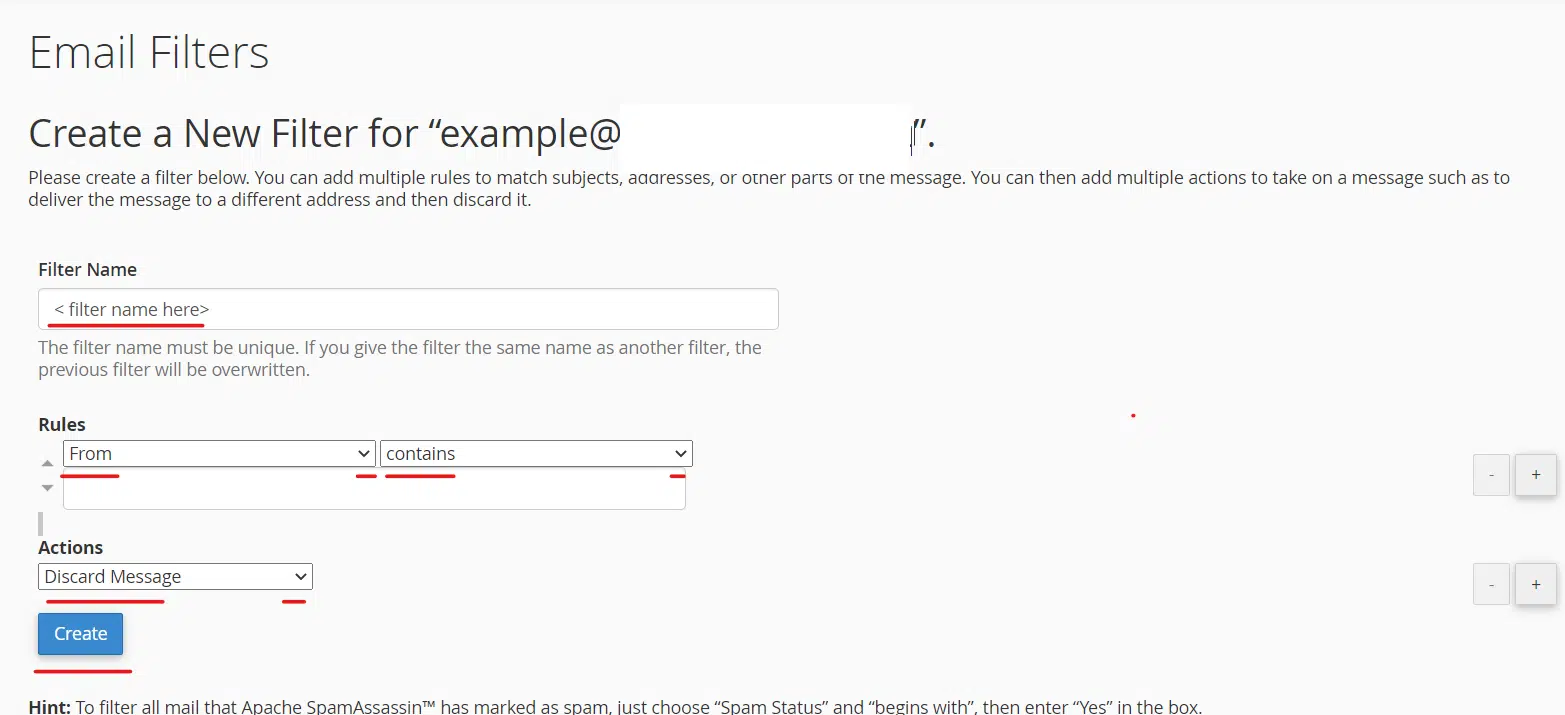
email filters cPanel
Conclusion
Congratulations, you have successfully learned how to create an email filter. Creating email filters in cPanel empowers you to manage your inbox effectively and optimize productivity.
If you have any web hosting questions please feel free to reach out to us. We're happy to help.
Our Guiding Principles