Use the following guide to flush or clear the DNS cache on your computer.
Quick Steps:
- Open a command prompt or terminal window.
- On Windows type ipconfig /flushdns.
- In Linux, see options below depending on your distribution.
- On Mac type dscacheutil -flushcache.
- You can also simply reboot your computer to flush DNS cache instead of running any of the above commands.
It may be necessary to flush or clear your DNS cache on your local computer when making DNS changes, especially when migrating your websites. This is a fairly simply task to complete. In most cases, rebooting your computer will also have a similar effect.
Note: When making DNS changes such as changing nameservers, it may be necessary to clear the DNS cache on your computer. By default, all computers store a cached version of DNS entries to make loading a website faster as opposed to having to look up the DNS record on each load. When you change your nameservers or modify DNS records, this can sometimes cause issues since your computer may not yet reflect the change.
Windows
Open up Command Prompt from your Windows installation. In WIndows 10, simply tap the Search button on the taskbar, type cmd in the search box and choose Command Prompt on the top. In Windows 7 and Windows Vista, enter cmd in the search box at the bottom of the Start Menu and then click Command Prompt when it appears in the results. For XP, go to Start > Run > type cmd in the run box & press Enter.
Once you’ve opened the Command Prompt, type the command below and then press Enter.
ipconfig /flushdns
This will clear the local DNS cache on the computer, refer to the image below.
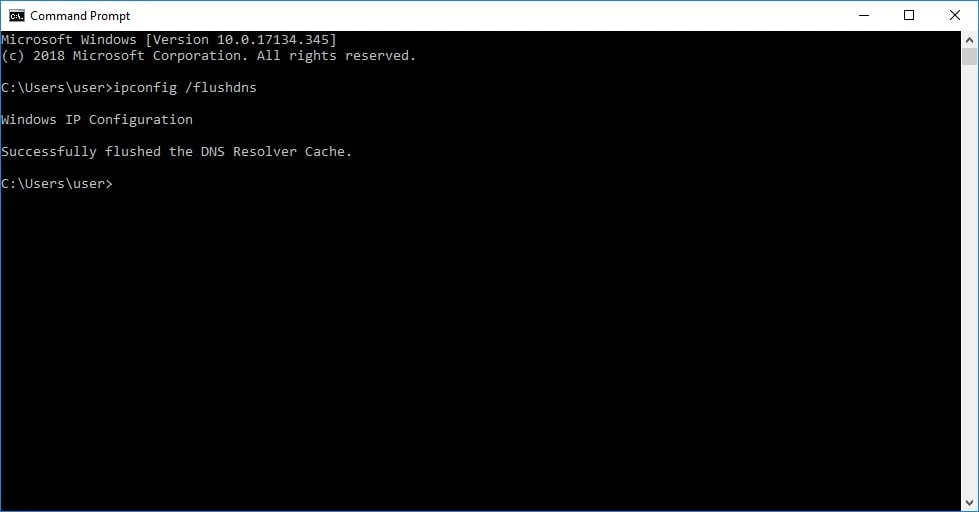
Flushing DNS cache in Windows.
Linux
Open terminal, run one of the corresponding commands below depending on the packages on your system:
Flush NSCD DNS Cache
sudo /etc/init.d/nscd restart

OR
service nscd reload
Flush BIND Server DNS Cache
/etc/init.d/named restart

OR

rndc restart
Flush DNSMASQ DNS Cache
/etc/init.d/dnsmasq restart

OR

service dnsmasq restart
Mac
Mac has different utilities for each of its versions. To clear the DNS cache, launch a terminal (Applications > Utilities > Terminal) and run the commands below based on the version you have.
| MacOS Versions | Commands |
| MacOS 10.10.4 and above | sudo killall -HUP mDNSResponder |
| MacOS 10.10.1, 10.10.2, and 10.10.3 | sudo discoveryutil mdnsflushcache |
| MacOS 10.7, 10.8, and 10.9 | sudo killall -HUP mDNSResponder |
| MacOS 10.5 and 10.6 | sudo dscacheutil -flushcache |
Even after flushing the DNS cache in an operating system level on a computer, the web browsers may also hold internal DNS caches. For this reason, the domains may still resolve to old IP addresses some times. Let us have a look at how to clear those DNS caches on different Web browsers.
Google Chrome
Due to Google Chrome’s internal DNS cache system, the domains may still point to old IPs even after clearing DNS cache on the operating system. You can follow the following steps in order to clear the same from your side.
Open a new tab in your Chrome browser and type the address chrome://net-internals/#dns which should get you to a page something like following.

Click on “Clear host cache”
That’s it.
Firefox Web Browser
In the Firefox web browser the process is almost similar to Google chrome. Here we will need to alter two variables called network.dnsCacheExpiration and network.dnsCacheExpirationGracePeriod. You can follow the following steps to do the same from your browser.
Open a new tab In the Firefox browser and enter the address about:config. This will get you to a page like the following.
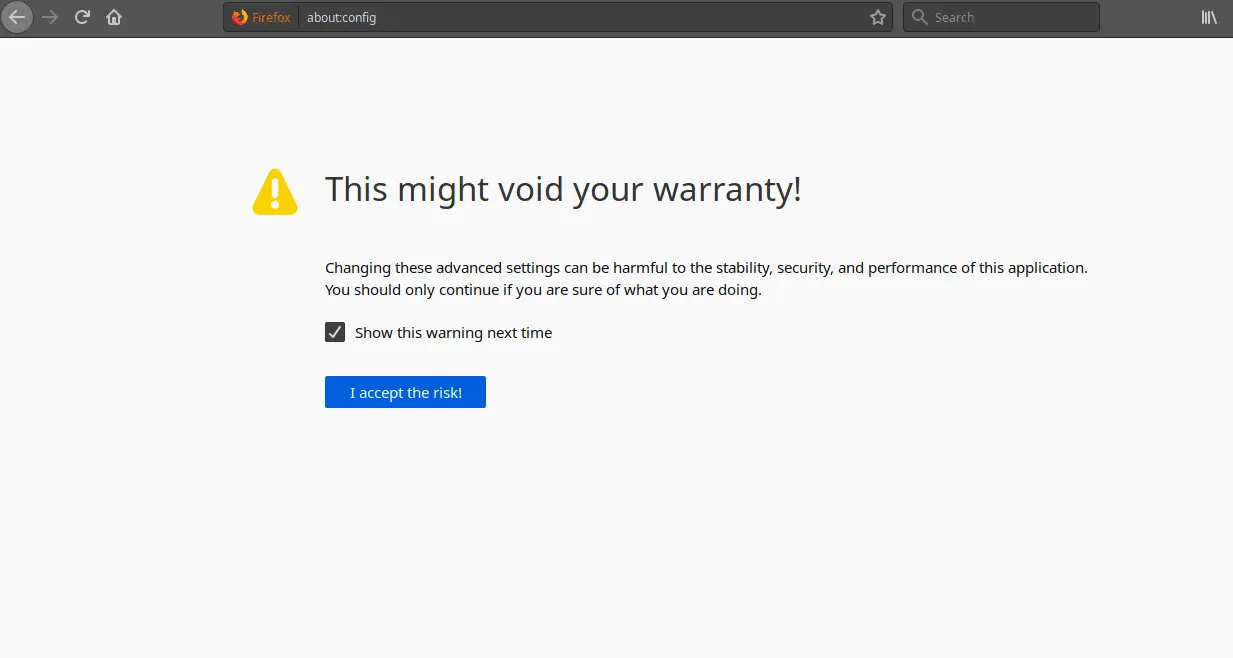
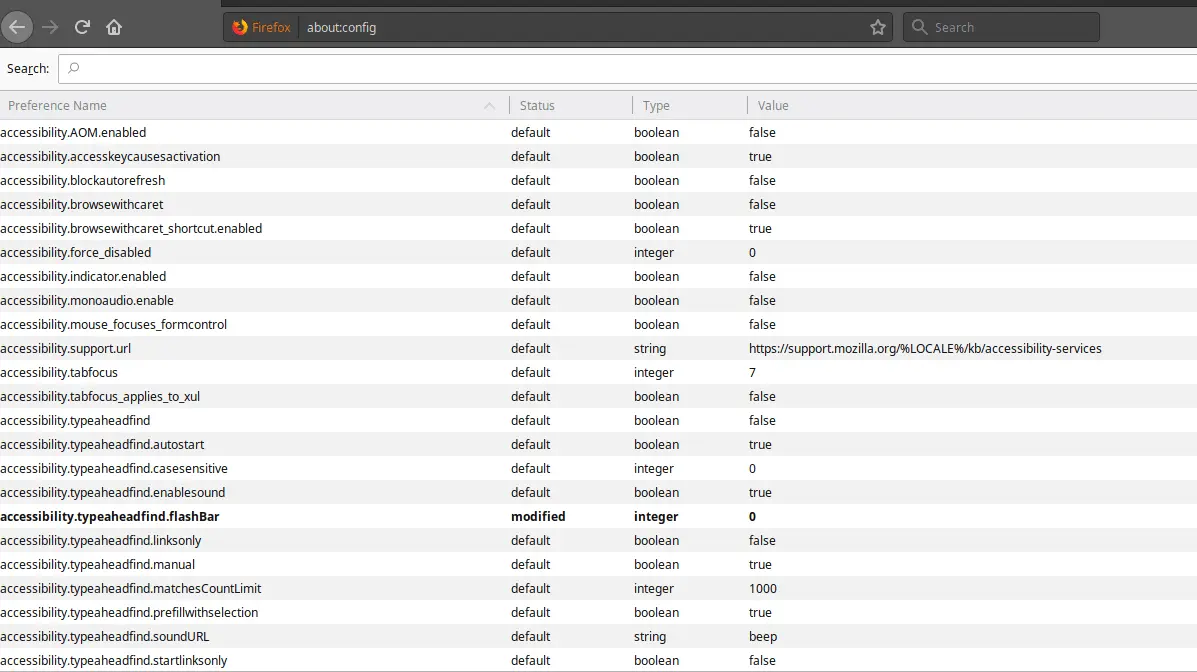
Click on “I accept the risk!” and you will see the list of variables in Firefox as follows.
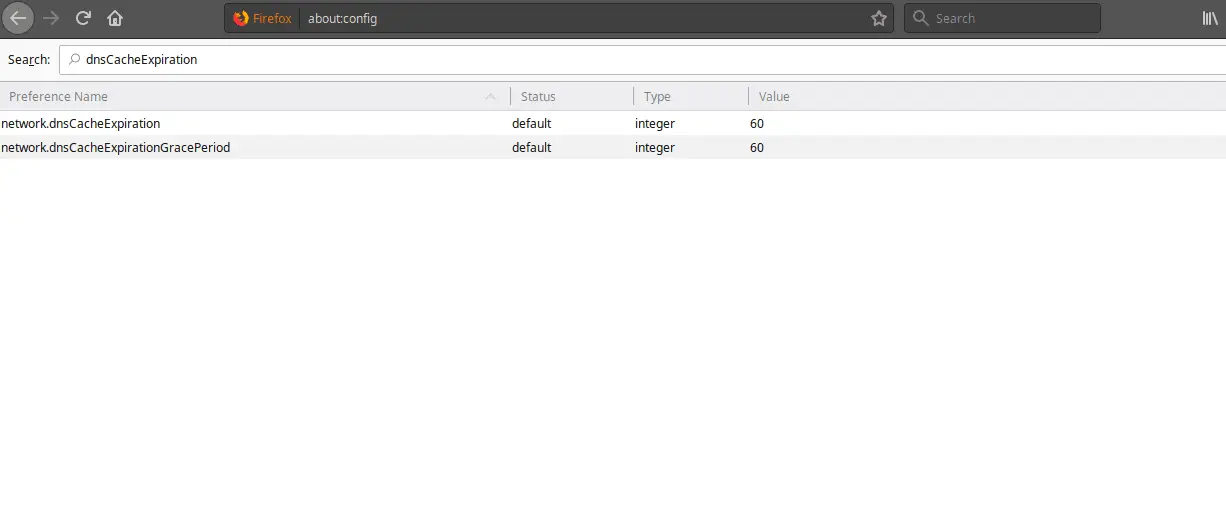
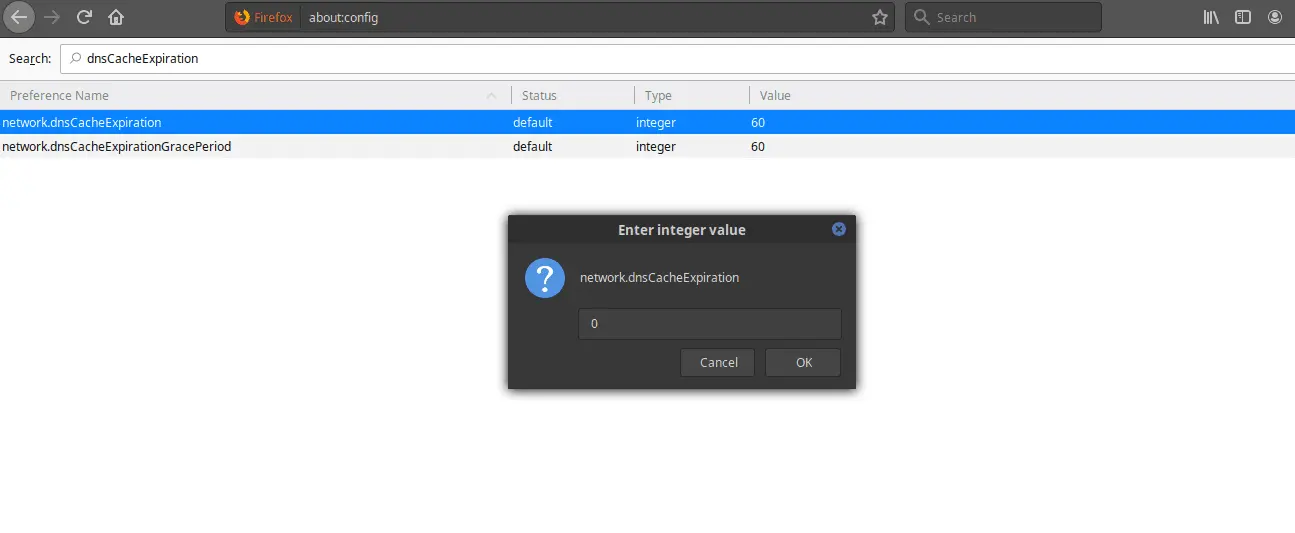
On the search bar on that page, search for “network.dnsCacheExpiration”
It should return with two results namely, network.dnsCacheExpiration and network.dnsCacheExpirationGracePeriod with the values set as 60. We will need to double click on that value and change it to 0.
Now, double-click on the value part where it says 60, and set it to 0.
Once done for both the values, reset those to 60 again.
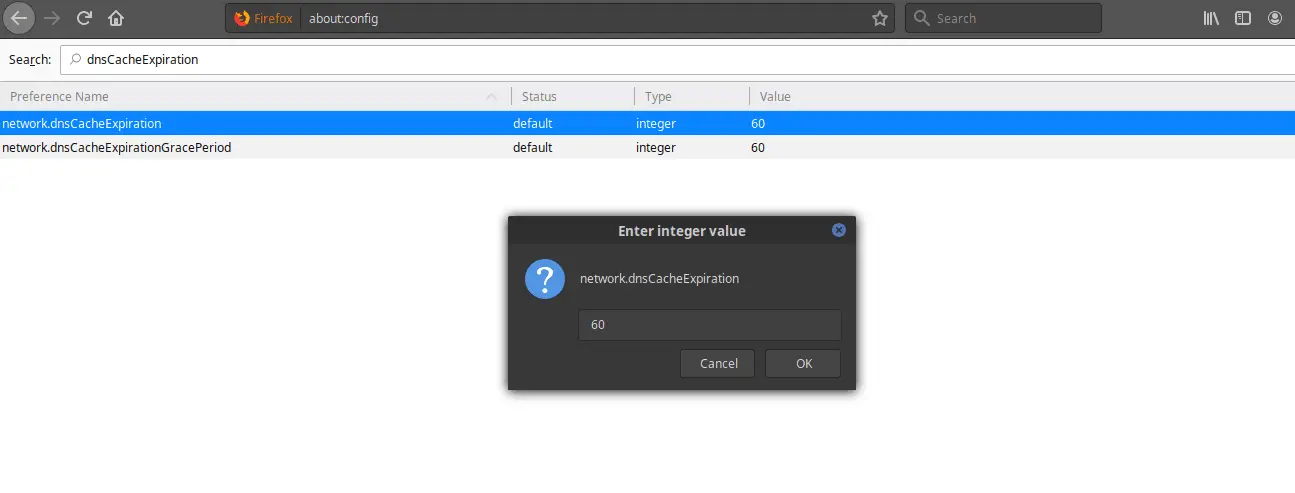
The value we just have changed stores the TTL (Time To Live or expiration time for DNS records). By changing it to 0 makes it immediately clear out the DNS cache. Once done we reset it back to its default value.
Note: If you are unable to find these values in your browser you will have to manually create those values with 60 and follow the above steps and you are good to go.
Conclusion
Great! You’ve successfully purged the DNS cache on your machine. One thing to note is that DNS changes can take up to 48 hours to fully propagate throughout the internet’s DNS servers. You would need to wait a few hours for these changes to take effect.
If you have any web hosting questions please feel free to reach out to us. We're happy to help.
Our Guiding Principles