In this guide, we will walk you through the steps required to change the WordPress language.
When you install WordPress, by default it comes in the English language as we all know. However, this can be changed at any time from your side. WordPress is available in more than 70 languages at the moment. There are basically two methods to get this changed. The first method is to change it directly from the WordPress admin dashboard and the second method is used when the desired language is not available in the WordPress admin language list.
Quick Steps:
Method 1:
- Login to WordPress Dashboard
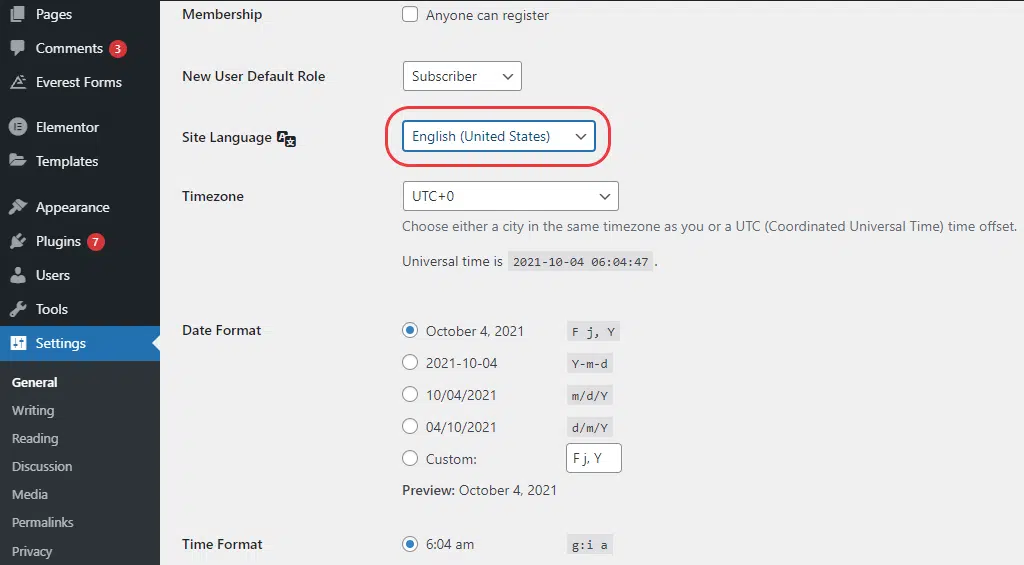
- Go to the Settings → General → Site Language
- Select the language from Drop down menu.
- Save changes
Method 2: - Check the availability of WordPress in your language.
- Find the desired dialect in the repository and download the .mo file.
- Upload the file to either wp-content/languages or wp-include/languages/ directory.
- Update wp-config.php with WP Locale code and hit update.
Updating WordPress Language from Dashboard
This is the most simple and straightforward way to change WordPress language is through the admin panel. Go to the Settings → General → Site Language → Save Changes Drop-down menu.
Updating WordPress Language Manually
You might end up in situations where the language that you prefer doe not present on the Site Language drop-down menu. In such cases, you can install languages manually with the help of the following steps.
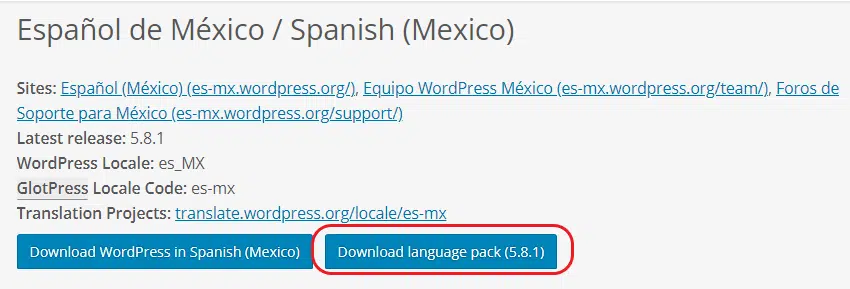
The first step would be checking the availability of WordPress in your language here
If you were able to find the required language pack in the table, click on View Team Page and download the language pack.

Now copy the contents of this ZIP file to either wp-content/languages or wp-include/languages/ directory. Then open the Worpress configuration file wp-config.php and paste the following code.
define ( ‘WPLANG’, ‘es_MX’);
Note: es_MX would change according to the WP Locale of language that you choose from the list. Here “es” stands for Espanol and “MX” tells you which version of Spanish.
After this operation and updating the WordPress dashboard, the new language will be available in Settings → General → Site Language
Conclusion
Congratulations! You have learned how to change the language of your WordPress admin interface.
If you have any web hosting questions please feel free to reach out to us. We're happy to help.
Our Guiding Principles