In this article, we will be discussing steps that need to be followed to restore or recover a website from the JetBackup backups. The JetBackup 5 plugin is available in cPanel and can be used to restore the website files and databases from the available backups.
What is JetBackup?
JetBackup is a tool available in your cPanel which provides a powerful set of backup and recovery solutions. JetBackup is a very simple and straightforward solution that is used to retain copies of your site’s data. It is counted among the leading backup solutions in the web hosting industry.
JetBackup offers both remote and local incremental backups. In simple words, JetBackup is a handy tool that you can make use of whenever you wish to backup your website’s content, such as email, databases, files, etc.
JetApps recently released JetBackup 5 to the EDGE tier. This release summarizes core bug fixes, plugin updates, additional features, and some GUI updates!
The following JetBackup Options will be covered in detail and demonstrated in this tutorial:
- Full Account Backups.
- File Backups.
- Database Backups.
- Email Backups.
Quick steps:
File Restoration using JetBackup 5
- Log in to your cPanel.
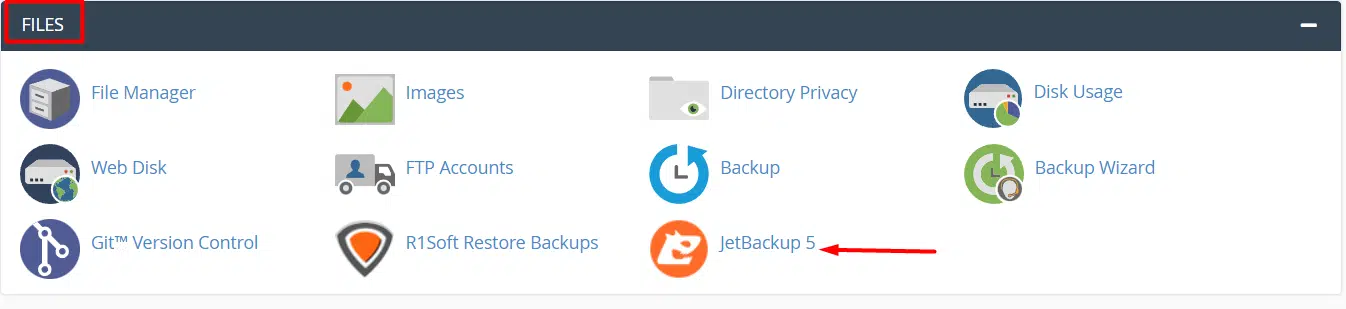
- Navigate to the Files section of your cPanel by scrolling down, then launch JetBackup 5.
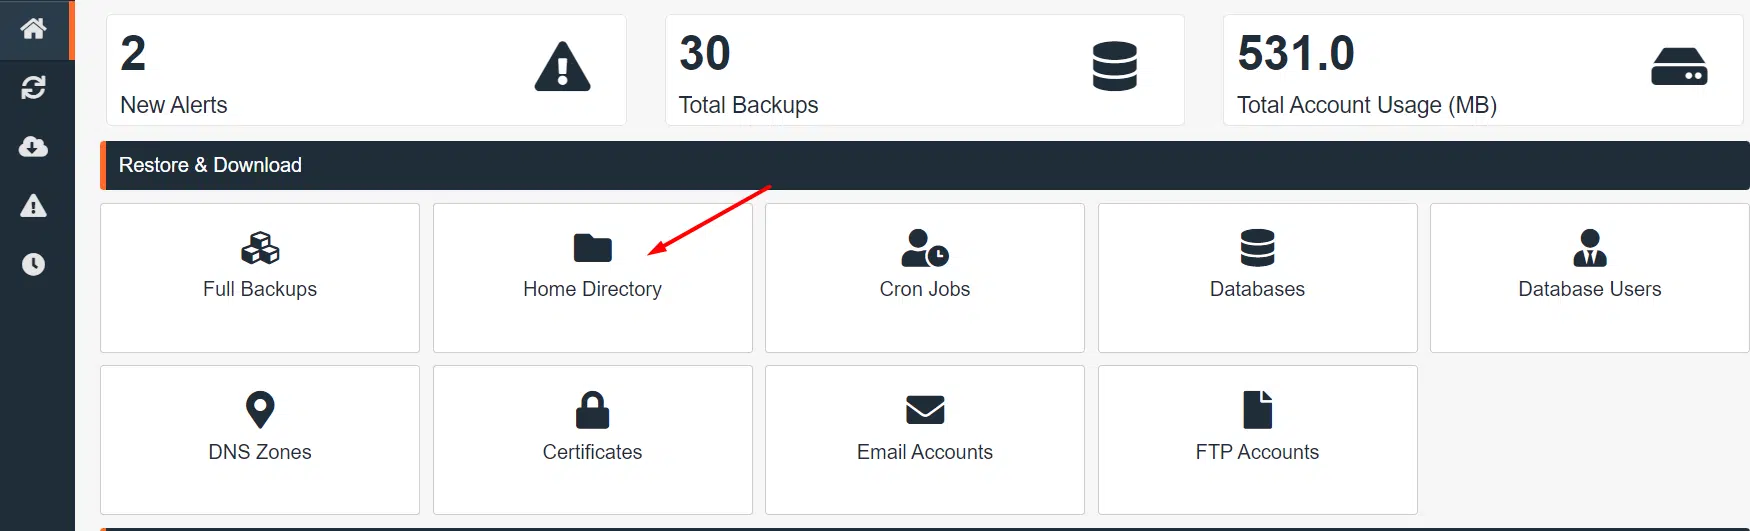
- Click the Home Directory tab in Jetbackup 5 to access the file restoration tool.
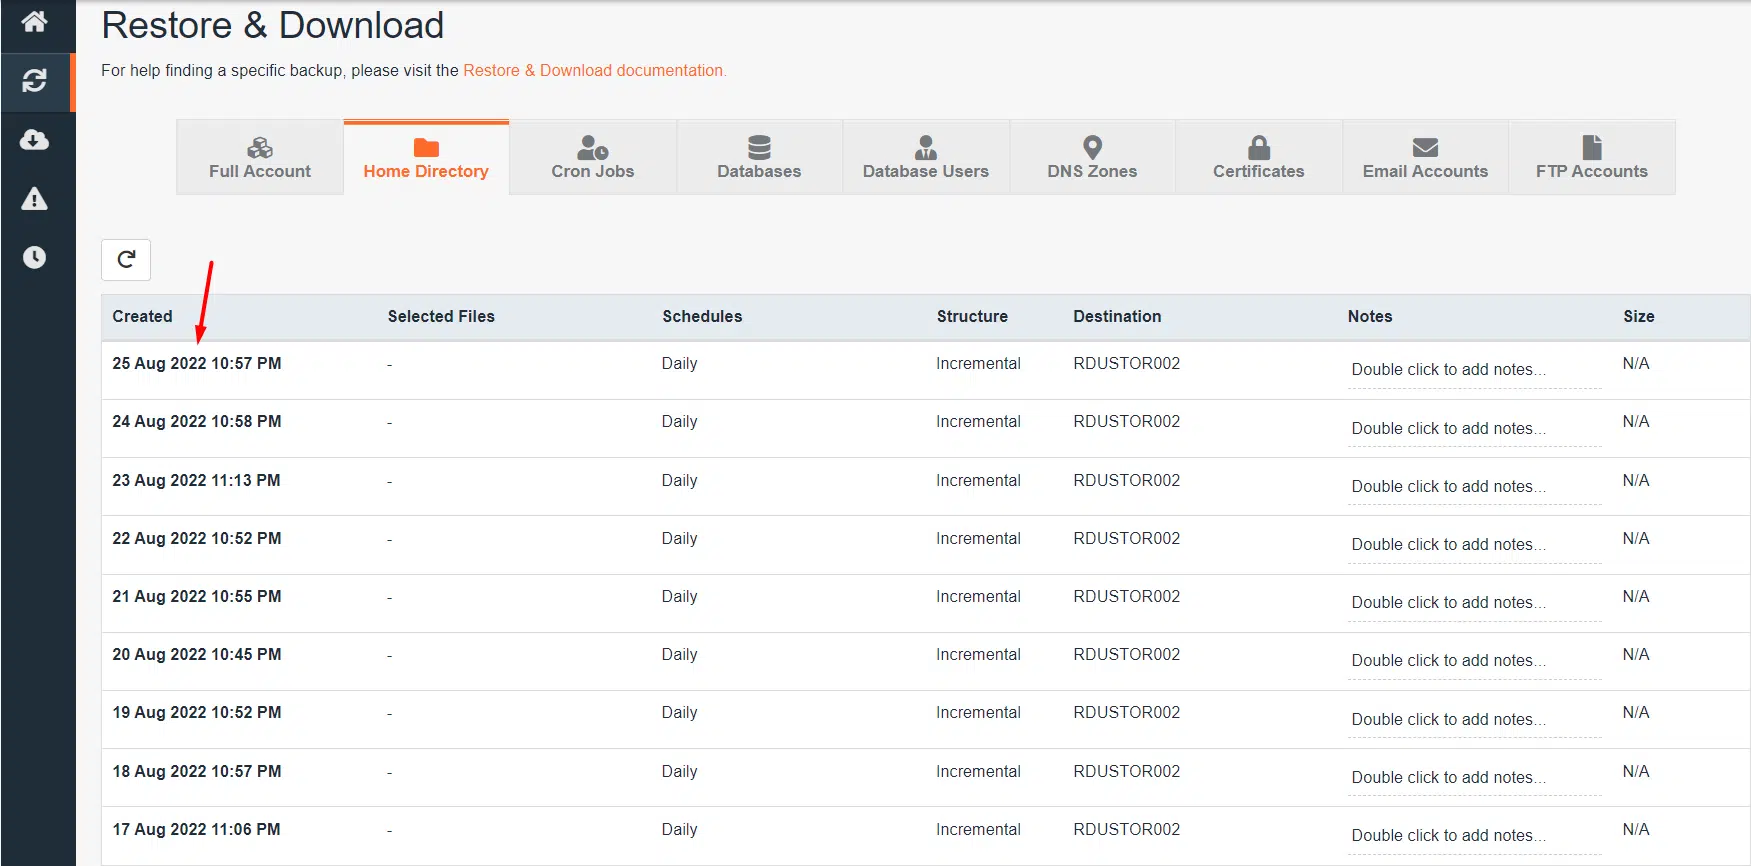
- After clicking Home Directory, you will be given a list of backups to choose from.
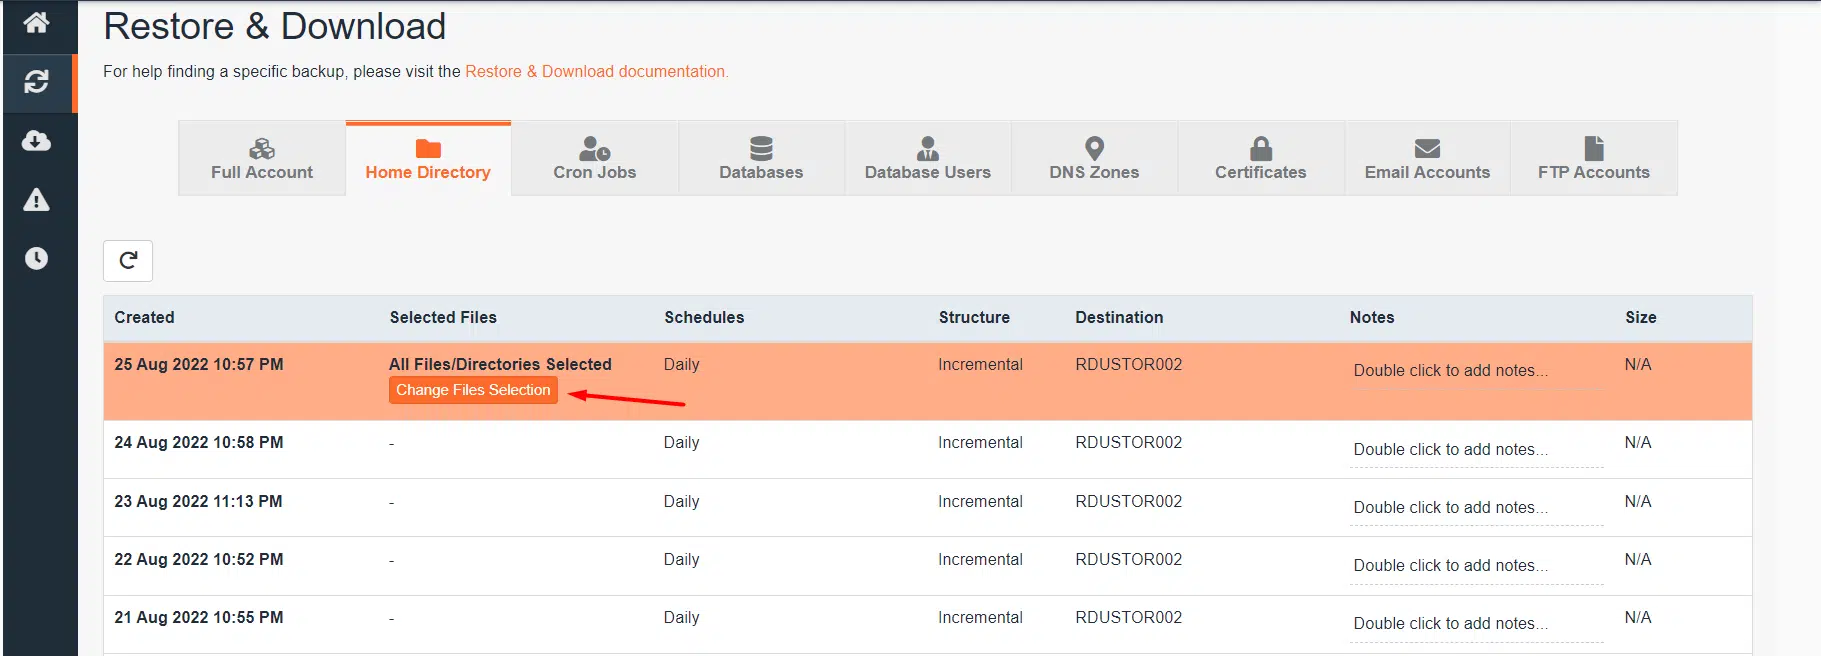
- Click the Change File Selection button to select the specific files or folders you wish to restore.
- A window or a list of the folders and files in your home directory will show up once you click that button.
- The file or files you wish to restore can be found by clicking through each of these directories. Once you’ve located the folder you must tick the checkbox to the left of the folder in the bottom right of the modal and click Select Files.
- You can select one of these options based on what you want to do. Clicking Restore is what you should do if you want to restore. The files will be made accessible to you in a zip file if you choose to just download them by clicking the download button.
- You’ll get a popup asking you to confirm the restoration after selecting Restore. Simply click Restore selected items button.
- You must locate the Queue option on the Jet Backup home page in order to access the queue.
Restoring a Full Account Backup
- Log in to your cPanel.
- Navigate to the Files section of your cPanel by scrolling down, then launch JetBackup 5.
- Once Jetbackup 5 opens, click the Full Backups icon under Restore & Download section
- The Backups modal will open. Choose the backup date you want to restore, then click Restore
- A list of the items you need to restore will be given to you. Keep them all selected, then click Restore Selected Items to restore the whole contents of the cPanel Account.
- It will be queued for restoration. You will see a success notification in the top right corner.
Download a Full Account Backup
- Log in to your cPanel.
- Navigate to the Files section of your cPanel by scrolling down, then launch JetBackup 5.
- Once Jetbackup 5 opens, click the Full Backups icon under Restore & Download section
- Choose the backup date you want to download, then click Download
- After clicking download, you will be presented with a list of Items to Download. Keep them all selected, then click Download Selected Items to download the whole contents of the cPanel Account.
- To access your downloads, click the Downloads button on the Accounts screen.
- After clicking the Downloads button, The file will be saved to your computer.
Follow the detailed instructions below to Restoration File using JetBackup 5
Log in to your cPanel first. Once you’ve logged in, scroll down through your cPanel and find the Files section, then open JetBackup 5.
Jetbackup 5
Click Home Directory to open the file restoration tool.
Jetbackup 5 interface
After clicking Home Directory, you will be given a list of backups to choose from. Please choose the backup that you want to restore by clicking on it.
Jetbackup 5 restore and download
You must click the Change File Selection button to select the specific files or folders you wish to restore.
Jetbackup 5 restore and download
After clicking that button, a modal will appear or you will be presented with a list of folders and files in your home directory.
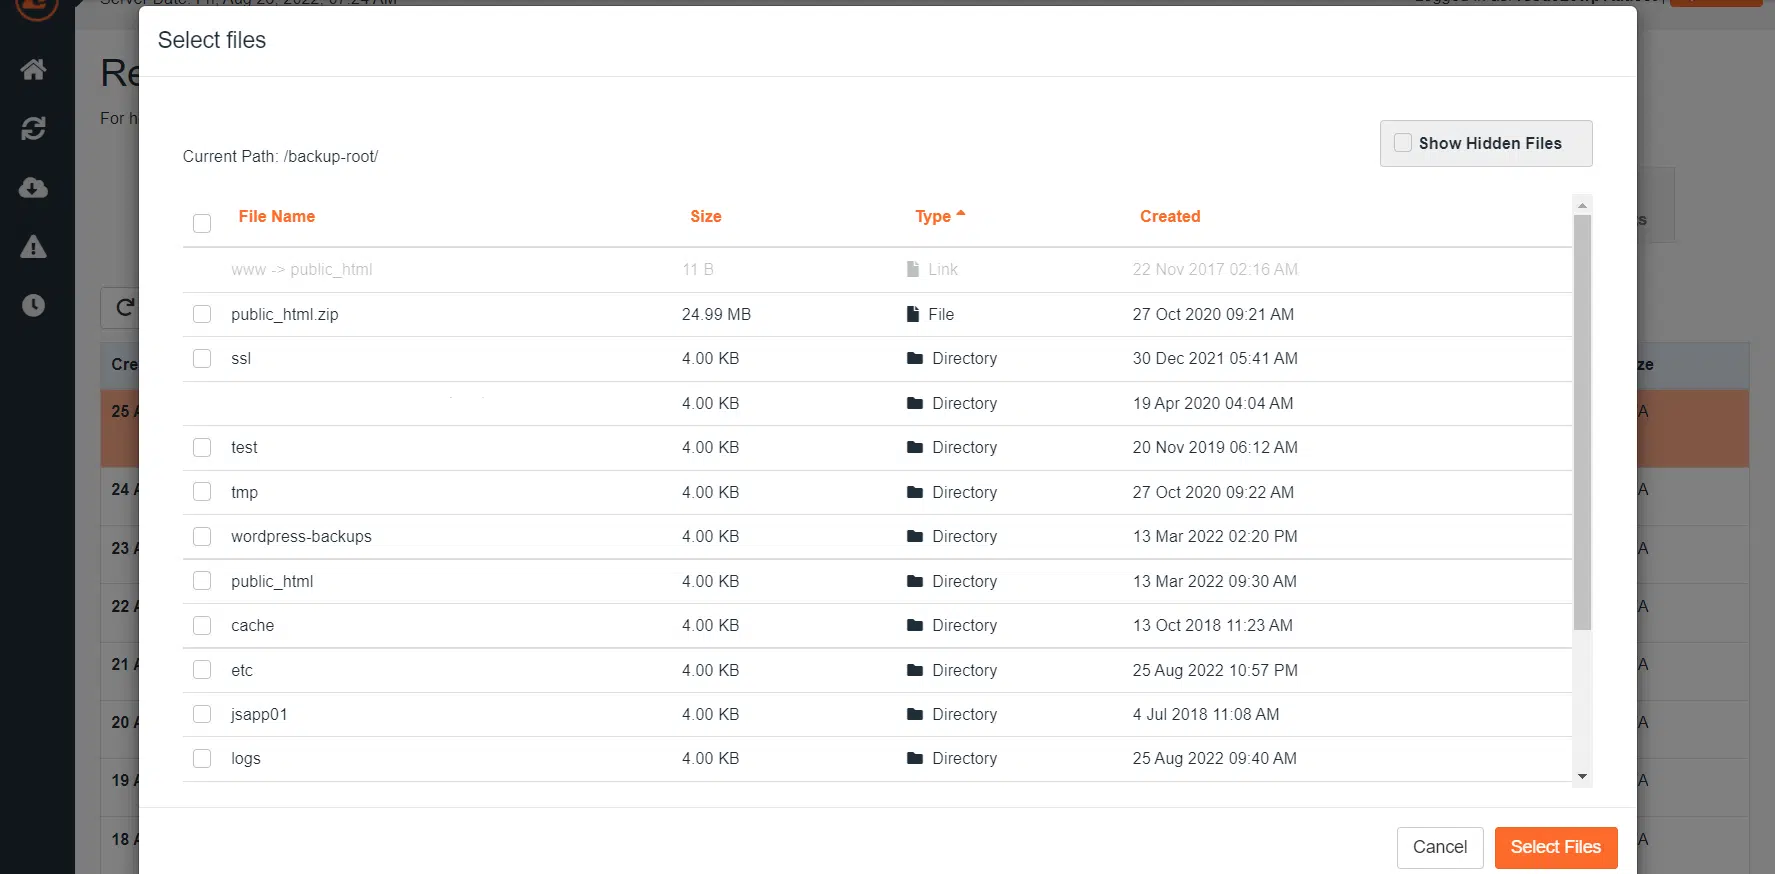
Jetbackup 5 list files
Click through these folders until you locate the file or folders you want to restore. Once you’ve located the folder you’re going to tick the checkbox to the left of the folder in the bottom right of the modal and click Select Files.
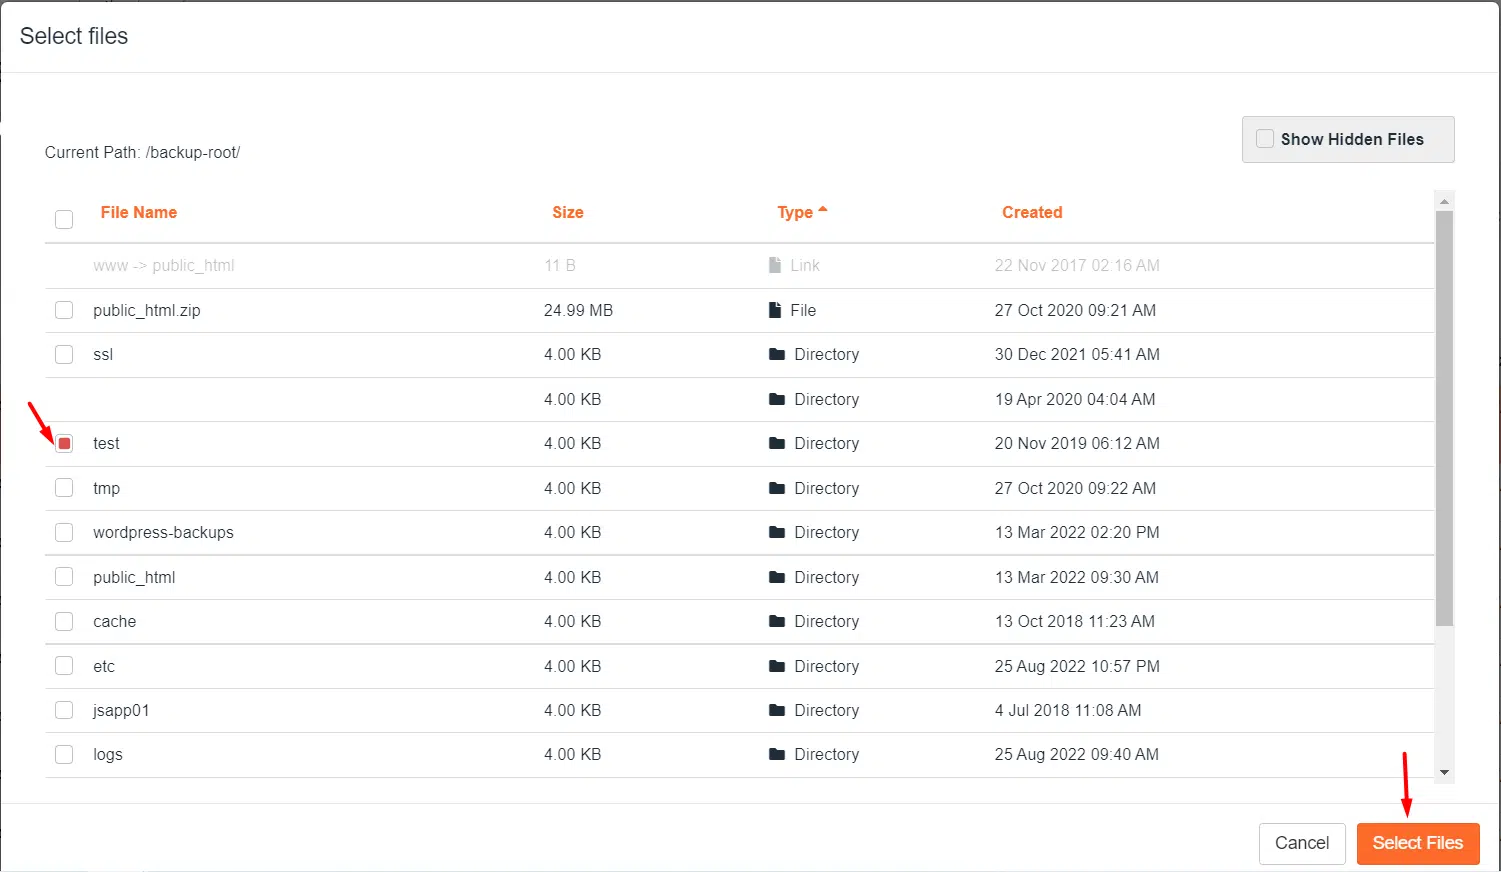
Jetbackup 5 list files
You can select one of these options based on what you want to do. Click Restore if you want to restore. The files will be made accessible to you in a zip file if you choose to just download them by clicking the download button.
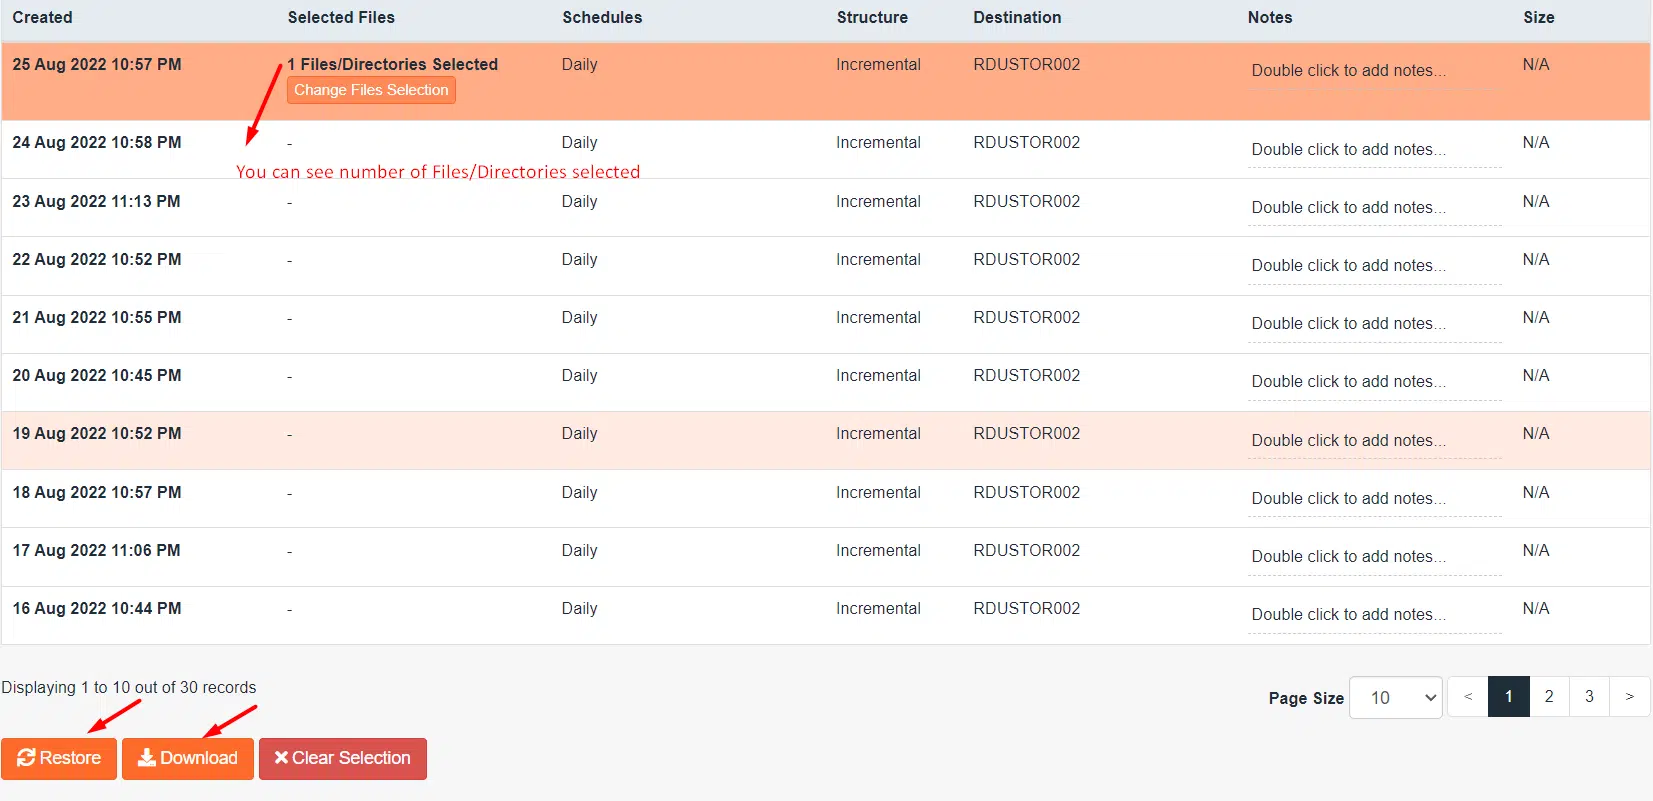
Jetbackup 5 restore
After clicking Restore a pop will appear asking you to confirm the restoration. Just click Restore selected items button.
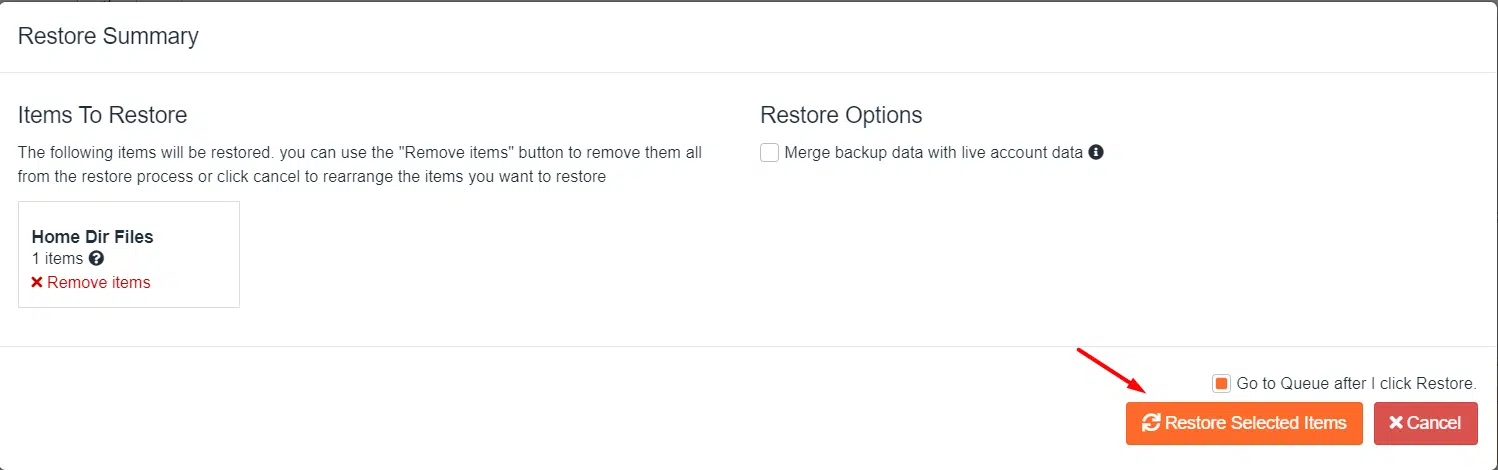
Jetbackup 5 restore
To access the queue, look for the Queue option on the Jet Backup homepage.
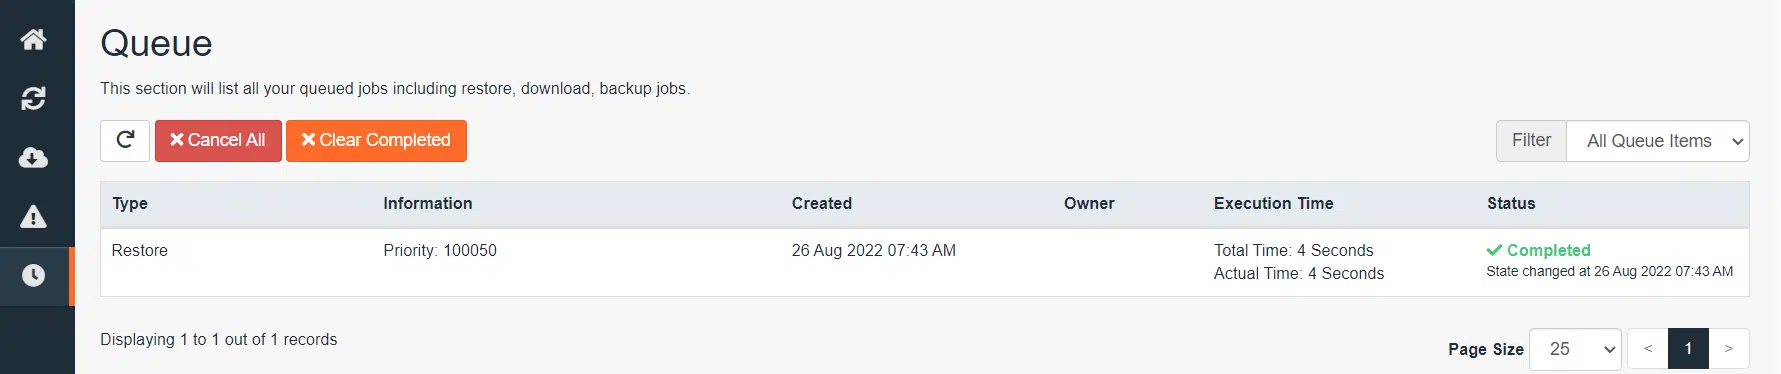
Jetbackup 5 queue
Follow the detailed instructions below to Restore Full Account Backups using JetBackup
Log in to your cPanel. Once you’ve signed in, navigate to the Files section of your cPanel by scrolling down, then launch JetBackup 5.
Jetbackup 5
Once Jetbackup 5 opens, click the Full Backups icon under Restore & Download section.

Jetbackup 5 interface
Choose the backup date you want to restore and then click Restore.
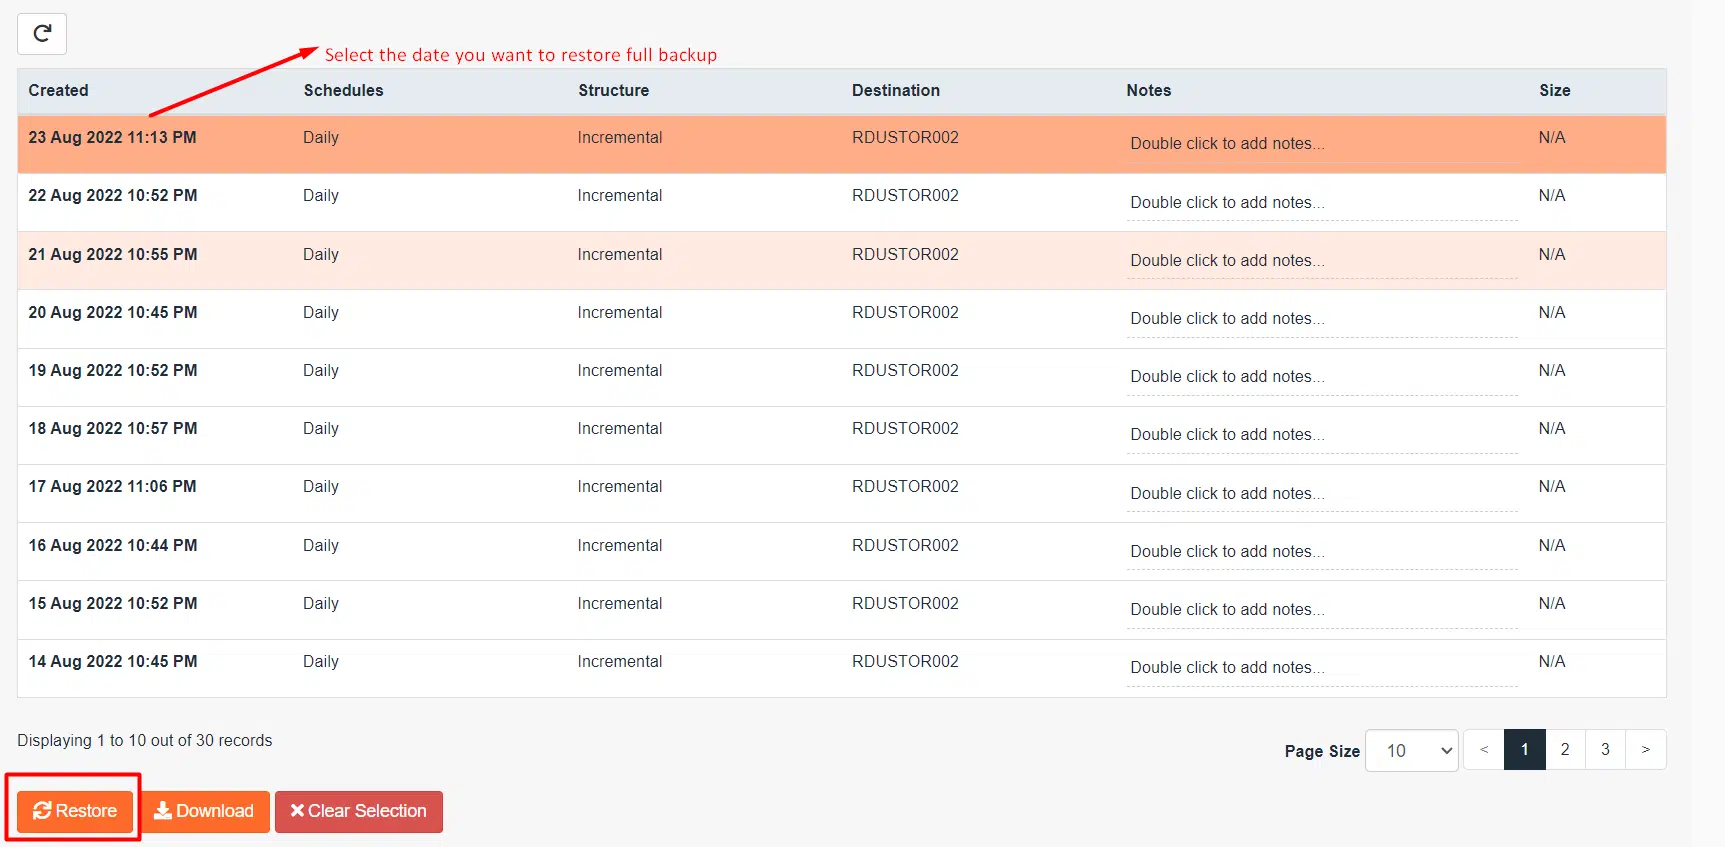
Jetbackup 5 interface
A list of the items you need to restore will be given to you. Keep them all selected, then click Restore Selected Items to restore the whole contents of the cPanel Account.
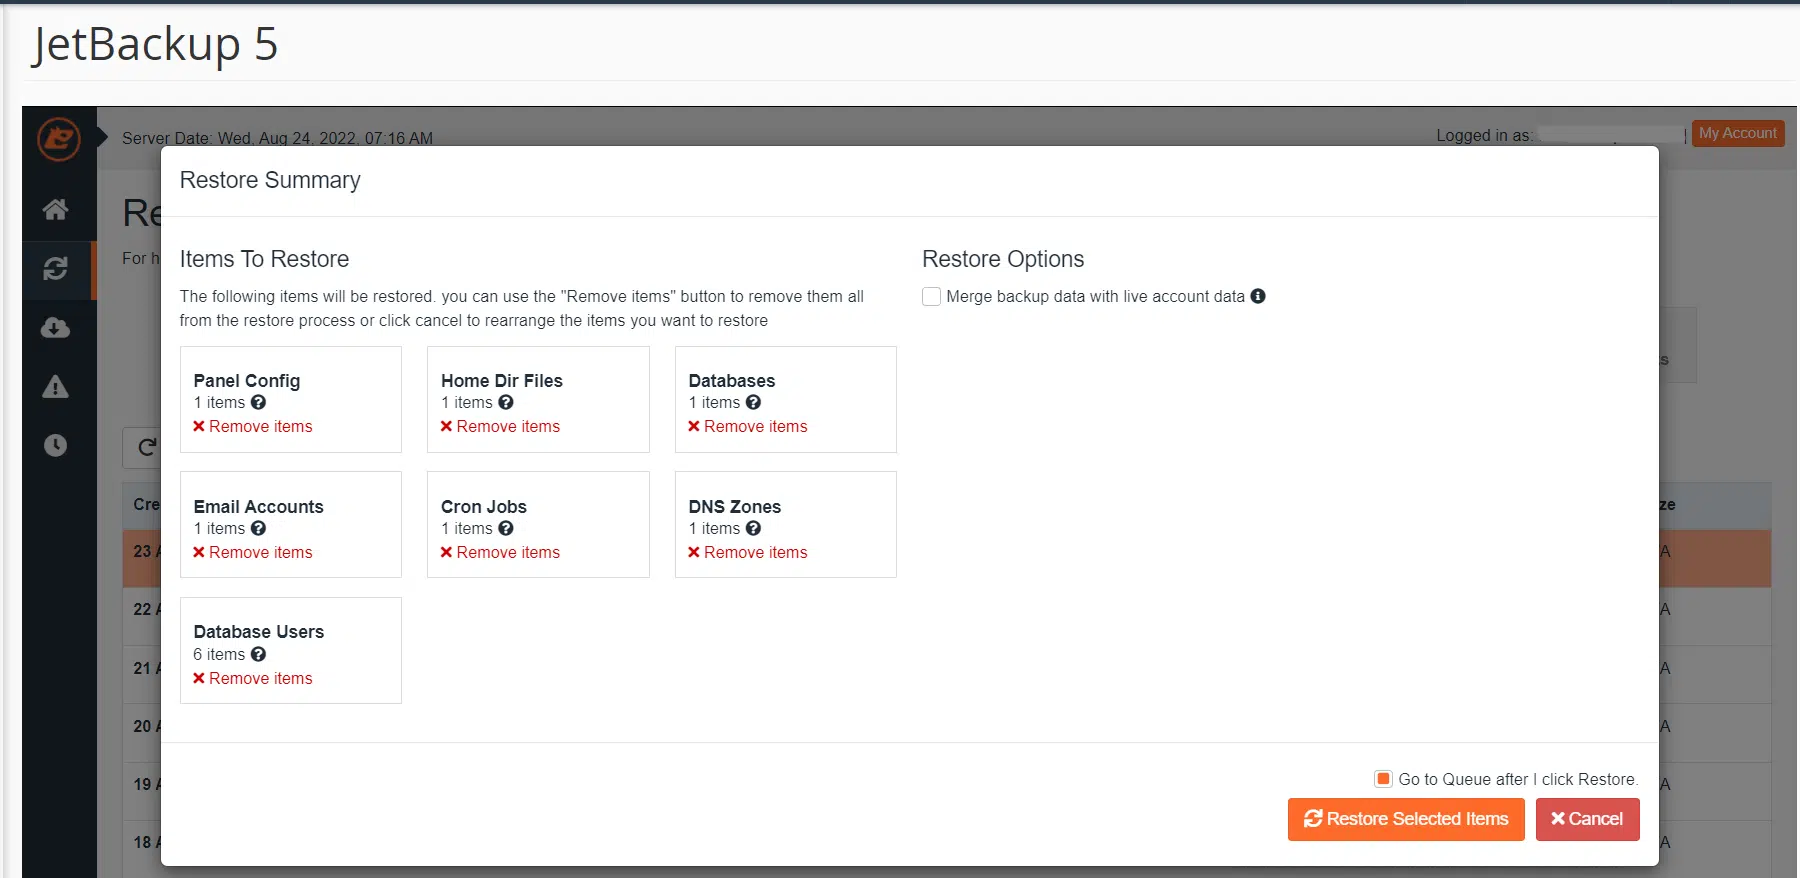
Jetbackup 5 restore
The selected account will be queued for restoration. You will see a success notification in the top right corner.
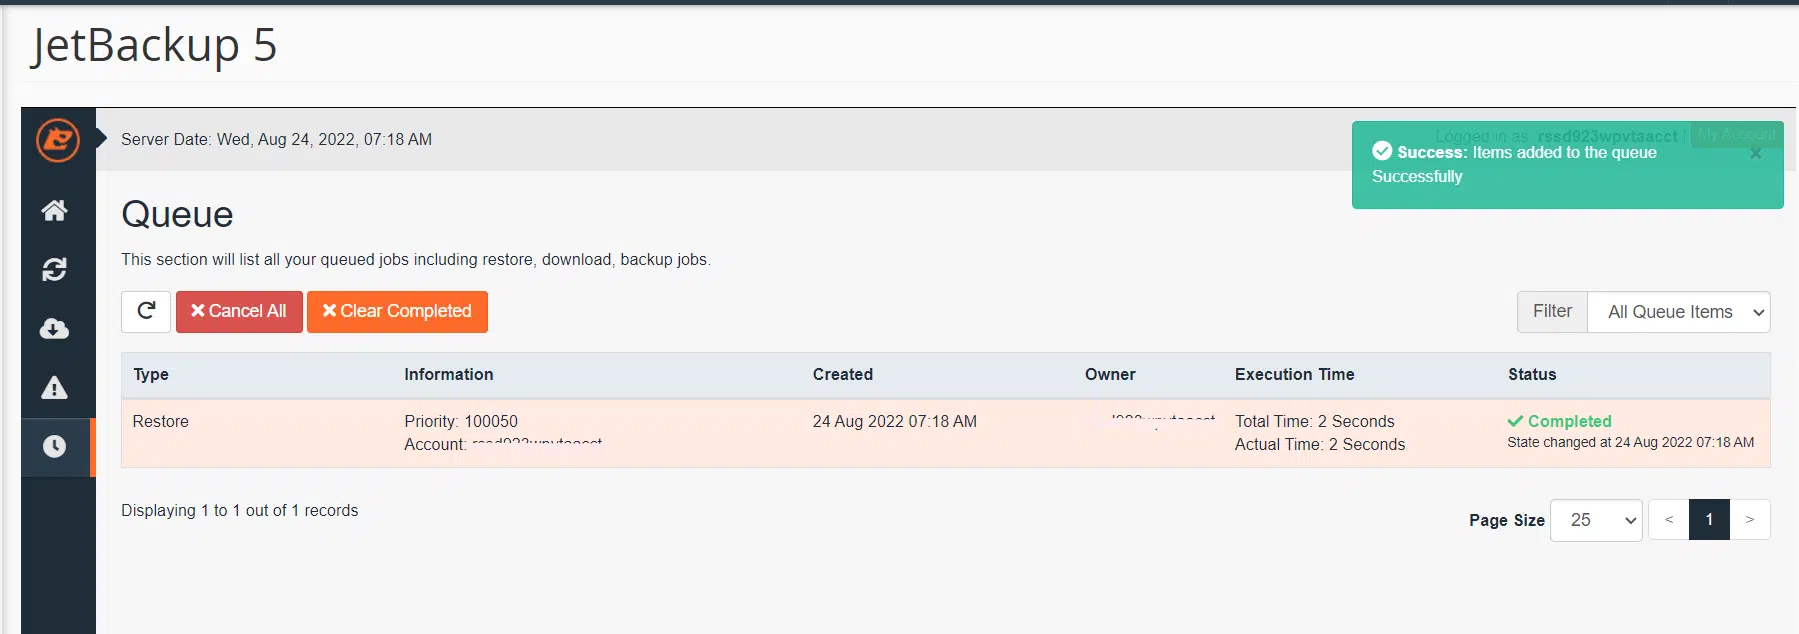
Jetbackup 5 queue
However, unlike a Download, a Restore takes place behind the scenes. You’ll need to open the Queue to see the Restore’s current status. Click the Queue icon which is the last icon from the row of tools on the left side. You will see a list of tasks when the Queue is open. The list below shows that the Restore we requested in the previous step has already been finished.
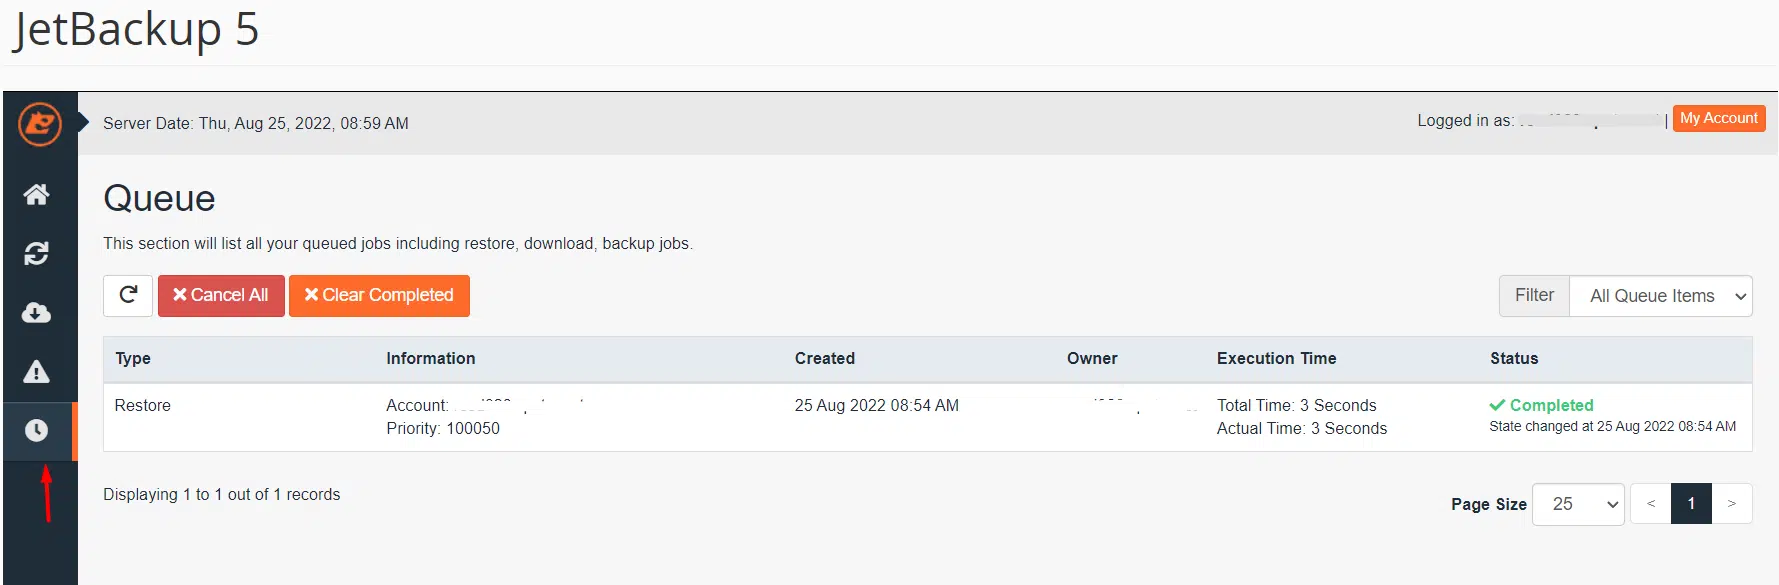
Jetbackup 5 queue
Follow the detailed instructions below to Download a Full Account Backup
Log in to your cPanel first. Once you’ve signed in, navigate to the Files section of your cPanel by scrolling down, then launch JetBackup 5. Once Jetbackup 5 opens up, click the Full Backups icon under Restore & Download section
Choose the backup date you want to download, then click Download.
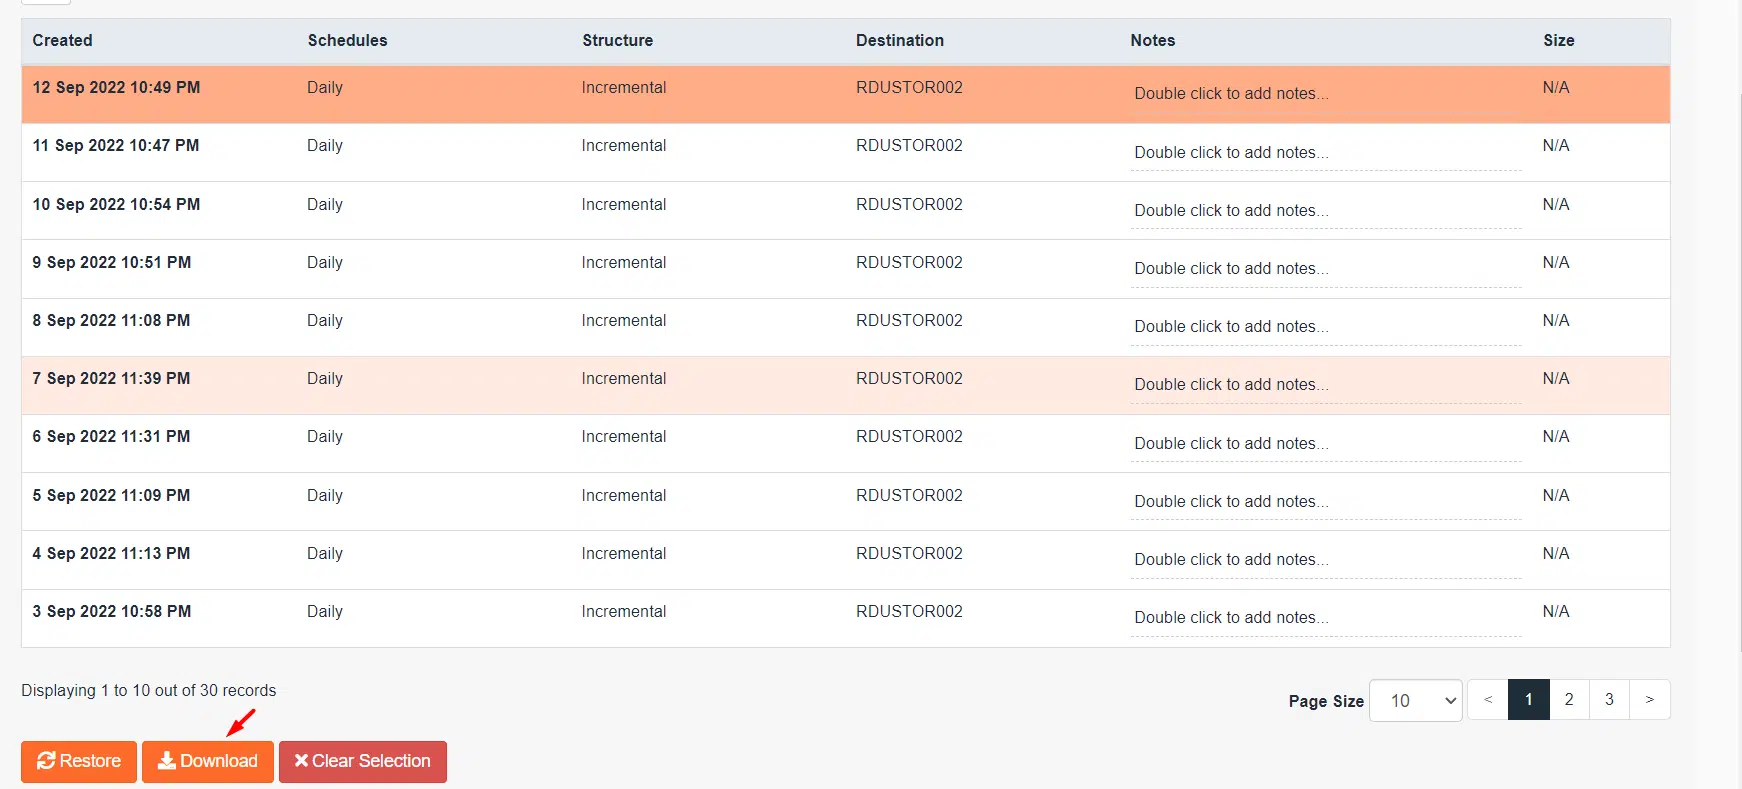
Jetbackup 5 interface
You will get a list of items to download after clicking download. To download the whole contents of the cPanel Account, keep them all selected and click Download Selected Items.
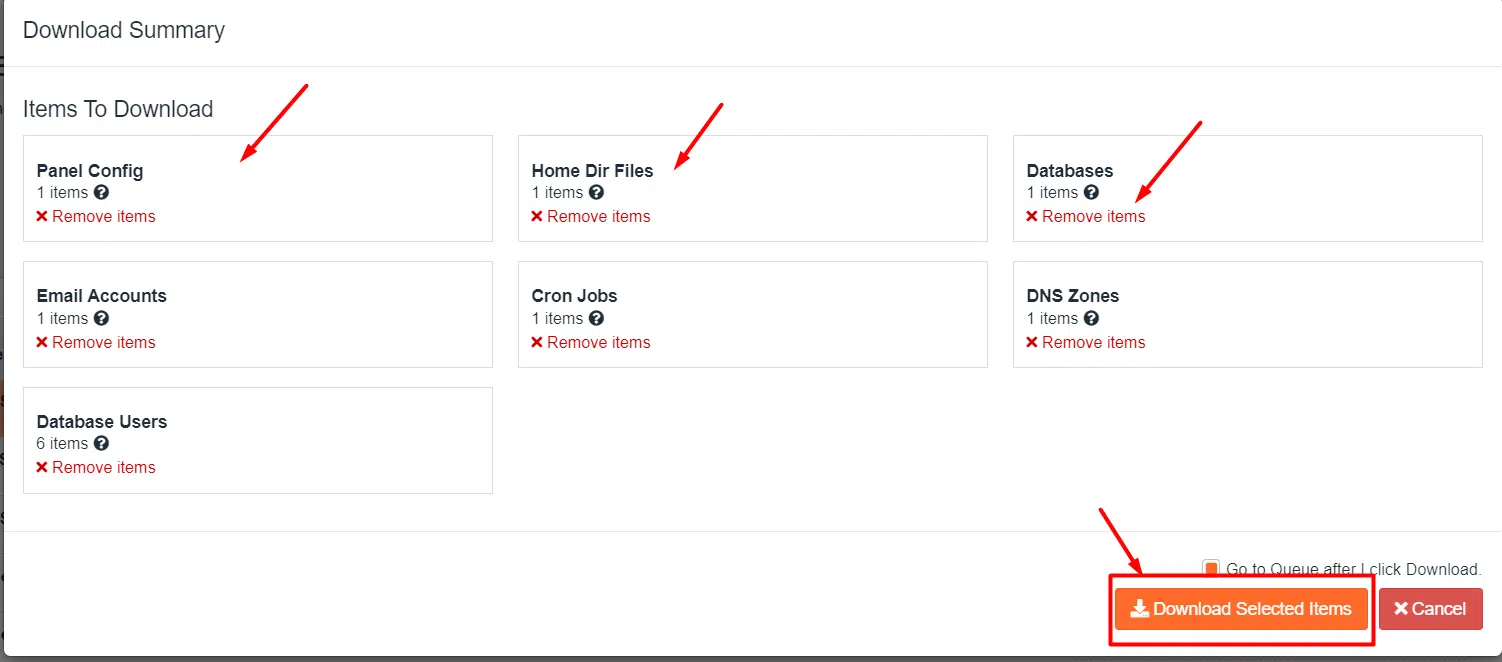
Jetbackup 5 download
To access your downloads, click the Downloads button on the Accounts screen.
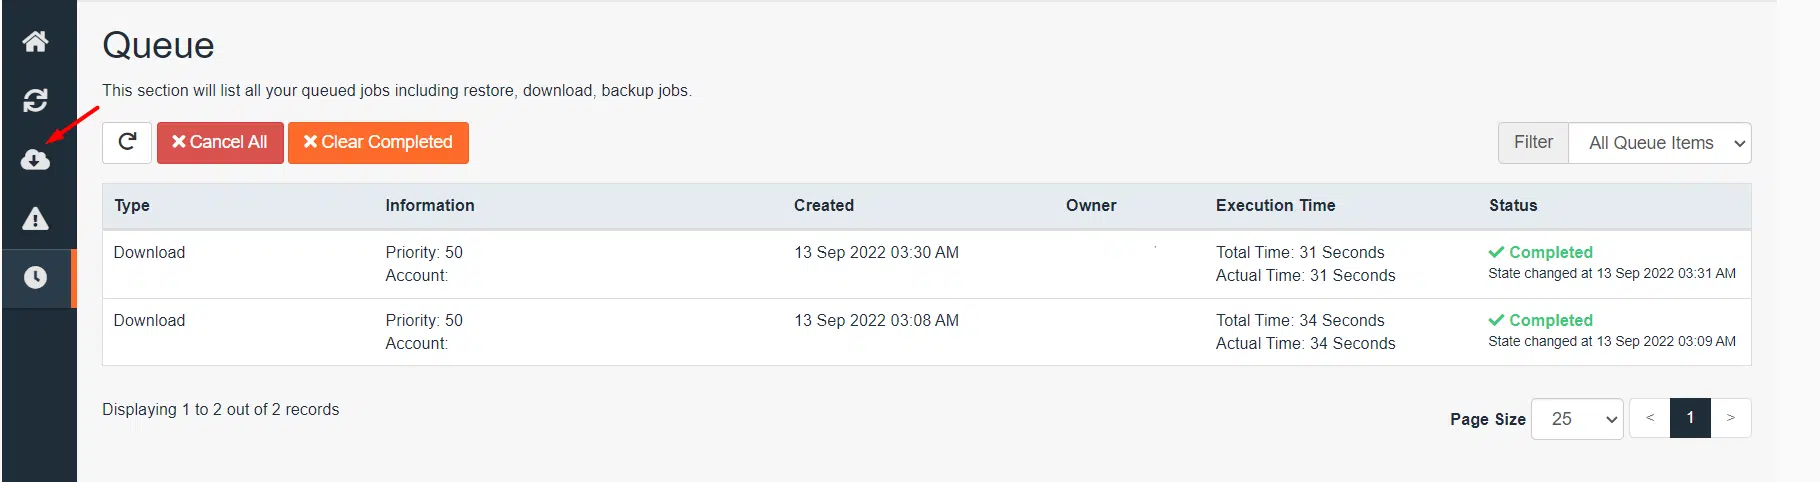
Jetbackup 5 queue
After clicking Downloads, a pop window will open with your downloads available. Just look for the download you want to save to your computer and click the Download button. The file will be saved to your computer.

Jetbackup 5 download
Conclusion
Congratulations, you have now learned how to Restore a Website with JetBackup 5.
If you have any web hosting questions please feel free to reach out to us. We're happy to help.
Our Guiding Principles