Quick Steps
- Step 1: Add an account in Outlook for POP or IMAP.
- Step 2: In cPanel, under Email settings, find the Configure Email Client link.
- Step 3: Make a note of the settings in cPanel, and enter them in Outlook.
In this guide, we’ll go over connecting your Outlook 2019 email client to your cPanel email account. This guide assumes you have already created the email account in cPanel as well as retained the password in your notes for use.
Note: While we support both POP & IMAP, we highly recommend IMAP over POP. As shown below, you will need to substitute the settings shown below for the settings shown in your cPanel account for the email address as well as the server connection settings.
If you are using SSL options, you will need to use the server hostname for both incoming & outgoing mail server in order to avoid a “certificate mismatch” error in your mail client unless you have a valid SSL Certificate for your domain.
If you already have your email account created, but simply need to modify the connection settings, please scroll to “Part 2” of this guide.
Part 1. Initial Email Account Setup
First, go to the File menu in Outlook and choose Add Account.

Adding an email account in Outlook.

Adding an email account in Outlook.
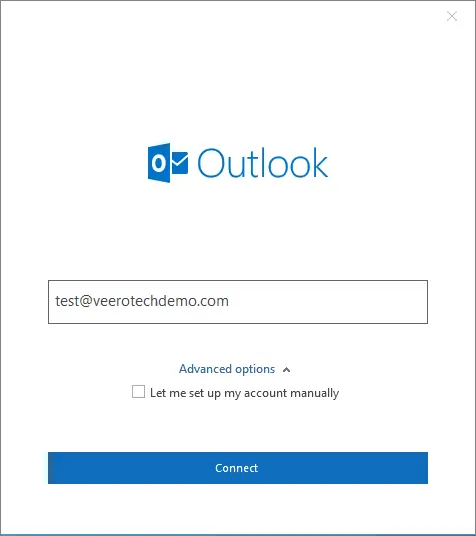
You will be now presented with a dialog box for adding a new mail account.
Note: By default, Outlook configures new mail accounts with IMAP, not POP. If you wish to select POP over IMAP, then check Let me set up me account manually, click Connect and select the POP option.
We will be using the default and the recommended setup – IMAP. Type in your full cPanel email address, and click Connect.
Adding an email account in Outlook
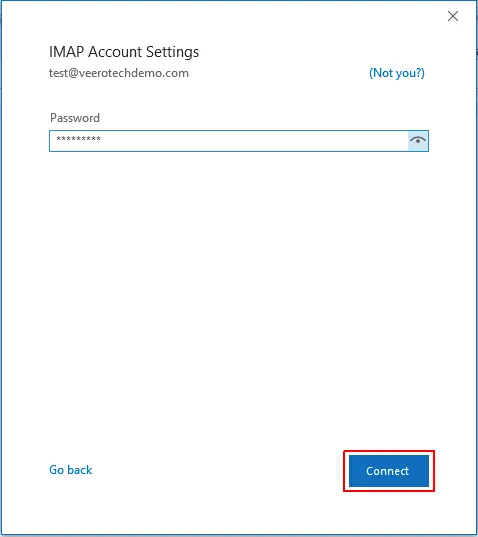
Type in the password of your email address and click Connect.
Adding an email account in Outlook.
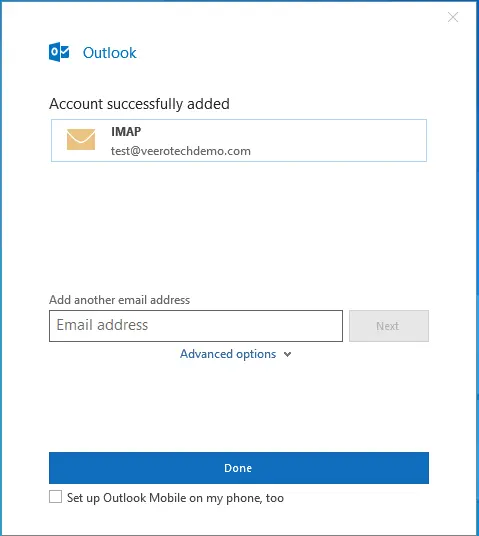
That’s it! Your account has been successfully added. Click Done to exit the setup.
Adding an email account in Outlook.
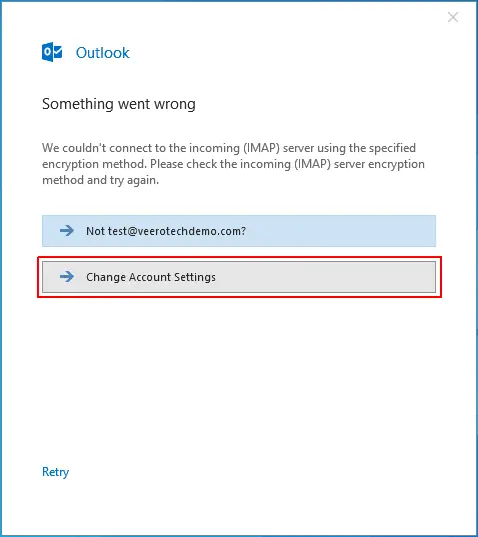
In case Outlook fails to add your account you will need to add it manually. No worries, the detailed instructions for adding the account manually can be found below.
You’ll be presented with the following window when Outlook fails to add your account. Click on Change account settings to add the account manually.
Adding an email account in Outlook.
Note: Whether you chose the IMAP or POP setup, the mail server settings for both of them can be found under Email Accounts >> “youraccount@domain.com” >> Connect Devices.
If you chose the IMAP setup, then enter the IMAP settings for your mail account, as shown below and click Next.
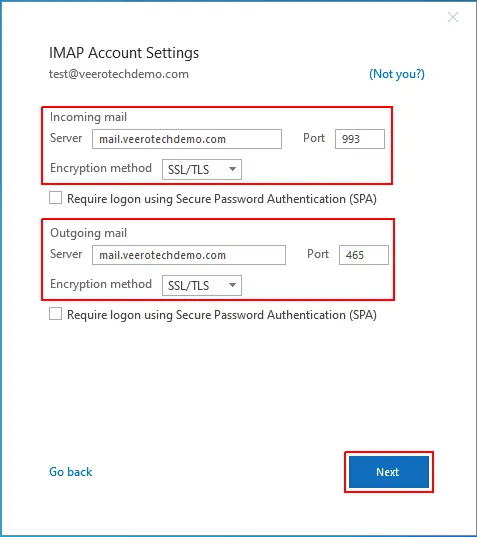
Configuring with IMAP.
If it was the POP setup that you chose, then enter the POP settings for your mail account (as shown below) and click Next.
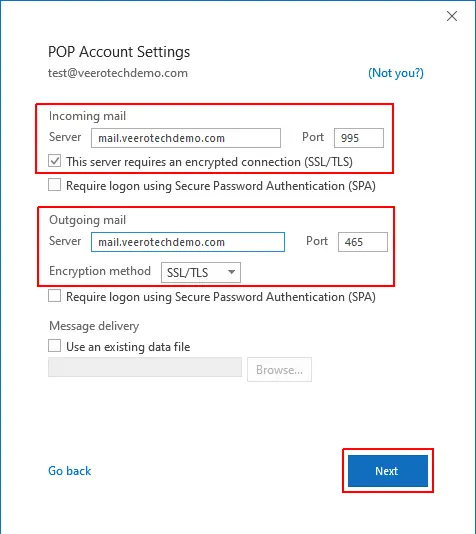
Configuring with POP.
After clicking Next, you’ll be presented with a new dialog box asking for the mail password. Type in the password and click Connect.
Configuring with IMAP.
If all the settings were correct, then the account will be added successfully.
Adding an email account in Outlook.
Click Done to complete the setup.
Part 2. Editing Connection Settings For An Email Account Already Set Up
If you already have an email account configured in your Outlook & simply need to modify OR verify the connection settings, you can follow the steps below. This would apply in the event of switching web hosts or mail servers.
Locate the File menu and go to Info >> Account Information and click on Account Settings.
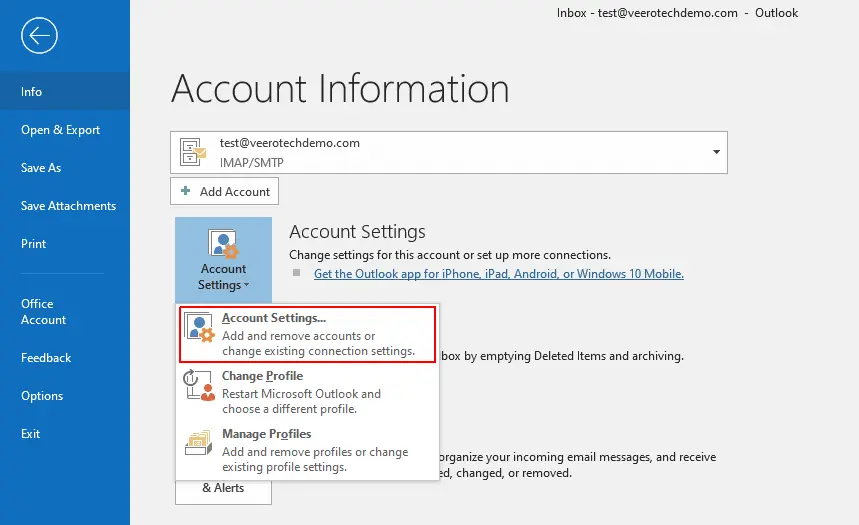
Configuring an existing mail account.
You’ll then be taken to the Account Settings window that will list all of your email accounts, as shown below.
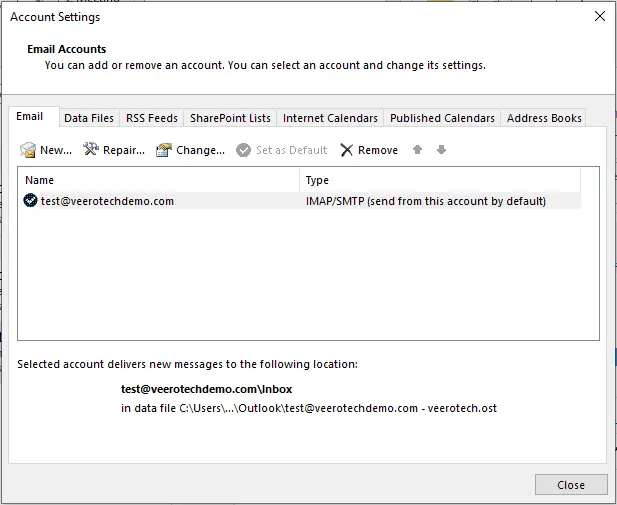
Configuring an existing mail account.
Select the email account you’d like to modify/view the settings, then click Repair.
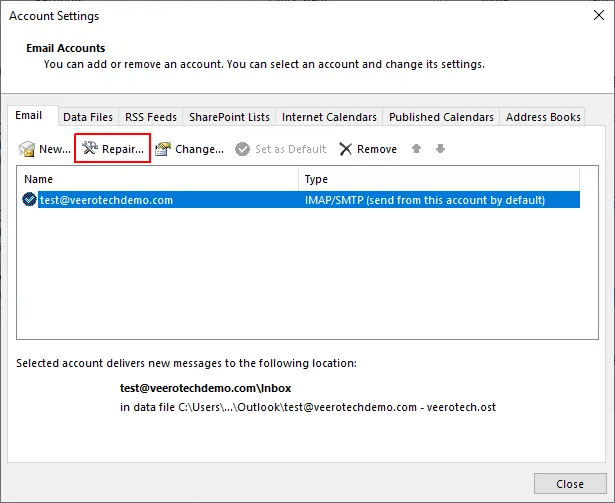
Configuring an existing mail account.
Once you are presented with the Repair window, click on Advanced options and check Let me repair my account manually and then, click on Repair.
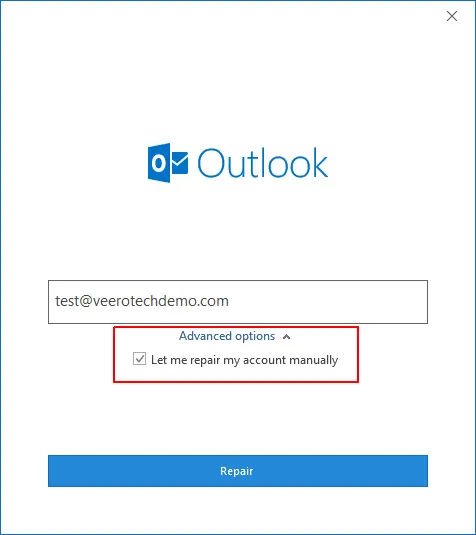
Configuring an existing mail account.
Verify both the incoming and outgoing mail server settings are correct. If any information is incorrect, then update it with the correct settings.
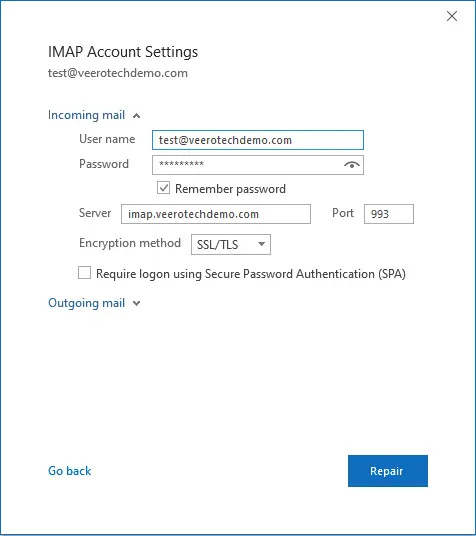
IMAP account settings for incoming mail.
Once all the settings are verified, click Repair.
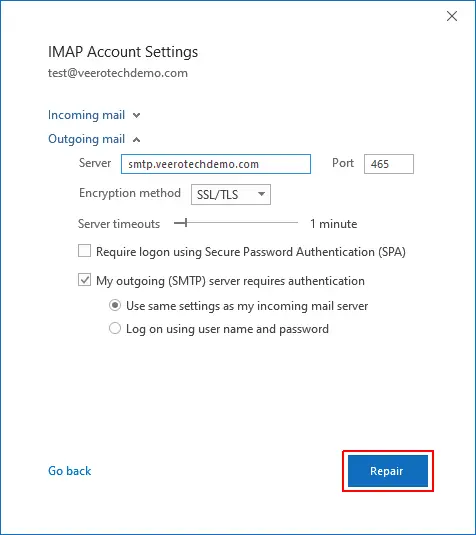
IMAP account settings for outgoing mail.
Conclusion
That’s it! You’ve successfully configured your mail account.
If you have any web hosting questions please feel free to reach out to us. We're happy to help.
Our Guiding Principles