GoDaddy is an ICANN-accredited domain registrar with over 40 million domain names under management. This article will show you how to update the name servers for a GoDaddy-registered domain.
Quick Steps
- Log in to your GoDaddy account.
- Go to your domain’s settings.
- Select the domain you want to manage.
- Click on “Manage DNS“
- Select Nameservers from the action menu
- Choose the nameserver setting that works best for you.
- GoDaddy Nameservers (recommended)
- I’ll use my own nameservers.
- Choose I’ll use my own nameservers.
- Enter your custom nameservers.
- Select Save, then Continue to complete your updates.
Follow detailed steps on how to set the name servers for a domain registered at GoDaddy
Visit GoDaddy.com and log in to your account by clicking the “Sign In” button at the top right of the page. Enter your login credentials and click “Sign In”.
Manage My Domains
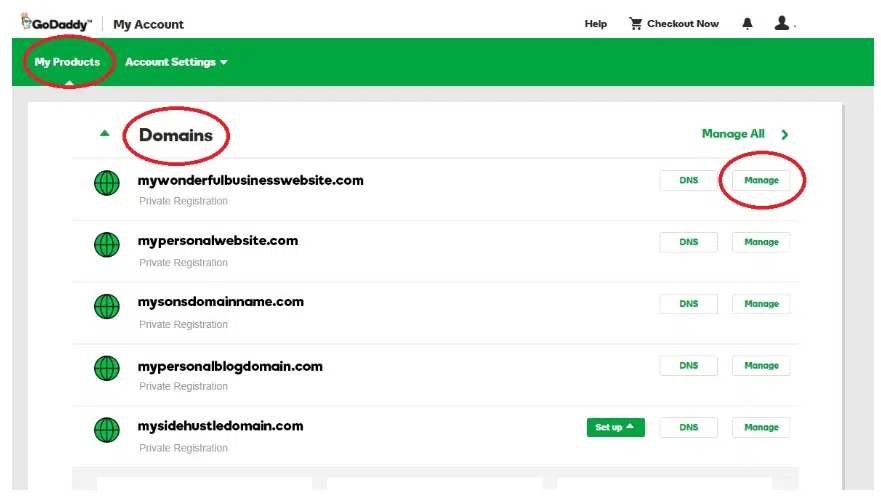
Once you’re logged in, you’ll be taken to the “My Products” page. Scroll down to the “Domains” section and click on the “Manage My Domains” button.
Select the domain you want to manage. You will see a list of all your registered domains. Click on the domain name you want to manage.
domain’s management page
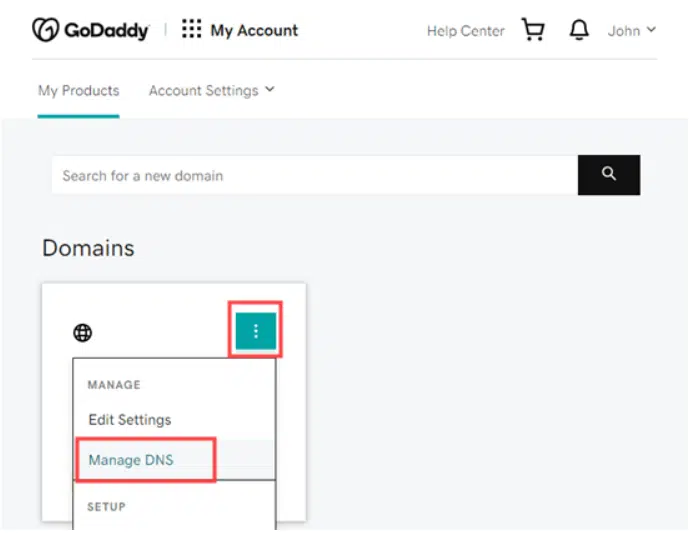
Click on “Manage DNS” On the domain’s management page, click on the “DNS” tab. Scroll down to the “Nameservers” section and click on the “Change” button.
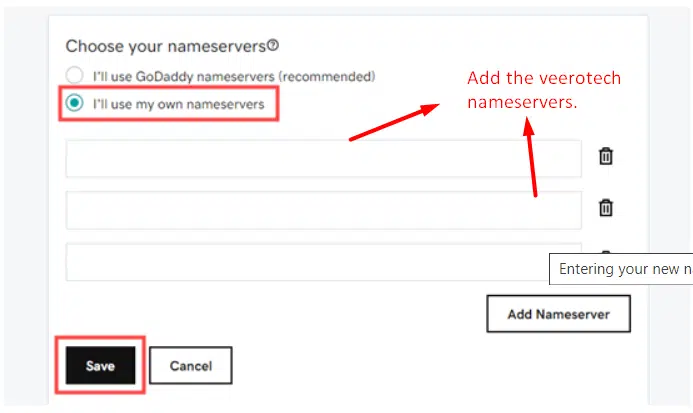
Choose the nameserver setting that works best for you:
GoDaddy Nameservers (recommended): We’ll update your domain to a set of GoDaddy nameservers, and you’ll manage DNS in your GoDaddy account.
I’ll use my own nameservers: Enter your custom nameservers. Your DNS will be managed elsewhere and not through your GoDaddy account.
If you choose the nameserver setting as “I’ll use my own nameservers”. Enter the two VeeroTech.net nameservers in the provided fields.
The nameservers should look like this:
ns1.veerotech.net

ns2.veerotech.net
domain’s management page
Once you’ve entered the nameservers, click “Save” and then continue to complete your updates.
Conclusion
Congratulations! You have learned how to set the nameservers for a domain registered at GoDaddy.
If you have any web hosting questions please feel free to reach out to us. We're happy to help.
Our Guiding Principles