There are many reasons why you might initially install WordPress in a subfolder (like example.com/wp), such as testing a new design or keeping a development area separate from a live site. However, when you are ready to go live, you likely want your website to load directly from the root domain (example.com). Moving WordPress requires more than just dragging and dropping files; you must also update your database paths and rewrite rules to ensure your links don’t break. This guide will walk you through the entire process of transitioning your site from a subdirectory to the domain root.
Note: Before making any changes, ensure you have a complete backup of your website files and your database
Quick Steps
-
File Migration: Move all files from the subfolder to the
public_htmldirectory. -
Database Update: Update the
siteurlandhomevalues in phpMyAdmin. -
URL Replacement: Use a plugin to update internal links throughout your database.
-
Htaccess Update: Refresh your
.htaccessfile with the standard WordPress rewrite rules.
Follow the step-by-step instructions below to move your WordPress installation.
File Migration
To begin the transfer, you need to access your website’s file structure using the cPanel File Manager or an FTP client.

File Manager in cPanel
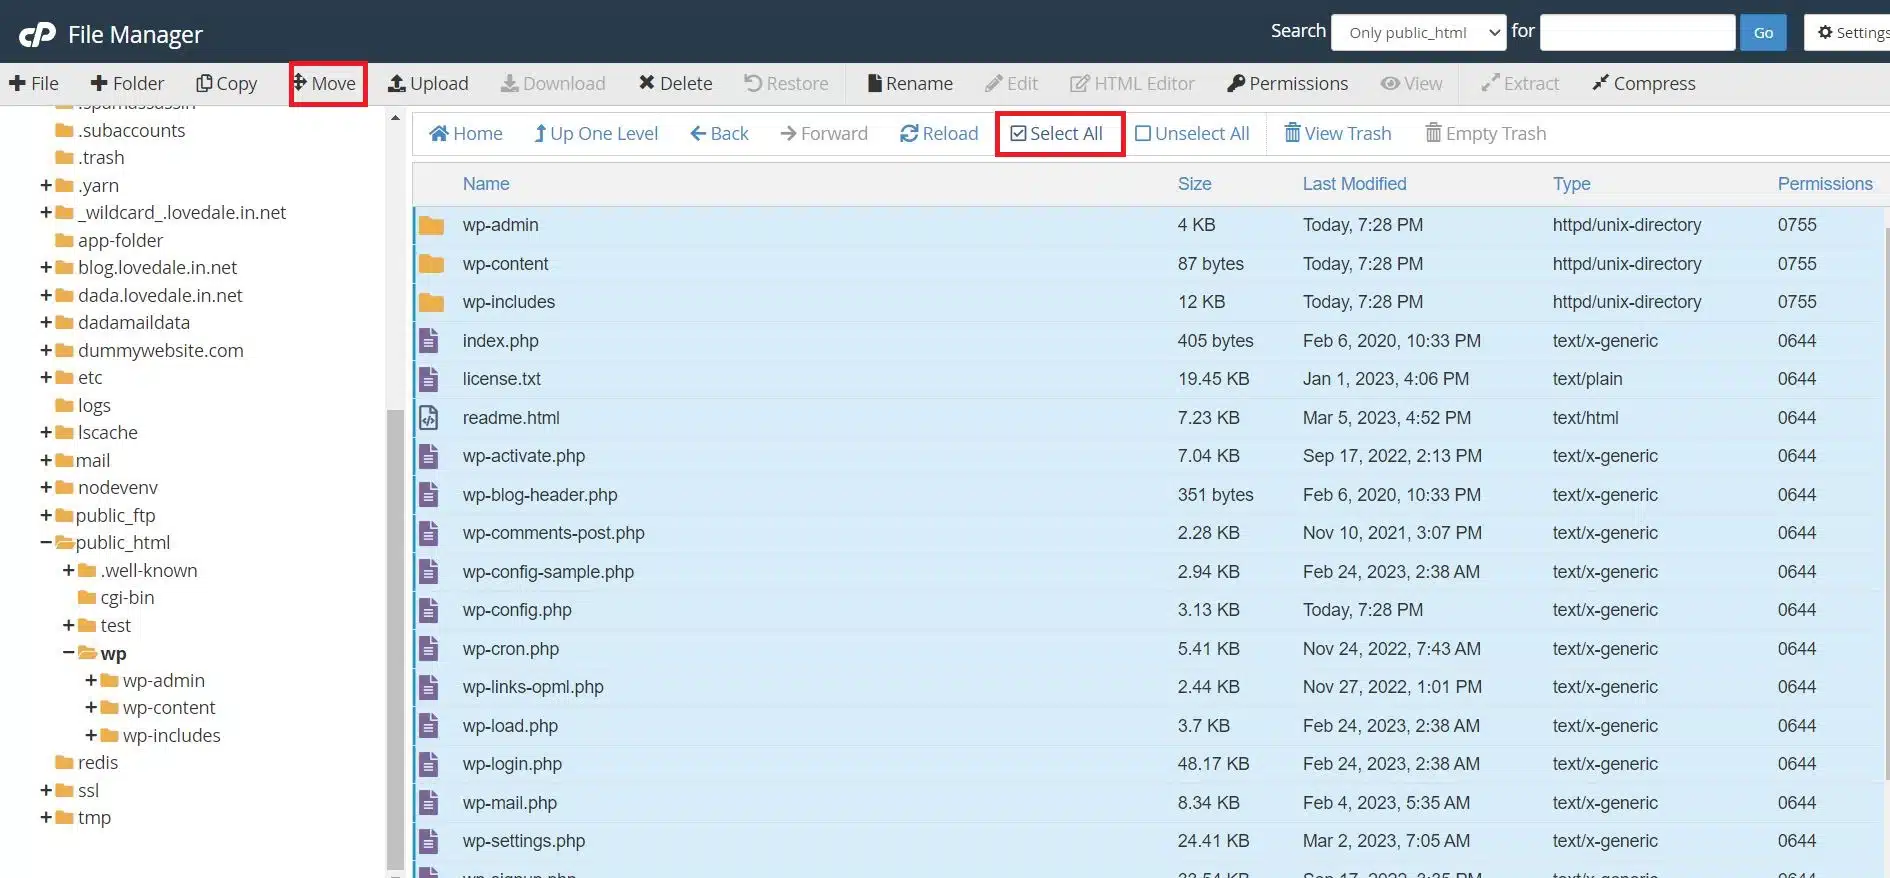
Navigate to the subfolder where WordPress is currently installed (e.g., public_html/wp).
File Manager in cPanel
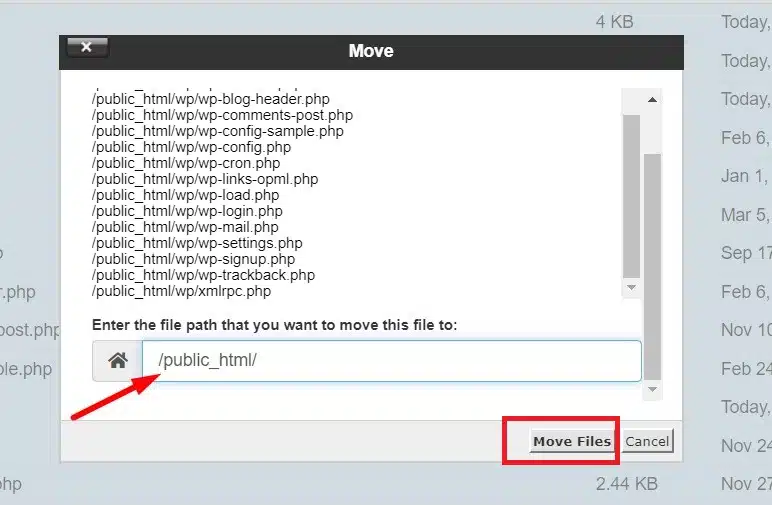
Use the Select All feature to highlight every file and folder within this directory, then use the Move function to relocate them to your primary document root, which is typically public_html.
File Manager in cPanel
Once finished, navigate back to the root folder to confirm that all core WordPress files (like wp-config.php and the wp-content folder) are now sitting in the main directory.
Database Update via phpMyAdmin
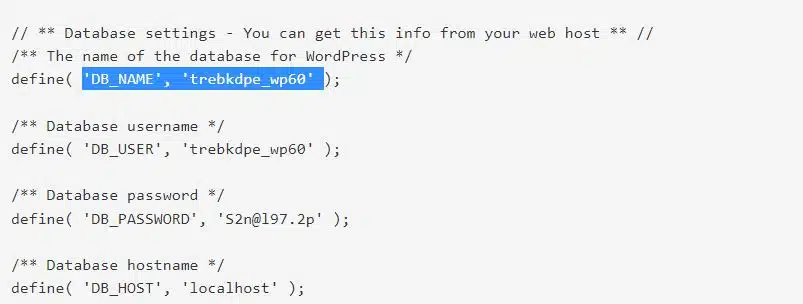
Since WordPress stores your site’s address in its database, the site will not load correctly until these values are updated. First, open your wp-config.php file in the root directory to identify your Database Name.
wp-config File Contents
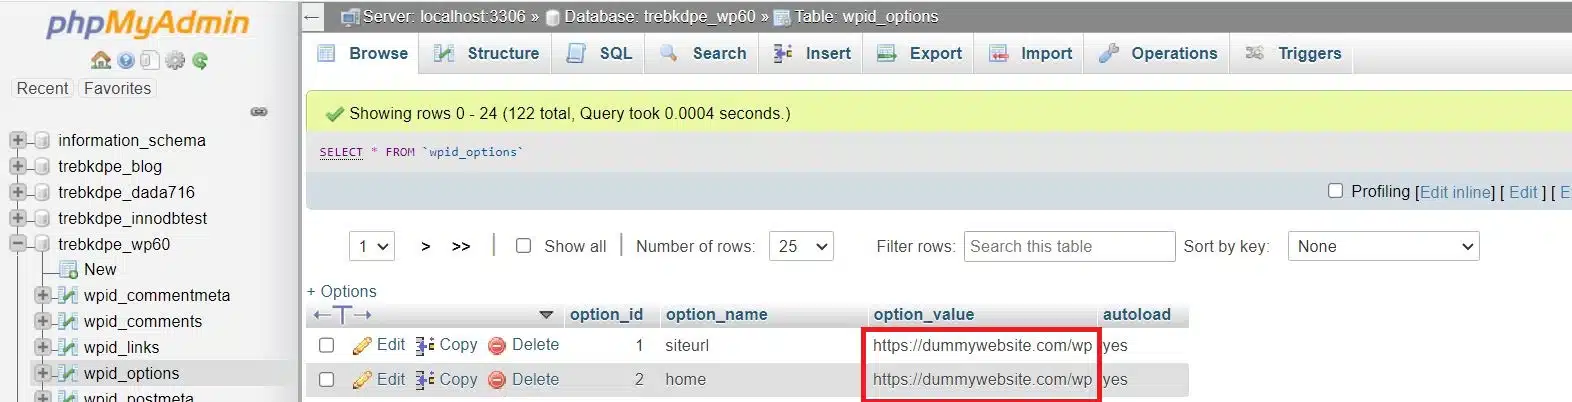
Next, return to cPanel, locate the Databases section, and open phpMyAdmin. Select your database from the left-hand sidebar and click on the wp_options table. You will need to find the rows labeled siteurl and home.
phpMyAdmin in cPanel

phpMyAdmin in cPanel
Click the Edit (pencil icon) for both and change the URL from the old subfolder path (e.g., http://domain.com/wp) to your new root domain (http://domain.com).
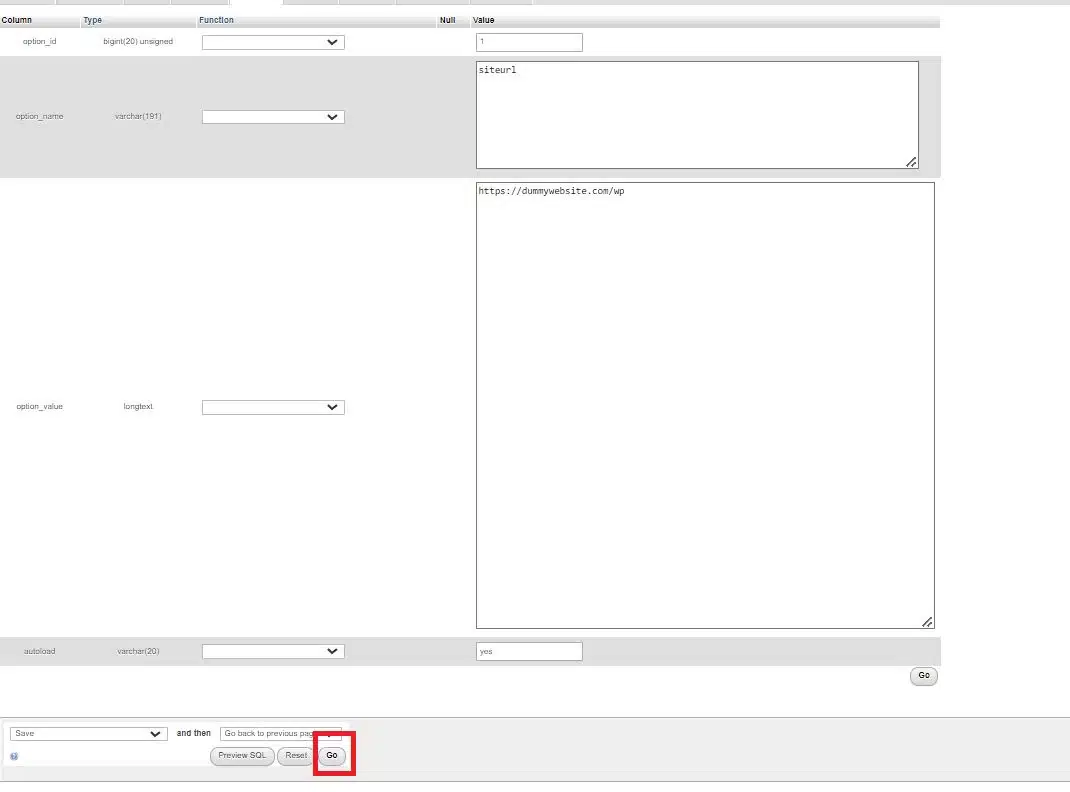
phpMyAdmin in cPanel
Click the Go button to save the settings. Do this for both the siteurl and home options.
Update the remaining URLs
Your WordPress site has moved to the root domain, but there will be links inside your WordPress database pointing to the subdomain. At this point, we have to install the Search & Replace URLs plugin.
After activating the plugin, head to Update URLs in the left menu.
As shown below, we must input the subdomain URL in the Old URL textbox and the root domain in the New URL textbox.
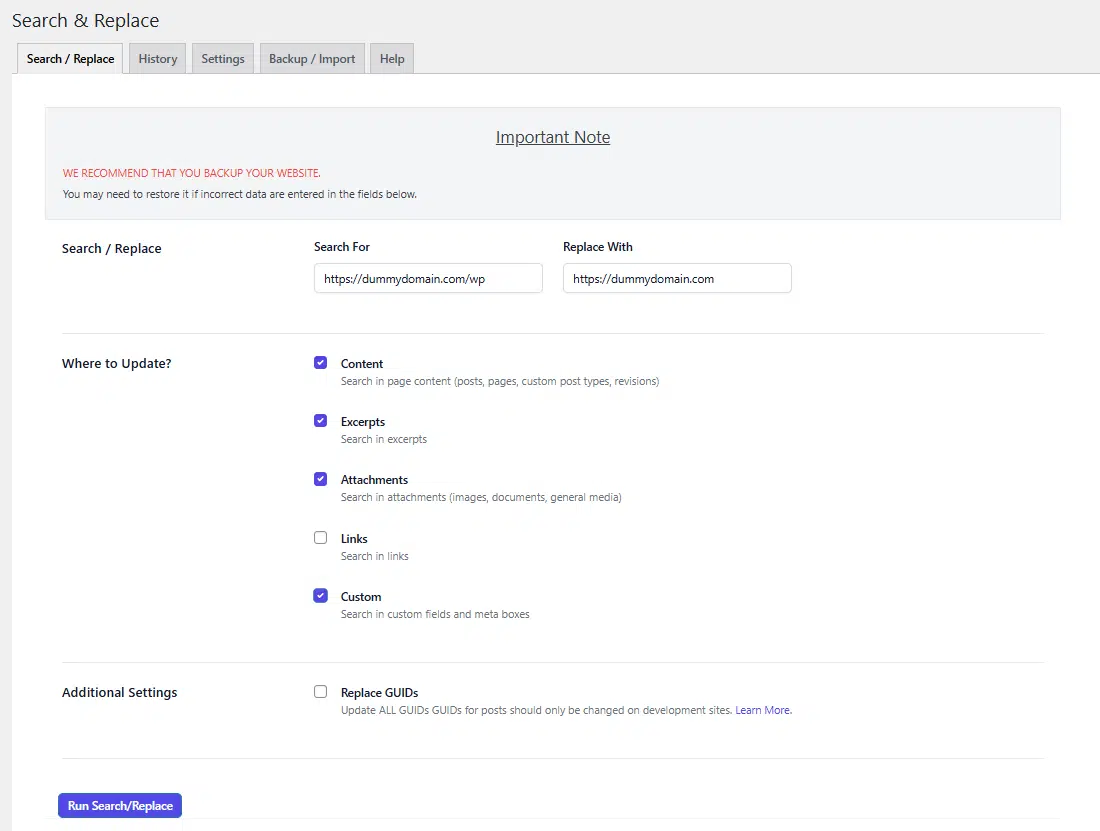
Search & Replace URLs plugin
Check all of the boxes under Step 2 as shown above, except the Update ALL GUIDs option.
Finally, click the Run search/replace button to have the plugin update all of the URLs in our WordPress database. This could take some time.
Update the .htaccess File
Moving your site often breaks the server’s redirect rules, which can lead to “404 Not Found” errors on your subpages. To fix this, locate the .htaccess file in your public_html directory. If one already exists from your previous installation, it is best to delete it and create a fresh one. Open the file editor and paste the following standard WordPress code to ensure your URLs are handled correctly:
# BEGIN WordPress

RewriteEngine On
RewriteRule .* - [E=HTTP_AUTHORIZATION:%{HTTP:Authorization}]
RewriteBase /
RewriteRule ^index\.php$ - [L]
RewriteCond %{REQUEST_FILENAME} !-f
RewriteCond %{REQUEST_FILENAME} !-d
RewriteRule . /index.php [L]

# END WordPress
Alternative: The Reinstallation Method
If you have only recently installed WordPress and haven’t added much content, it may be faster to simply reinstall the application. You can use the Softaculous Apps Installer in cPanel to remove the subfolder installation. .
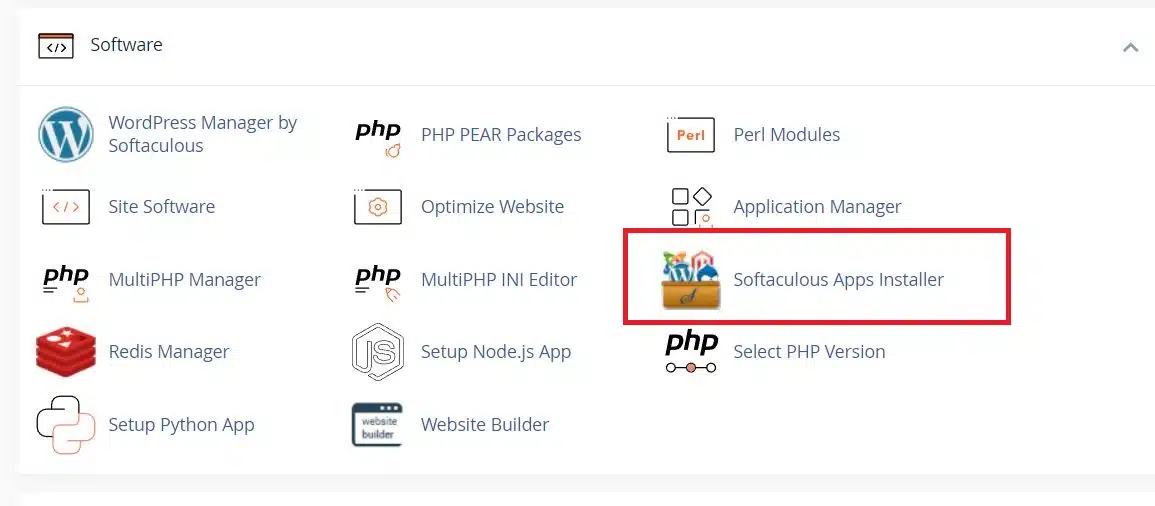
Softaculous in cPanel
When performing a fresh install, simply leave the In Directory field empty to ensure WordPress installs directly into your root domain.
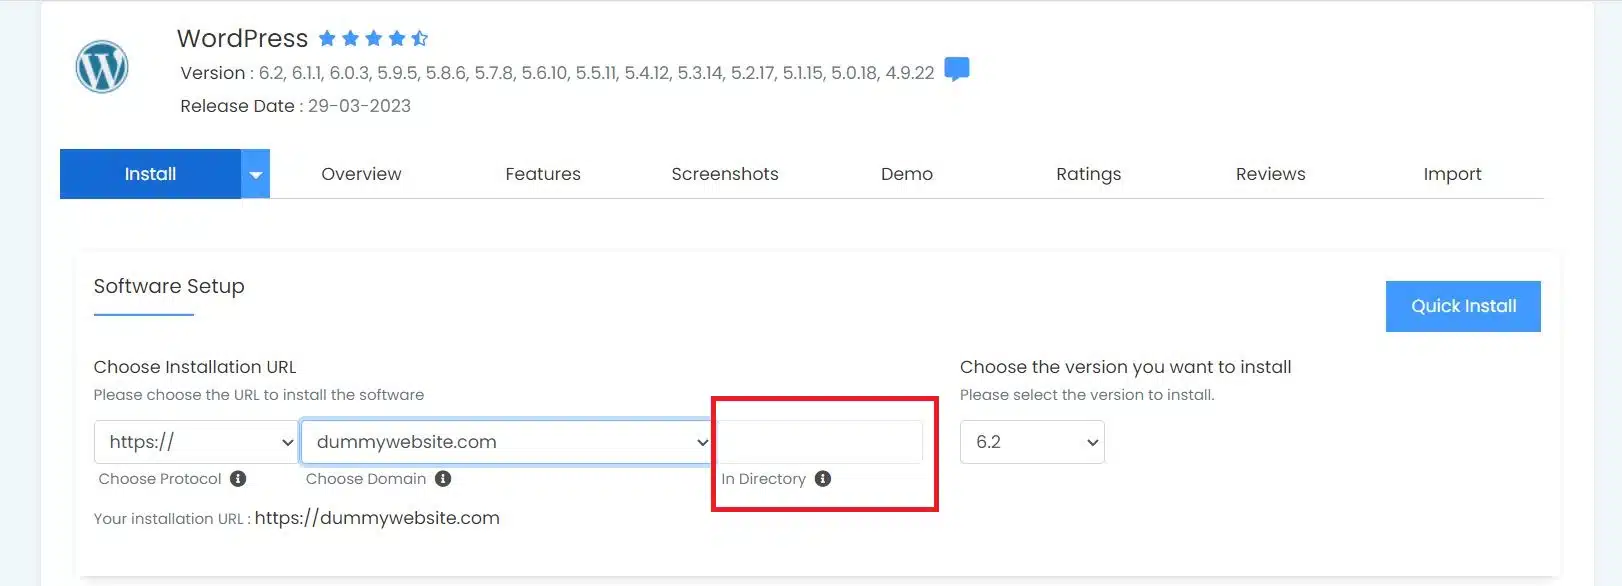
Softaculous in cPanel
Do not forget to uninstall /subfolder website by hitting the red cross in All Installations menu:
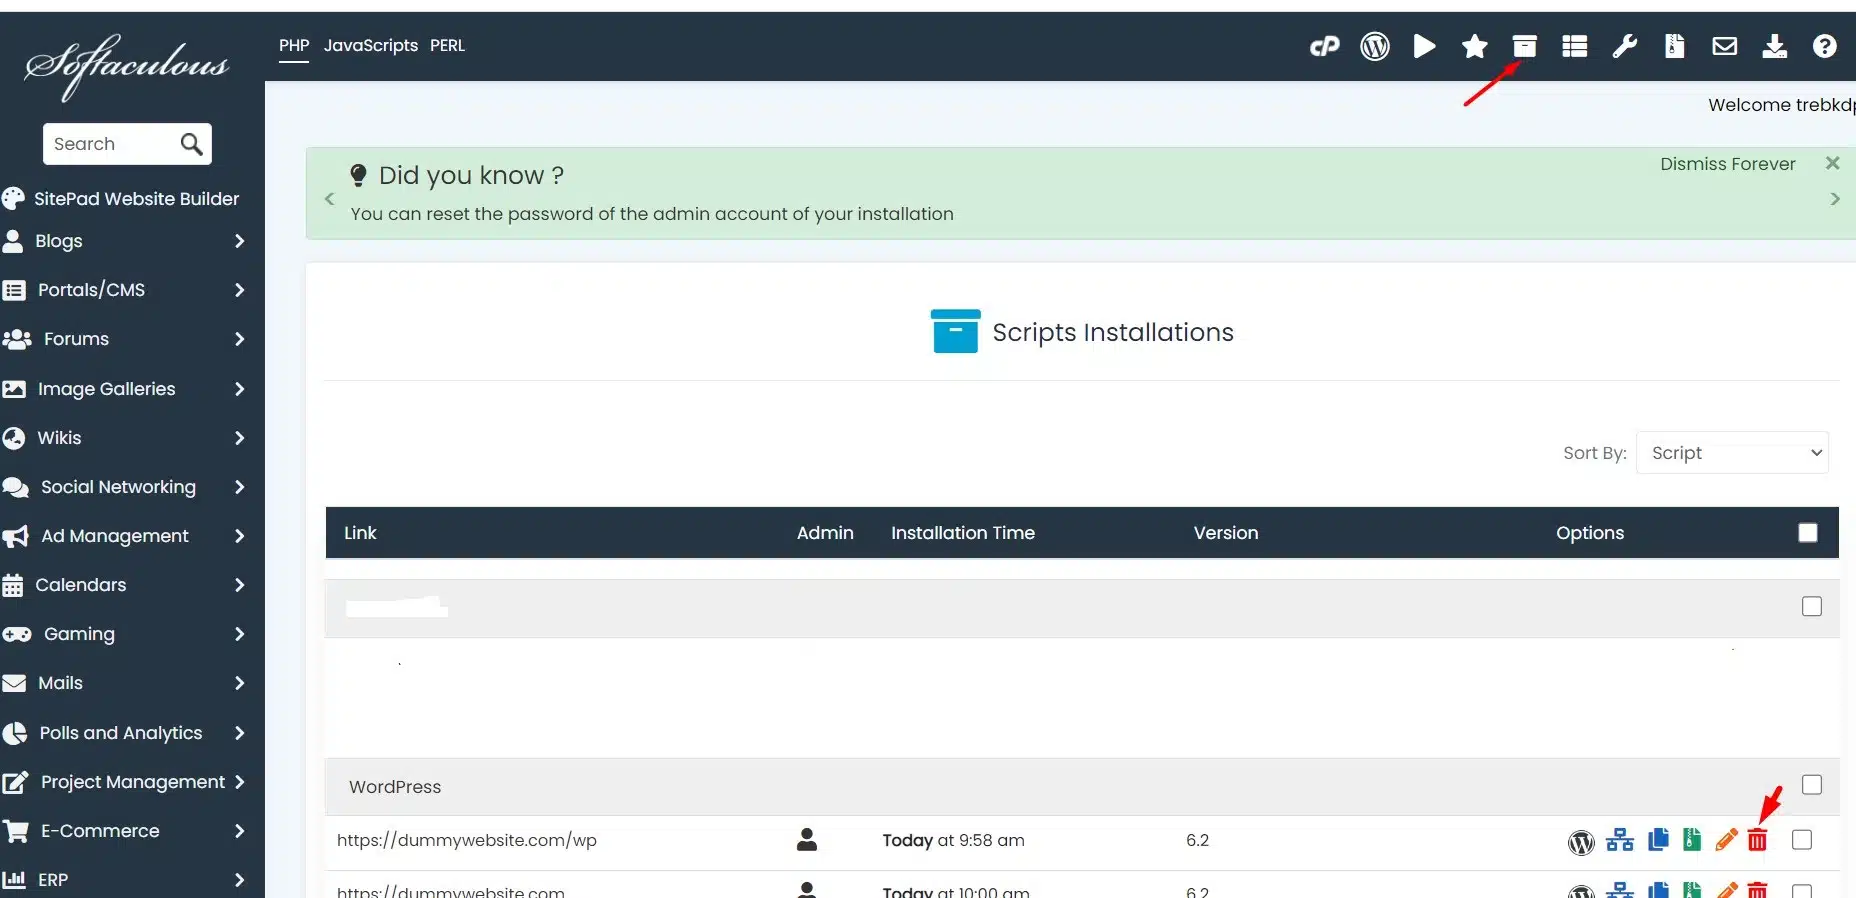
Softaculous in cPanel
Wrapping Up
Congratulations! You have successfully moved your WordPress website from a subfolder to the root directory. By carefully migrating your files and updating your database entries, you have ensured a professional URL structure for your visitors. Remember to clear your browser cache and any server-side caching plugins to see the changes take effect immediately.
If you have any web hosting questions please feel free to reach out to us. We're happy to help.
Our Guiding Principles