In this guide, we’ll go over connecting your Mac mail client (High Sierra) to your cPanel email account. This guide assumes you have already created the email account in cPanel as well as retained the password and connection information in your notes for use.
Note #1: The default Mac mail client uses the incorrect ports when connecting, which may end up getting your IP blocked at the server level. This would mean that you cannot connect to your sites or the server. This guide will guide you though how to change these ports. If you find yourself blocked, log into your client area and follow the links to remove the block.
Note #2: While we support both POP & IMAP, we highly recommend IMAP over POP. As shown below, you will need to substitute the settings shown below for the settings shown in your cPanel account for the email address as well as the server connection settings.
Note #3: If you are using SSL options, you will need to use the server hostname for both incoming & outgoing mail server in order to avoid a “certificate mismatch” error in your mail client unless you have a valid SSL Certificate for your domain.
Email Account Setup on Mac Mail
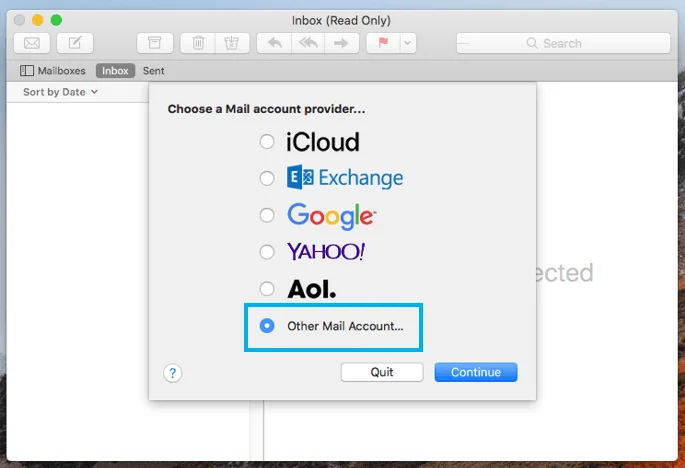
If you already have accounts set up on you mail client, then open the client and go to “Mail / Add Account“. If this is a fresh install, the add account option will pop up when you initially launch the mail application. Click on the radio button “Other Mail Account…” and hit continue.
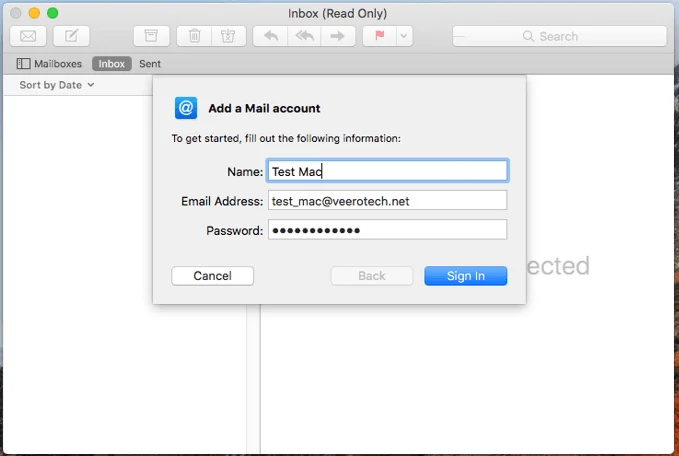
After clicking continue you will be presented with the following screen. Fill in the information and then click Sign In.
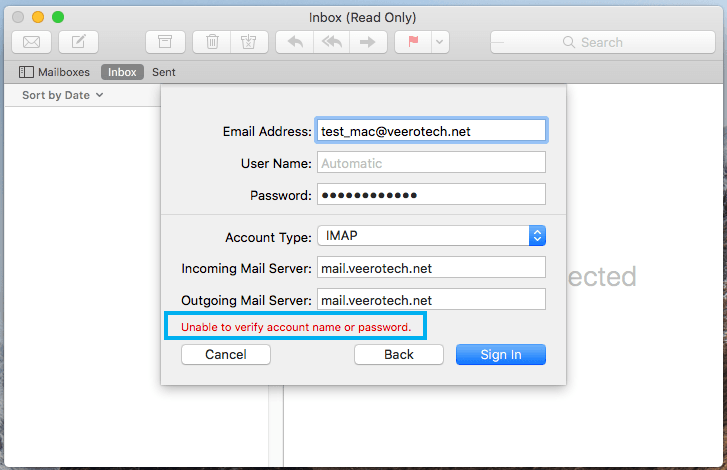
Don’t worry, this will end up showing an error – “Unable to verify account name or password”. You will need to fill in the rest of the information similar to the image below. Remember, ensure you are using your email account connection settings. If you wish to use POP for connecting, use the pull down menu to select this option (IMAP is recommended). Once you have filled in the information, click Sign In.
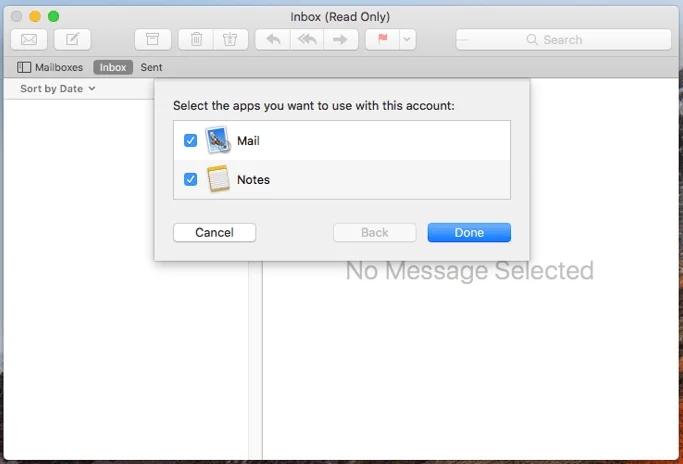
The following screen will pop up showing that your account was connected. You can leave both Mail and Notes checked, then click done.
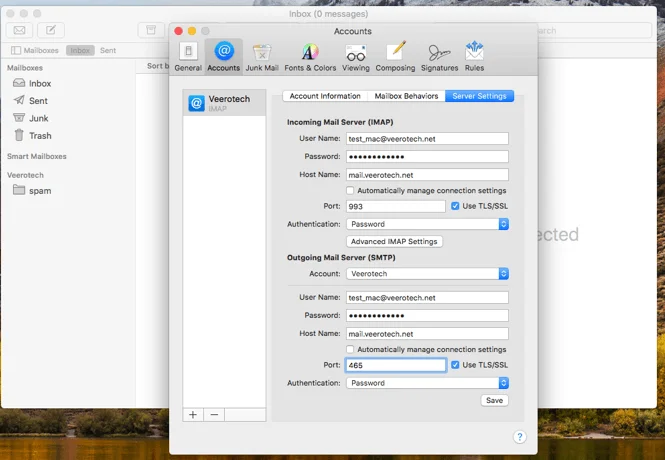
**IMPORTANT NOTE** do not use “mail.veerotech.net” when trying to connect your mail client, you must use the information displayed in your cPanel.
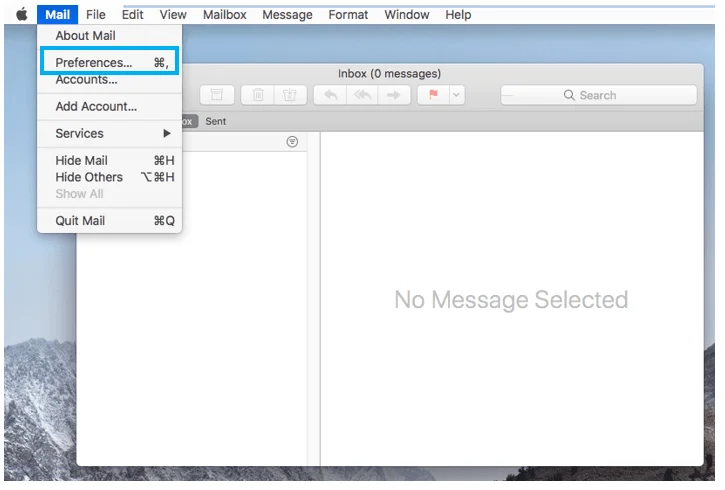
Now we need to change the connection settings (required!). While the mail client is active, click on Mail / Preferences.
Then click on the “Accounts” section, then the “Server Settings” tab. You will need to uncheck the “Automatically manage connection settings” box for both incoming and outgoing settings. This will open up additional boxes for information. Fill out each of the boxes with the proper account information, see screenshot below for reference. Once filled out, hit Save.
Your Mac Mail client setup is now complete. Should you have any problems connecting, please feel free to get in touch with our support department.
If you have any web hosting questions please feel free to reach out to us. We're happy to help.
Our Guiding Principles