
Category Archives: Guides

What is DNS? And How Does It Actually Work?

Introduction: Meet the Internet’s Traffic Cop

What happens behind the scenes when you type something like netflix.com or yourfavoriteblog.org into your browser and hit enter? It seems instant and effortless—but there’s an unsung hero quietly making it all work: the Domain Name System (DNS). This invisible network is one of the cornerstones of the internet, helping everything run smoothly. So, what exactly is DNS—and why does it matter to you?

Imagine DNS as the internet’s phone book. While computers communicate using IP addresses—strings of numbers like 104.18.32.156—humans find it much easier to remember names like amazon.com. That’s where DNS steps in. It acts as a translator, turning easy-to-remember domain names into the numeric IP addresses your devices need to find websites. Without DNS, using the internet would be like trying to call your friends by memorizing random numbers from an endless list—pretty overwhelming, right?

Whether you’re planning to launch your website, exploring web hosting options, or just curious about how the internet works, understanding DNS gives you a significant advantage. It helps demystify common tech issues, simplifies troubleshooting, and opens the door to smarter, smoother online experiences. Ready to dive deeper? Let’s break it down.

What is DNS? The Core Idea

At its core, the Domain Name System (DNS) works like the internet’s global, ever-evolving contact list. Its main role? Converting easy-to-remember domain names into the numeric IP addresses that computers use to identify each other. Think of it as a massive, constantly updated digital directory that helps your browser find the exact location of websites, email servers, and other online services in milliseconds.

Why is DNS so important? Here’s what makes it essential:

No More Numbers: You don’t need to remember a string of digits like 172.217.14.206 to visit Google. You type google.com, and DNS instantly takes care of the rest, pointing your browser in the right direction.

Seamless Flexibility: If a website changes servers and gets a new IP address, users don’t have to worry. The site owner just updates the DNS record, and visitors still get routed to the correct place—no broken links, no confusion.

Fast and Reliable Access: Thanks to a network of DNS servers around the globe, your device can connect with a server nearby to resolve domain names quickly. This keeps your internet browsing experience smooth, fast, and consistent, no matter where you are.

Understanding how DNS works helps demystify the internet and puts you in control when dealing with websites, hosting, or solving connection issues.

How DNS Works: The Journey from Name to Number

Let’s examine what happens when you type google.com into your browser. Behind the scenes, a fascinating step-by-step process makes it all work seamlessly—often in the blink of an eye.

Step 1: Check Your Browser’s Cache First

Your browser doesn’t like doing extra work if it doesn’t have to. It keeps a local memory—called a DNS cache—of websites you’ve visited recently. If you’ve visited google.com not long ago, your browser may already know the IP address. If it finds it in the cache, you’re instantly connected—no need to ask anyone else!

Step 2: Ask the Recursive DNS Resolver

If the cache comes up empty, your computer reaches out to a recursive DNS resolver—usually provided by your Internet Service Provider (ISP) or public DNS services like Google DNS (8.8.8.8) or Cloudflare DNS (1.1.1.1). Think of the resolver as your internet librarian—it’s the one digging to find the correct information.

Step 3: Query the Root DNS Server

The resolver starts its hunt at the top of the DNS hierarchy—one of the Internet’s root servers. These servers don’t have the exact IP address for google.com, but they do know who’s in charge of all the .com domains, so they point the resolver in the right direction.

Step 4: Contact the .com TLD Server

Next, the resolver connects to the Top-Level Domain (TLD) server for .com. This server is like a regional directory—it narrows the search by directing the resolver to the authoritative name server responsible for google.com.

Step 5: Ask the Authoritative Name Server

Finally, the resolver reaches the authoritative name server for google.com, usually managed by Google itself or a domain registrar. This server holds the official DNS records, including the crucial A record, which lists the website’s actual IP address—like 203.0.113.45.

Step 6: Back to Your Browser with the IP Address

Once the resolver has the IP address, it sends it back to your browser. Your browser then uses this IP to connect directly to Google’s server, request the webpage, and display it on your screen.

All of this happens in milliseconds, yet it’s a beautiful ballet of digital coordination that keeps the internet running smoothly.

The Key DNS Players

To really understand DNS, it helps to know the main components:

Domain Name: The human-friendly web address you register (e.g., mysite.com). You typically get these from registrars (like VeeroTech, PorkBun, and SquareSpace Domains) and pay a renewal fee.

IP Address: The unique numerical address for devices online. Web servers usually have static IP addresses that don’t change often.

DNS Servers (The different types we just met): Recursive Resolvers: Do the lookup work for your device.

Root Servers: The highest level directory, pointing to TLDs.

TLD Servers: Manage specific extensions (.com, .org, .uk, etc.).

Authoritative Name Servers: Hold the official records for a specific domain.

DNS Records: The Instructions Inside the Directory

DNS isn’t just about matching a domain to one IP address. DNS records are specific instructions stored on the authoritative name servers. Here are common ones you might encounter, especially if you run a website:

A Record: Points your main domain (like myblog.com) to a standard IPv4 address. The most fundamental record for a website.

AAAA Record: Like the A record, it points to a newer format IPv6 address.

CNAME Record (Canonical Name): Used to point a subdomain (like shop.myblog.com) to another domain name, not directly to an IP. Valid for aliasing services or pointing www.myblog.com to myblog.com.

MX Record (Mail Exchanger): This record directs emails sent to addresses at your domain (e.g., info@myblog.com) to the correct mail server (like Google Workspace or Microsoft 365).

TTL (Time To Live): This setting tells resolvers how long (in seconds) they should cache (remember) a DNS record before asking for it again. Shorter TTLs (like 300 seconds/5 minutes) mean changes spread faster but can put more load on DNS servers. Longer TTLs reduce load, but changes take longer to be seen everywhere.

Why DNS Matters So Much for Your Website

If you’re building a website, understanding DNS is essential. DNS is the hidden bridge that connects your domain name—the one people type into their browser—to the actual web server where your site lives. Without it, your beautiful new site could be invisible to the world.

Connecting Your Domain to Your Web Host

When you sign up for a hosting service like Bluehost, VeeroTech, SiteGround, or Kinsta, they’ll provide the details needed to connect your domain. Usually, this includes nameserver addresses (like ns1.hostingprovider.com and ns2.hostingprovider.com) or sometimes a direct IP address.

To make this connection, you’ll head to your domain registrar—where you purchased your domain name—and update the DNS settings to point to your host’s nameservers. This step tells the global DNS network where to find your site’s files when someone visits your domain.

What Are Nameservers, and Why Do They Matter?

By updating your nameservers to those provided by your hosting company, you’re essentially handing over DNS management to them. This means your host will control critical DNS records like your A record, CNAME, MX (for email), and more. This setup is super convenient—everything can be managed from your hosting dashboard, all in one place.

DNS Propagation: The Short Wait After Changes

Many website owners don’t expect this: when you update DNS settings, changes don’t happen instantly. It takes time for DNS updates to propagate across the internet. This period usually lasts a few minutes to several hours, but in some cases, it can take up to 48 hours.

During propagation, some users may still see the old version of your site (or an error page), while others are directed to the updated version. It’s all about timing and local DNS caching. If you want to track how it’s going, tools like whatsmydns.net let you see how your new DNS settings spread worldwide.

Understanding this part of DNS can help you avoid a lot of confusion and launch your site with confidence.

Making Sense of DNS: Simple Analogies

Sometimes, the best way to grasp a technical concept like DNS is to relate it to something you already know. Here are a couple of simple analogies that can help DNS make more sense.

DNS Is Like the Postal System

Think of your domain name as the recipient’s name and address on a letter. When you send a letter, the post office sorts it by city or ZIP code—similar to how the TLD server (like .com or .org) narrows the search down. Then, it heads to the local post office, like the authoritative DNS server. That local server knows the exact street and house to which the letter is delivered—just like DNS directs your browser to the right server for a website.

In short, DNS ensures your online request gets delivered to the right place, just like your mail.

DNS Is Also Like a Restaurant Menu

Picture yourself at a restaurant. You don’t walk into the kitchen and start shouting out ingredients. Instead, you look at the menu and tell the waiter the name of the dish you want. The waiter then translates that into an order ticket, and the kitchen understands—just like DNS translates a domain name into an IP address.

You don’t need to know the exact recipe (IP address); you say the dish’s name, and DNS ensures you get what you’re looking for.

These everyday comparisons help explain what DNS does in the background—quietly making sure everything on the web gets where it needs to go.

Practical DNS Tips:

Check Nameservers Carefully: When connecting a domain to hosting, typos in nameserver addresses are a common cause of sites not working. Double-check them!

Use CNAMEs Wisely: They’re great for pointing subdomains (blog., shop.) to external services or your primary domain without needing separate IP addresses.

Lower TTL Before Big Changes: Are you planning to move your website or change email providers? Lower the TTL on relevant DNS records (e.g., to 300 seconds) about 24 hours beforehand. This helps the changes propagate faster once you make them. Remember to raise it back later if needed.

Verify After Changes: Typos in any DNS record can break your website or email flow. Always test thoroughly after making updates.

Conclusion: DNS – The Unsung Hero

DNS is one of those behind-the-scenes technologies that most of us never think about, but the internet would be chaos without it. Every time you visit a website, stream a video or send an email, DNS works tirelessly in the background, translating domain names into IP addresses and guiding your requests to the right place.

DNS makes the internet feel simple and seamless for everyday users. For website owners, DNS is the vital connection that links your domain name to your online content, making your site visible to the world.

So, the next time a website loads in a flash, take a second to appreciate the incredible DNS system powering that moment. It’s fast, reliable, and essential for keeping the internet user-friendly and connected.

Happy browsing—and long live DNS!

Quick Q&A:

Q: How long does DNS propagation take?

A: It varies—it could be minutes or up to 48 hours. Plan for potential delays and use online checkers to monitor them.

Q: Do I have to manage DNS myself?

A: Not always. Setting your nameservers at your host often means they handle the core records. But most registrars and hosts provide tools if you need or want to manage records directly.

Q: What happens if I mess up my DNS settings?

A: Your website might become unreachable, or email could styour email might It’s usually fCorrecting the record is usually fixableouble-check entries!

What is a Sitemap? – A Complete Guide

Have you ever wondered how search engines like Google and Bing navigate your website? That’s where sitemaps come in! A sitemap is a structured file that acts as a roadmap, guiding search engine crawlers through your site’s pages, images, and videos. Without one, some of your valuable content might get overlooked, hurting your SEO performance.

In this guide, we’ll explain everything you need to know about sitemaps—what they are, why they matter, and how to optimize them for better search rankings.

What is a Sitemap?

A sitemap is a digital blueprint that lists all the important pages on your website. It helps search engines like Google and Bing understand your site’s structure, ensuring that every crucial page gets indexed. There are different types of sitemaps, each serving a unique function:

XML Sitemaps:

XML sitemaps are designed specifically for search engines. They provide a structured list of URLs, along with metadata such as:

  • Last update date
  • Change frequency
  • Priority level of each page

Search engines use this data to crawl your site more efficiently. Specialized XML sitemaps also exist for:

  • Images – Includes details like captions, licensing, and location data
  • Videos – Provides video length, thumbnail, and category information
  • News – Helps Google News index fresh content quickly

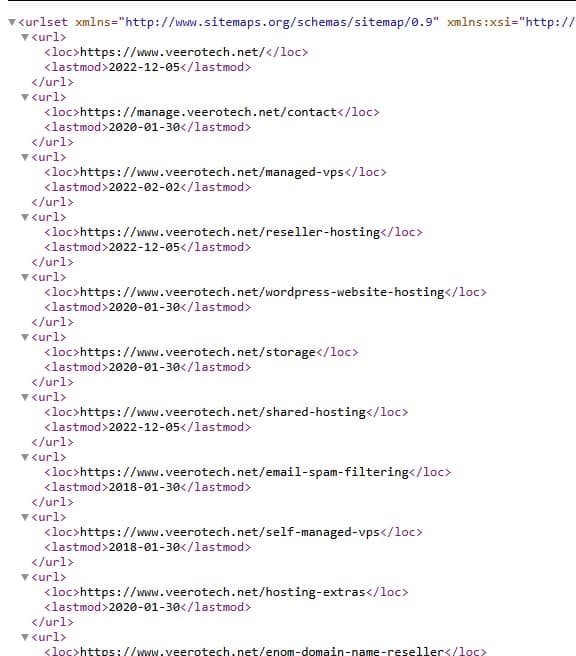
XML Sitemaps look something like this:

HTML Sitemaps:

Unlike XML sitemaps, HTML sitemaps are built for website visitors. These are usually found in the footer and help users navigate large websites more efficiently.

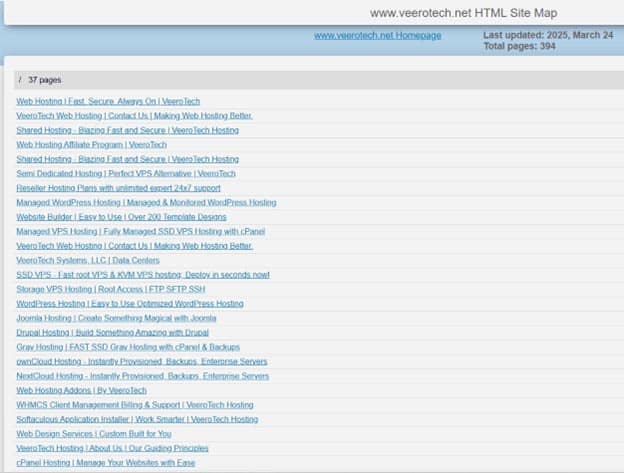
HTML Sitemaps look something like this:

RSS/Atom Feeds:

An RSS or Atom feed acts as an automatic sitemap if your website has frequently updated content, such as a blog. It notifies search engines whenever new content is published, ensuring faster indexing.

Why Are Sitemaps Necessary?

Sitemaps are essential for helping search engines find and index your content efficiently. For large websites with countless pages, search engine crawlers might miss some without a sitemap to guide them. Similarly, new or small websites with limited backlinks benefit greatly, as sitemaps speed up indexing. Websites with dynamic content (like e-commerce filters) or orphan pages (pages without internal links) rely on sitemaps for discoverability.

Specialized sitemaps give multimedia content like videos or images a better chance of appearing in Google Images or video search results. For multilingual or region-specific sites, sitemaps with `hreflang` tags help prevent duplicate content issues.

Key Benefits of Sitemaps

  1. Improved Crawling Efficiency: Search engines use sitemaps to prioritize what to crawl, meaning your most important pages get indexed faster. Imagine – that a new blog post in your XML sitemap could appear in search results within hours!
  2. Faster Indexing: Submitting an updated sitemap after adding new content tells search engines to crawl those changes immediately.
  3. SEO Advantages: While sitemaps don’t directly boost rankings, they ensure all your pages are indexed – which is absolutely crucial for ranking well. This is especially helpful for pages with few internal links.
  4. Support for Dynamic Content: Pages generated with JavaScript or user interactions (like filtered product listings) might be overlooked without a sitemap.
  5. Enhanced Multimedia Visibility: Images and video sitemaps include metadata like captions or thumbnails, making your content more appealing in search results.
  6. Diagnostic Insights: Tools like Google Search Console use sitemaps to identify problems (like crawl errors or blocked pages), helping you fix issues before they become major headaches.

How to Create and Submit a Sitemap

1. Generate Your Sitemap

Depending on your website platform, you can generate an XML sitemap using:

  • WordPress – Plugins like Yoast SEO or Rank Math automatically create and update XML sitemaps.
  • Shopify & Magento – Built-in tools generate sitemaps automatically.
  • Custom Websites – Use tools like Screaming Frog, XML-Sitemaps.com, or Google’s free sitemap generator.

2. Sitemap Best Practices

Follow these guidelines for a well-optimized sitemap:

  • Exclude non-indexable pages (e.g., admin, login, thank-you pages)
  • Limit the sitemap file size to 50MB or 50,000 URLs per file (use multiple sitemaps if needed)
  • Use gzip compression to reduce file size
  • Keep it up to date by automating sitemap updates

3. Submitting Your Sitemap

Once your sitemap is ready, submit it to search engines for better indexing:

  • Google – Submit via Google Search Console
  • Bing – Use Bing Webmaster Tools
  • txt File – Add this line to ensure automatic discovery:

Sitemap: https://yourwebsite.com/sitemap.xml

Best Practices for Sitemap Optimization

To maximize the impact of your sitemap, follow these optimization strategies:

1. Automate Sitemap Updates

Ensure your sitemap reflects new pages, updates, or site structure changes in real-time.

2. Validate Your Sitemap

Use tools like:

  • W3C XML Validator – To check for formatting errors
  • Google Search Console’s Coverage Report – To identify indexing issues

3. Use hreflang for Multilingual Content

For websites with multiple languages, add hreflang tags to indicate the correct language and region for each page.

4. Monitor Sitemap Performance

Regularly check Google Search Console for crawl errors, indexing warnings, or broken links.

5. Avoid Common Mistakes

  • Don’t include broken links or 404 pages
  • Exclude duplicate content (e.g., category pages, archive pages)
  • Ensure mobile and AMP pages have their own sitemaps if applicable

Common Mistakes to Avoid

Many websites make sitemap-related errors that impact SEO. Here are some pitfalls to watch out for:

  • Adding non-indexable pages – Exclude login pages, private sections, and duplicate content.
  • Neglecting deleted pages – Remove URLs that return a 404 error to prevent crawl issues.
  • Skipping hreflang for multilingual sites – This can cause incorrect indexing and affect international rankings.
  • Ignoring mobile/AMP sitemaps – If you have AMP pages, create a separate sitemap for them.

Conclusion

A sitemap is more than just a technical SEO tool—it’s crucial for search engine visibility and user experience. A well-optimized sitemap ensures faster indexing, better-crawling efficiency, and improved visibility in search results by guiding search engines through your website’s structure.

Whether you run a personal blog or a large e-commerce site, investing in a properly structured sitemap is essential for long-term SEO success. Update it regularly, follow best practices, and use Google Search Console to monitor its performance.

Want to stay ahead in search rankings? Start optimizing your sitemap today!

10 Things to Check Before Choosing a Hosting Provider

Looking for a reliable web hosting provider? Here are 10 essential things to check before choosing one to ensure performance, security, and value for your website.

Introduction

Choosing the right hosting provider is one of the most critical decisions when setting up a website. Your hosting provider determines how fast, secure, and reliable your site is, directly impacting user experience and SEO rankings. With so many options available, it’s essential to evaluate key factors before deciding.

This guide’ll walk you through the top 10 crucial things to check before selecting a web hosting provider. Whether you’re launching a blog, an eCommerce store, or a business website, these factors will help you make an informed choice.

1. Uptime Guarantee

Uptime refers to the amount of time your website is accessible to visitors. If your website experiences frequent downtime, you risk losing potential customers and harming your search engine rankings. A reliable hosting provider should offer at least a 99.9% uptime guarantee, meaning that your website will only experience a few minutes of downtime per month.

Why It’s Important:
  • Websites that go offline often appear unprofessional and unreliable.
  • Downtime leads to lost traffic and revenue, especially for eCommerce sites.
  • Google penalizes sites with frequent downtime, affecting SEO rankings.
How to Check:
  • Look for an uptime guarantee on the hosting provider’s website.
  • Read genuine customer reviews on platforms like Trustpilot, G2, or ShopperApproved.
  • Use uptime monitoring tools like UptimeRobot to track a hosting provider’s performance.

A good hosting provider will have backup servers in place to prevent downtime and keep your website accessible at all times.

2. Website Speed and Performance

Website speed is crucial for user experience and search engine optimization (SEO). If your site takes more than 3 seconds to load, visitors may leave before it even fully appears. A slow website can frustrate users, lower your rankings on Google, and reduce sales.

What Affects Website Speed?
  • Server response time – A good hosting provider should have high-performance servers.
  • SSD storage – SSDs (Solid-State Drives) load data faster than traditional HDDs.
  • Content Delivery Network (CDN) – A CDN distributes your site’s content across global data centers, speeding up load times.
  • Server locations – Hosting providers with servers close to your target audience provide faster access.
How to Test Speed:
  • Use tools like Google PageSpeed Insights, GTmetrix, or Pingdom to analyze page speed.
  • Choose a provider with LiteSpeed or NGINX servers for better performance.

3. Customer Support Quality

Even if you’re tech-savvy, you’ll need support at some point—whether for technical issues, billing questions, or website troubleshooting. Good customer support can save you time, money, and stress.

What to Look For:
  • 24/7 support through live chat, phone, and email.
  • Fast response times – You shouldn’t have to wait hours for help.
  • Knowledgeable support team – The support staff should be experienced and capable of solving technical issues.
How to Test Customer Support:
  • Before purchasing a hosting plan, contact their support team with a few questions and see how quickly they respond.
  • Check customer reviews to see if users complain about poor support experiences.

A hosting provider with fast and friendly support ensures that any problems you face will be resolved quickly.

4. Security Features

Cyberattacks are becoming more common, and websites are a frequent target. A good hosting provider should prioritize security to protect your site and user data.

Essential Security Features:
  • Free SSL Certificate – Encrypts data and secures user information.
  • DDoS Protection – Prevents cyberattacks that can take down your website.
  • Firewall and Malware Scanning – Blocks harmful threats before they reach your site.
  • Regular Software Updates – Keeps your website safe from vulnerabilities.
How to Check:
  • See if the hosting provider offers security monitoring and automatic backups.
  • Ask about firewall protection and malware scanning.

A secure hosting provider prevents hackers, viruses, and data loss, ensuring your website stays safe.

5. Pricing and Value for Money

Web hosting prices vary, and it’s easy to be tempted by cheap plans that seem too good to be true. However, some hosting companies advertise low prices only to charge high renewal rates or hidden fees later.

What to Watch For:
  • Introductory vs. Renewal Prices – Check how much you’ll pay after the first term.
  • Hidden Fees – Some hosts charge extra for backups, security, or email services.
  • Refund Policy – Look for a money-back guarantee in case you’re unsatisfied.
How to Choose a Good Plan:
  • Compare different hosting plans and consider long-term costs.
  • Look for providers offering transparent pricing with no hidden costs.

6. Scalability and Upgrade Options

If your website grows and attracts more visitors, you may need more powerful hosting. A scalable hosting provider allows you to upgrade your plan easily without downtime.

What Scalability Means:
  • Easy upgrades from shared hosting to VPS or dedicated hosting.
  • Cloud hosting options that automatically adjust to traffic spikes.
  • Support for multiple websites if you plan to expand your online presence.
How to Check:
  • Ask if upgrading to a higher plan is quick and seamless.
  • See if the provider offers cloud hosting for automatic scalability.

7. Backup and Data Recovery

Your website’s data is valuable; accidental deletion or hacking can wipe it out. A good hosting provider should offer automatic backups.

What to Look For:
  • Daily or weekly automatic backups.
  • One-click restore options for quick data recovery.
  • Offsite backups for extra security.
How to Check:
  • See if backups are included in your plan or require an extra fee.
  • Ask if they offer easy restore options in case of emergencies.

8. Ease of Use and Control Panel

Not everyone is a tech expert, so a user-friendly control panel is important.

What to Look For:
  • cPanel or Plesk for easy management.
  • One-click installers for WordPress and other CMS platforms.
  • A clean interface for managing emails, domains, and databases.
How to Check:
  • Look for a demo version of the control panel before signing up.

9. Technology and Server Infrastructure

A good hosting provider should use the latest technology to keep your site fast, secure, and stable.

What to Look For:
  • Latest PHP and MySQL versions.
  • LiteSpeed or NGINX servers (faster than Apache).
  • Cloud-based hosting options.
Why It Matters:
  • Outdated technology slows down your website and creates security risks.

10. Customer Reviews and Reputation

Real customer feedback can give you a clear picture of a hosting provider’s reliability.

Where to Find Reviews:

– G2, Trustpilot, and ShopperApproved for unbiased customer experiences.

– Web hosting forums where users discuss their experiences.

Pro Tip: Look for consistent complaints about downtime, support, or security issues.

How to Choose the Best Hosting Provider

Now that you know what to look for, here are some actionable steps to make the best choice:

Define your needs – Do you need shared hosting, VPS, or dedicated hosting?

Compare multiple providers – Make a list of 3-5 top contenders.

Check trial periods or refund policies – Many hosts offer money-back guarantees.

Test customer support – Ask pre-sales questions to assess responsiveness.

Read the fine print – Look for hidden fees or contract lock-ins.

By following these steps, you can confidently choose a hosting provider that suits your needs.

Why VeeroTech Web Hosting is a Great Choice

Choosing a web hosting provider isn’t just about finding the cheapest plan or the flashiest features—it’s about reliability, transparency, and long-term value. VeeroTech  Web Hosting isn’t just another hosting provider; they’ve built their business around a simple yet powerful principle: Treat customers the way you’d want to be treated.

Many hosting companies lure customers with low introductory prices, only to drastically increase renewal rates, hide essential features behind paywalls, and bombard users with upsells. VeeroTech Web Hosting takes a different approach: no hidden fees, no pricing tricks, and no last-minute surprises at renewal. From the moment you sign up, you get a clear, upfront understanding of what you’re paying for—and that price remains the same year after year.

If you’re looking for a reliable, secure, and high-performance hosting provider, VeeroTech Web Hosting is an excellent choice.

99.9% Uptime Guarantee – Ensuring your website is always online.
Fast Loading Speeds – NVMe storage, LiteSpeed servers, and a global CDN.
24/7 Expert Support – Friendly and knowledgeable team available anytime.
Robust Security Features – Free SSL, malware protection, and DDoS defense.
Affordable Pricing – Transparent plans with no hidden costs.
Easy Scalability – Upgrade as your business grows with one click.

With VeeroTech Web Hosting, you get the best combination of speed, security, and support at an affordable price.

Choosing the right hosting provider is crucial for your website’s success. By evaluating factors like uptime, speed, security, pricing, and support, you can avoid common pitfalls and select a hosting solution that meets your needs.

Signup Deals vs. Renewal Prices: How to Make an Informed Choice

Luring Deals and Their Long-Term Impact

Imagine You’re scrolling through your inbox, and an email catches your eye. “Get 80% off your first year!” or “Lock in $2/month for 12 months—today only!” The offer may seem too good to pass up. You click, sign up, and feel like you’ve won the frugality lottery. After a year, suddenly, your bill triples. The “deal” now feels like a bait-and-switch. Sound familiar?

From site hosting and software subscriptions to streaming services and gym memberships, signup offers are everywhere. Businesses use these promos to attract customers, encourage prompt decisions, and expand their clientele.

The problem is not the discount itself but rather the lack of transparency about what happens after the promotional period ends. Many businesses rely on this cycle: Hook customers with a low upfront cost, then rely on inertia, contract terms, or hidden fees to keep them paying higher rates later. This creates a dilemma for buyers.

Is the short-term savings worth the long-term cost?

In this article, we’ll explore how to navigate signup deals wisely, why VeeroTech’s honest pricing model stands out in a sea of gimmicks, and how to save money over the long term by making informed choices.

How to Evaluate Deals: Looking Beyond First-Year Pricing

Before clicking “Subscribe,” pausing and dissecting the offer is essential. Here’s a step-by-step framework to evaluate whether a signup deal is truly a bargain—or a financial trap in disguise. 

1. Calculate the Total Cost of Ownership

Most deals focus on the first year’s price, but savvy shoppers think about total cost over time. For example:

Scenario A: A web hosting plan costs $2/ month for the first year and then renews at $10/month.

Scenario B: A competitor charges $8/month with no promotional discounts.

Initially, Scenario A may seem cheaper. But over three years, the math tells a different story:

– Scenario A: ($2 x 12) + ($10 x 24) = $264

– Scenario B: $8 x 36 = $288

In this case, the “discounted” plan saves $24 over three years. But what if you only need the service for two years? The savings will drop to $8. If the renewal price were $12/month, Scenario A would become more expensive than Scenario B in the second year.

Takeaway: Always calculate costs for your expected usage period. Use a spreadsheet or calculator to compare total expenses, not just introductory rates.

2. Read the Fine Print on Renewal Terms

Companies often bury critical details in terms of service agreements. Key questions to ask before purchasing are the following:

– Is the renewal price clearly stated?

– Does the contract auto-renew? Can you cancel easily?

– Are there hidden fees (e.g., setup charges, overage costs)?

For instance, some web hosts advertise “unlimited bandwidth” but throttle speeds after a certain threshold. Others lock customers into multi-year contracts with steep early termination fees. If the terms are vague or hard to find, consider them a red flag.

3. Assess the Company’s Pricing History

Does the provider have a reputation for sudden price hikes? Check online reviews or forums to see if existing customers report “bill shock” after their initial term. A pattern of aggressive renewal pricing suggests that the company prioritizes short-term gains over customer retention. 

4.Consider Your Flexibility Needs

Are you signing up for a service you might outgrow? For example, a startup might choose a discounted basic hosting plan but later need more resources. The initial deal could backfire if upgrading mid-term resets your rate or incurs penalties. 

5.Factor In the Value of Peace of Mind

A slightly higher upfront price with stable renewal rates often beats a roller coaster of discounts and surprises. Predictable pricing lets you budget effectively and reduces decision fatigue when renewal time comes. 

VeeroTech’s Honest Pricing Model: No Renewal Gimmicks

In a market where pricing games is very common, VeeroTech has developed a reputation for transparency. Unlike competitors relying on loss-leading promotions, VeeroTech’s pricing model is straightforward: **What you see is what you get.**

How It Works

VeeroTech offers the same monthly or annual rate from Day 1. Even with promotional discounts, there are no secret renewal hikes or contracts locking customers into unfavourable terms. For example:

– Competitor:** $2.95/month for Year 1, $17.99/month thereafter.

– VeeroTech: $6.95/month consistently.

Over three years, the competitor’s plan totals $467.64, while VeeroTech costs $250.20. The “cheap” option ends up being 86.7% more expensive.

Why This Approach Wins Trust

VeeroTech’s model reflects a customer-first philosophy. Here’s why it resonates:

  1. No Surprises: Customers aren’t penalized for staying loyal.
  2. Very Simplified Budgeting: Businesses and individuals can accurately forecast expenses.
  3. Alignment of Incentives: VeeroTech earns trust by prioritizing long-term relationships over quick signups.

The Hidden Cost of “Cheap”

Low introductory prices often signal that a company is willing to undervalue its service to attract customers. This can lead to: 

– Underinvesting in infrastructure (e.g., slow servers, outdated software). 

– Poor customer support due to high churn rates. 

– Aggressive upselling to offset revenue lost from discounts. 

VeeroTech avoids these pitfalls by pricing its services sustainably from the start. This allows consistent investment in performance, security, and support—benefits that compound over time. 

Conclusion: Saving Money Over the Long Term

In a world of flashy promotions and psychological pricing tactics, saving money isn’t about chasing the lowest upfront cost—it’s about understanding the total cost of trust. Here’s how to make empowered decisions: 

  1. Play the Long Game: Calculate costs over 2–5 years, not just the first 12 months.
  2. Prioritize Transparency: Support companies that disclose renewal terms upfront.
  3. Value Stability Over Short-Term Wins: A slightly higher consistent rate often saves money (and stress) in the long run.
  4. Vote with Your Wallet: Reward businesses like VeeroTech that reject manipulative pricing.

The next time you see a “90% off!” deal, pause and ask: What happens when the honeymoon phase ends? By focusing on value, transparency, and sustainability, you’ll save money and build relationships with companies that respect your intelligence and your budget. 

Check this price comparison with leading hosting providers

Feature Veerotech Hostinger A2 Hosting SiteGround Bluehost GoDaddy
Starting Price (1 Yr. Plan) $6.95/mo $2.99/mo $4.95/mo $2.99/mo $2.95/mo $2.95/mo
Renewal Price (After 1st Yr.) $6.95/mo $10.99/mo $11.99/mo $17.99/mo $11.99/mo $4.99/mo
Approx. Running Cost for 3 Yr. $250.20 ($6.95/mo) $299.64 ($8.32/mo) $347.16 ($9.64/mo) $467.64 ($12.99/mo) $807.24 ($22.42/mo) $1333.26 ($37.03/mo)
Approx. % Saving Over 3 Yr. 81% 77% 73% 65% 39%
Storage (Basic Plan) 25GB NVMe 100GB SSD 10GB SSD 10GB SSD 10GB NVMe 10GB NVMe
Speed (Basic Plan) 1vCPU / 2GB RAM 1vCPU / 1GB RAM 2vCPU / 1GB RAM NA NA NA
Domains Unlimited 100 1 Unlimited 10 1
Websites/Apps Unlimited 100 1 1 10 10
Free Email Accounts Unlimited 100 Unlimited Unlimited $2.49/mailbox/mo $5.99/mailbox/mo
Free Daily Backup Yes Weekly Yes Yes $2.99/mo Yes
Free SSL Certificates Yes Yes Yes Yes Yes $99.99/yr

Disclaimer: This comparison is based on publicly available information as of Nov 2024. Prices, features, and specifications may change. Visit provider websites for the latest details. This table is not an endorsement of any brand. All trademarks belong to their respective owners.

Final Thought

Informed choices aren’t just about money but peace of mind. Whether you’re choosing a web host, a fitness app, or a streaming service, remember: The best deal isn’t the one that looks good today. It’s the one that still feels fair a year from now.

Getting Started with Publii – A Desktop-Based Static Site Generator

Getting Started with Publii – A Desktop-Based Static Site Generator

In this article, we will take a closer look at Publli, a desktop-based static site generator. Static website generators have been around for a long time. However, they have not been as popular as dynamic websites with database back-end web applications, most likely because dynamically rich websites easily modify, maintain, and administer content through a beautiful dashboard, such as WordPress and Joomla. Continue reading