Building out a successful web hosting business or managing an expanding portfolio of web properties requires the ability to provision isolated hosting spaces. In DirectAdmin, this is accomplished by creating discrete user accounts. Each user account gets its own independent control panel, ensuring your clients can manage their own domains, databases, and emails without seeing anyone else’s data. This guide walks you through the process of securely creating a new user account, assigning resource packages, and distributing access credentials.
Quick Steps
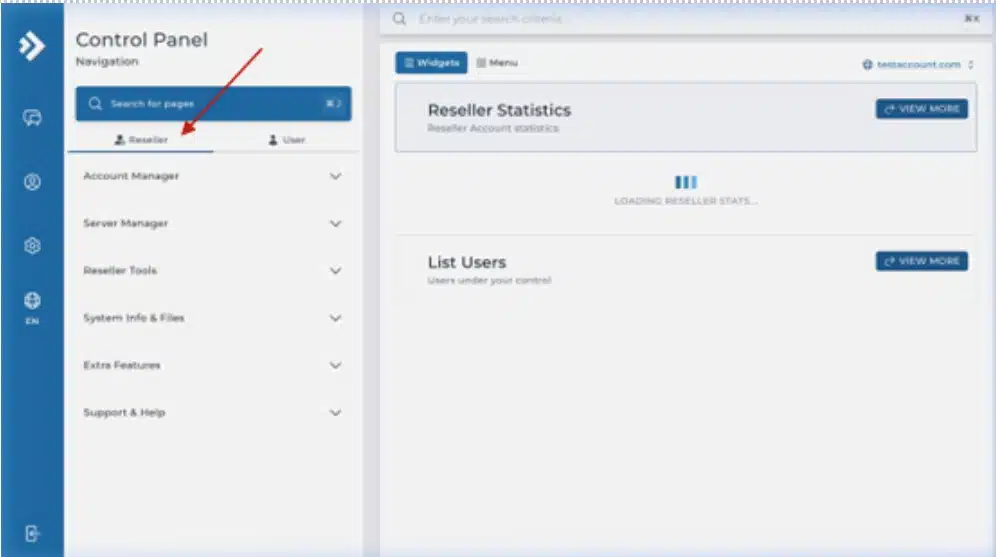
- Log in to your DirectAdmin panel and verify you are at the Reseller Level.
- Expand the left sidebar menu and navigate to Account Manager > List Users (or My Users).
- Click the Add New User button at the top of the interface.
- Populate the account parameters (Username, Email, Password, and primary Domain).
- Choose a pre-configured User Package and assign an IP Address.
- Check the notification box and click Submit to provision the account.
Follow the step-by-step instructions below to provision a new client control panel.
Accessing the User Management Interface
Before adding a customer, you need to navigate to the account provisioning section of your reseller panel.
- Log in to your DirectAdmin dashboard. Look at the top right corner or the main sidebar to confirm that your access tier is set to Reseller Level. If it is set to User Level, toggle it back to see your reseller administrative tools.
- Click on Account Manager in the main left sidebar menu to expand the option list.
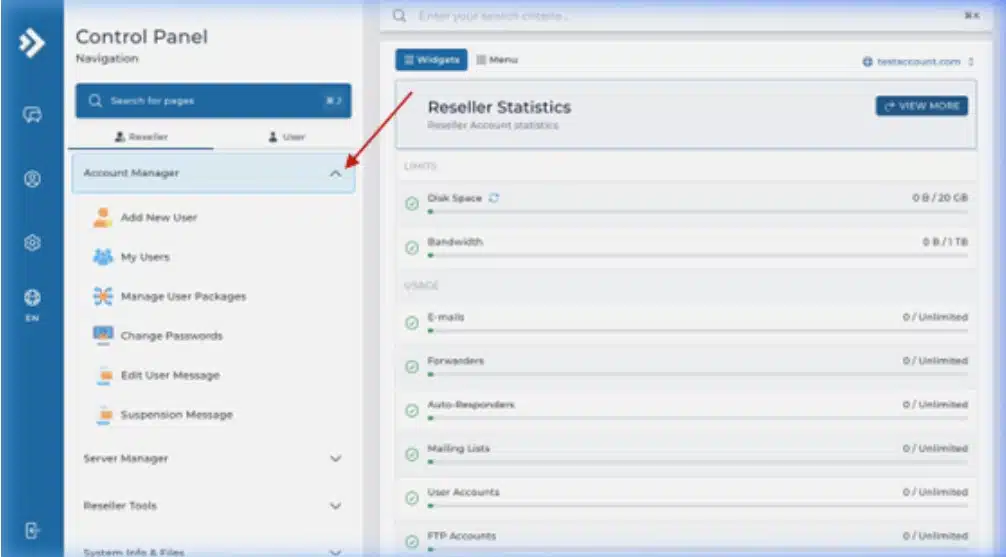
- Select List Users (labeled as My Users in some modern skins).
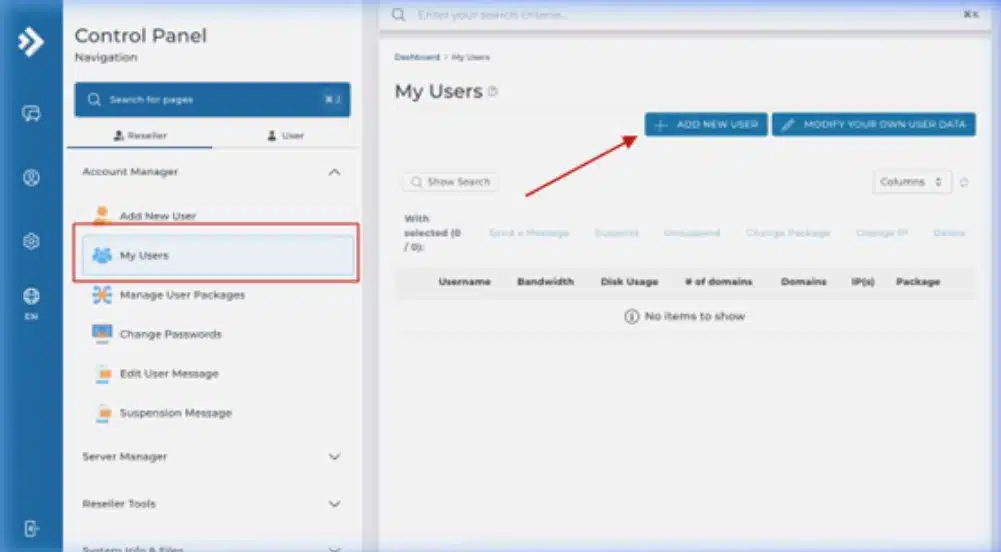
- Once the user list dashboard loads, click the Add New User button located in the top-right block of the page.
Entering the Account Credentials & Settings
After launching the creation tool, a form will appear requesting technical configuration limits and the user’s primary identity profiles.
- Username: Input an administrative handle for the customer. Ensure it uses lowercase letters only and contains no special symbols or spaces.
- Email: Enter the account owner’s primary contact address. This is where system alerts, bandwidth warnings, and password resets will go.
- Password: Generate a high-strength password. We strongly advise clicking the built-in Random Password Generator icon rather than making up a simple phrase.
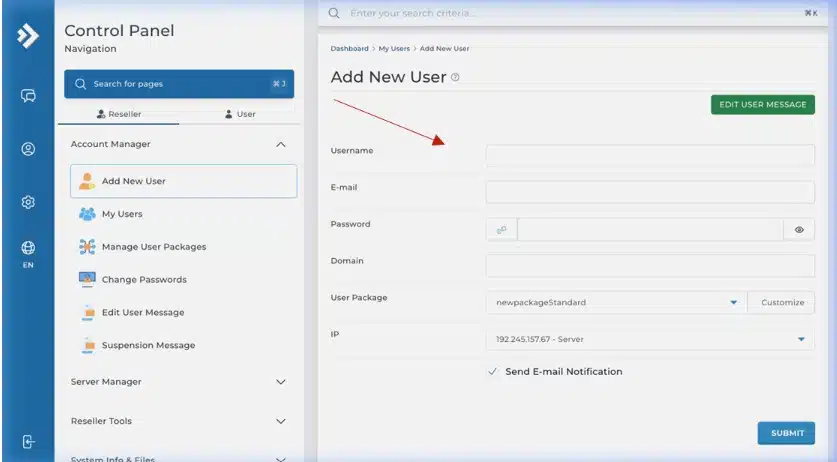
-
Domain: Type the primary domain name that this specific account will host. Do not include
http://orwww.prefixes. -
User Package: Choose a pre-defined resource layout (e.g., Standard or Business) from the dropdown menu.
Pro Tip: If an individual client needs unique allocations that don’t match your generic templates, you can click the Customize button right next to the package interface to override limits on a per-user basis.
- IP Address: Depending on what you purchased with your reseller node, choose between the main Shared Server IP, your Shared Reseller IP, or an Assigned Dedicated IP.
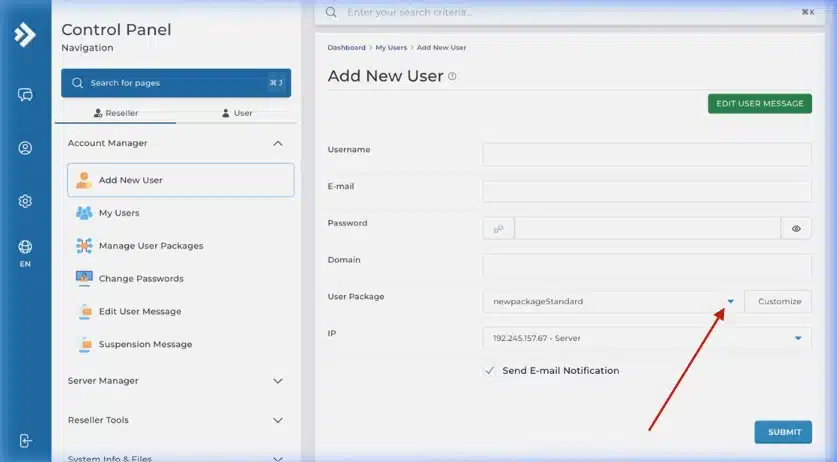
- Send Email Notification: Make sure this checkbox is marked. This instructs DirectAdmin to securely bundle the login details and transmit an automated welcome email directly to the client’s inbox.
Finalizing and Testing Client Access
With the configuration details set, scroll to the bottom of the page and click the Submit (or Save) button.
A green success confirmation pop-up will display in the corner of your screen, indicating that the domain directories, DNS zones, and control panel file blocks have been fully generated. The newly created account will instantly appear inside your List Users table view.

Once created, your client can access their clean, white-labeled control panel interface using these credentials:
-
Access URL:
https://your-server-hostname:2222
or
https://your-client-domain.com:2222 - Username / Password: The lowercase handle and secure string generated during the steps above.
Wrapping Up
You have successfully learned how to provision a new isolated user account within your DirectAdmin reseller ecosystem. Standardizing this workflow ensures your clients receive their login details instantly while staying bound to the appropriate resource limits.
If you have any web hosting questions please feel free to reach out to us. We're happy to help.
Our Guiding Principles